
TECHNOLOGY
Inside the Localization Pivot That Saved a Global Launch


Product failure is a typical concern in technology companies. Product launch data reveal that nearly 75% of products do not even generate $7.5 million in revenue in their first year. Global launches have an even smaller chance of success. The challenges often result from poorly planned strategies and a failure to localize products for new markets properly.
Global launches are often executed as either phased rollouts or as simultaneous “big bang” releases. The “big bang” method has a certain allure, but it struggles to handle complexity effectively and has higher failure rates. A technology company quickly realized the validity of this wisdom when a flagship software platform launch was rolled out in 12 countries simultaneously.
In the software rollout plan, a global compliance team used a one-size-fits-all approach to consistency across markets. This template-heavy methodology began to falter early on when the team failed to consider local complexities and nuances. Localization nuances, including language, regulatory standards, and regional priorities, were overlooked.
“When global product compliance is an afterthought, manufacturers risk not meeting international requirements that may result in launch delays, additional testing costs, or even a product redesign,” said a compliance expert. Unfortunately, these warnings were realized by the company as they encountered regulatory barriers in four key markets and customer resistance in three others.
Warnings were brought to light by regional teams early in the process, but were pushed aside. Headquarters prioritized a centralized one-size-fits-all approach, which caused many local-specific barriers to be overlooked by the teams in each country. The single-source-of-truth approach is a common pitfall of global launches, as siloed departments that fail to coordinate or communicate properly can lead to the misuse of resources, schedule delays, and system integration problems.
In addition to the issues mentioned above, the company also did not correctly account for or include many regional factors in its planning, such as:
- Local registrations or trademarks are necessary for market entry.
- Modifications to the content to ensure the product is not culturally insensitive.
- Local holidays and other buying cycle variations that may impact timing.
The day of the launch, a preventable crisis ensued. Global launch readiness in markets that accounted for 40% of the expected revenue was looking bleak. The company was left with the difficult decision of whether to press forward or to pivot.
The decision to bring in a localization service to build market-specific teams to help untangle the mess proved to be the right one. The localization service worked with key stakeholders in each market to address regulatory barriers, make last-minute marketing adjustments, and conduct region-specific testing.
This crisis-driven localization effort proved to be the company’s saving grace, but at a higher price than if localization had been planned for in the early stages. Product managers should understand that global launches require more than language translation. Product localization services should consider every facet of a new region to achieve optimal results, from compliance frameworks to cultural norms. Incorporating these insights from day one of product development is the best way to ensure early success.
Why Early Localization Decisions Make or Break Market Entry
Localized product labels are the visible tip of a massive localization iceberg. 52% of consumers have a strong preference to be able to complete a purchase in their native language. Additionally, nearly three-quarters (76%) of consumers are more likely to buy products when they see localized product information and descriptions. These data points are reflective of just how significantly early localization decisions have the potential to impact your market success.
Monetarily speaking, 56% of global consumers prioritize receiving localized product details over competing with product price. Further, 40% of consumers refuse to purchase on websites that do not offer product details in their native language. Product managers cannot afford to take this hard fact lightly: considering and planning for localization earlier in the product development life cycle has a direct impact on the revenue opportunities for your product.
Localization is far more than product translation. Localization extends to a product, holistically aligning with:
- Cultural expectations and nuances
- Local and regional laws and compliance
- Consumer shopping behaviors and payment preferences
- Local design priorities and market specificities.
Thinking of localization as an afterthought creates major headaches. Market research indicates that 33% of localization professionals note that making last-minute design changes requires a lot more resources, with a negative ROI. Furthermore, 37% of companies cite slow time to market as a primary challenge when it comes to rushing localization efforts.
Brands that integrate localization into the beginning of their product development process are able to release to new markets at a much faster rate. This localization-first mentality not only fosters the building of sturdy systems and processes to support seamless expansion, but each additional market launch takes nowhere near as much effort.
The benefits extend past speed and resource allocation. Highly localized products engender trust and better connect with their users, driving sales. Localized products are seen as more trustworthy by users and inspire active participation by consumers. Customers who feel that the product was customized to their market become loyal brand evangelists. Brands that invest in nuanced and culturally sensitive localization experience 35% increases in sales.
Working with localization professionals early on also presents the opportunity to uncover region-specific obstacles that could otherwise cause time or functionality setbacks. Localization-first strategies enable forward-thinking businesses to scale elegantly across channels with a singularly cohesive strategy. This top-to-bottom strategy ensures the localization of all product elements, including product data and metadata, marketing, pricing, and shipping and fulfillment operations. Product managers who understand how early localization decisions play a significant role in market success set their global launches up for success, rather than grappling with costly setbacks.
Pivoting Fast: How Smart Localization Turned Things Around
Businesses that successfully recover from localization crises typically implement agile localization strategies. Marketing organizations in particular have taken a strong interest in agile localization. As it stands, 86% have implemented or are planning to implement agile localization by 2025.
The innovative approach to localization is to integrate translation into development cycles, rather than tacking it on after the fact. A global payments provider put this strategy into action, allowing their eLearning portfolio to scale from two languages to thirteen. Their approach? A tailor-made Machine Translation (MT) and Post-Editing (PE) workflow, that accelerated content scaling 6X, enabling them to localize roughly 500 training courses in the span of one year.
Localization pivots that are designed strategically typically have short recovery timeframes. One technology provider connected with a localization service, which was able to subtitle their one-hour company videos for worldwide release in just 3-4 days. The speed was the result of a technology-first approach that combined:
- AI-assisted transcription with human QA.
- Workload distribution across multiple specialized linguists.
- Consistency through approved terminology glossaries.
Businesses that have agile localization programs report 93% higher customer satisfaction than their non-agile counterparts. Airbnb is a case in point; their growth story from 7 to 62 language-supporting products began with the introduction of flexible design systems, which bridged the gap between design and globalization teams.
Smart localization pivots also have the added benefit of significant cost savings. A software company’s ROI from AI-powered translation was $3.40, and another 60% drop in translation spend with added brand consistency.
Localization-centric pivots require more than just text translation, though. A law enforcement solution provider learned that the hard way and developed specific solutions to aid with codeless localization. Their new suite of tools would extract text that needed to be translated from source code and move it into resource files. What had been an hours-long process was now a single click of a button. The automation allowed them to scale faster into international markets with no additional lines of code written for each language.
One defining characteristic of an effective localization pivot is its alignment with existing processes. This is demonstrated by Smartling’s customers, with one study showing that localization processes simplified with innovative tools and technology deploy up to 50% faster and have up to 93% shorter translation turnaround times.
Product managers have the power to pivot from a flailing launch to a worldwide success story in record time when they partner with specialized localization services early on.
Real-World Impact: From Risk to Revenue in Record Time
A well-executed localization strategy is a powerful means of driving revenue and delivering a high-quality experience to your customers worldwide. Research from marketing.com shows that 84% of marketers reported that localization had a positive impact on revenue growth. In addition, 76% of online shoppers are more likely to choose a product that has information in their native language.
ROI metrics offer insights into the financial impact of localization on the business. For example, the ROI for enterprises using localization services is seen to range from 140% to 3000%. Language partners with AI-powered translation and self-serve dashboards have helped software companies reduce spend by $3.4 million. Another software company partnered with a global translation provider and achieved a 60% decrease in translation costs, while also enhancing the consistency of its brand.
Time to market is a crucial competitive advantage, and localization is a key factor that can help a company capture that advantage. In one instance, a leading global fintech brand reduced its time to market by 60% by centralizing localization efforts on cloud-based platforms. A leading consumer electronics brand, utilizing modular design systems, successfully launched its holiday campaign simultaneously in 15 markets.
Quality localization has a direct impact on the customer experience and serves as a driver of both revenue and brand trust. Customers who are happy with the localization services provided by companies are likely to experience increased revenue (86%), improved brand recognition (86%), customer acquisition (85%), and customer retention (79%).
Localization KPIs, such as throughput rates, error rates, or milestone completion percentages, are a few factors that organizations use to measure the success of their localization programs. Localization services enable companies to mitigate risks and capitalize on localization as a means to drive revenue growth. Localization should no longer be treated as a cost center, but as a strategic investment with a measurable ROI.
Conclusion: Localization Isn’t an Afterthought – it’s a Launch Lifeline
Worldwide product managers understand that successful product launches require foresightful localization planning. Localization is not an afterthought; it’s an integrated part of the initial strategy. Companies that factor localization into their strategy early in product development are the ones that achieve market success. On the other hand, businesses that treat localization as an afterthought often face costly and time-consuming corrections, which can sometimes result in market entry failure. This is all reflected in some staggering statistics. When presented with the option to purchase, 76% of consumers show a preference for products that provide information in their native language. These are clear indications that an early partnership with a professional localization company is key to winning market share on a global scale.
Competent localization services provide measurable and sometimes astronomical returns on investment, including possible gains of 3000%. In a study of businesses that have adopted faster localization processes, 93% reported improved customer satisfaction. Additionally, these companies experienced a 50% reduction in product release timeframes. And here’s the point of it all: these statistics highlight the need to consider localization during product development instead of a “reactive” approach late in the product launch.
Localization services are not merely a translation process, but a comprehensive plan that takes into account cultural idiosyncrasies, local laws, and shopping preferences. This is why a reputable localization agency is more than a translator: it’s a partner in business that helps save time and avoid costly errors by providing market-specific insights that speed up product localization. This is especially the case when it comes to entering unfamiliar markets where business regulations and consumer needs are far from being identical.
Here’s where the rationale behind using professional localization services gets pretty compelling. 86% of companies report improved brand awareness after investing in high-quality localization. These businesses also experience an 85% improvement in customer acquisition, 79% better customer retention, and numerous other market-specific benefits after integrating translation services into their business strategy. These statistics suggest that localization is a long-term investment rather than a short-term measure for generating quick revenue.
Product managers must view localization companies as strategic partners, not just line items in their business plan. Collaborating with localization professionals in the early stages of product development ensures a seamless transition to new markets, alignment with cultural expectations, and compliance with local regulations. All these elements play a vital role in defining the ultimate success or failure of product launches. Empirical evidence shows that a proper localization strategy is the difference between market success and possible failure.

Searching for amcoder quickly leads to confusion. Several technology-related names sit close together in search results, and they serve very different purposes. The most prominent are AmCoder, AmCodr IT Solutions, and AmcoderZ Infotech. Treating them as the same entity creates avoidable mistakes when you evaluate learning options or hire development partners.
This guide separates the names clearly so you can match the right organisation to your goal.
What Is Amcoder?
Amcoder functions as an umbrella search term rather than a single company. It most often points to three distinct organisations that share similar naming but operate with different audiences and business models.
AmCoder positions itself as a structured software-engineering learning path. Its public materials describe a longer curriculum that moves from computing foundations through algorithms, data structures, databases, APIs, backend services, frontend architecture, and system design topics such as caching and load balancing. The emphasis sits on understanding computer science rather than completing short coding bootcamp projects.
AmCodr IT Solutions is a software development company established in 2016 and based in Ahmedabad, India. It offers web application development, mobile application development, website development, and custom solutions that include ERP and CRM work. Public profiles list technologies such as Laravel, React, Flutter, and PHP.
AmcoderZ Infotech is another Ahmedabad-based software development business. Its published services cover mobile applications, web platforms, custom software, healthcare applications, and BLE/IoT integrations. Company listings place its founding around 2023 and describe work for clients in multiple countries.
Because the names are so close, the first useful step is always identity resolution: confirm the exact spelling, domain, and location before you read further.
AmCoder as a Structured Learning Path
AmCoder’s published approach differs from conventional short coding courses. It frames learning as a conceptual map of computer science and software engineering rather than a sequence of framework tutorials.
Core topics listed in its materials include:
- Operating systems, memory, and processes
- Relational databases and SQL
- APIs and backend services
- Frontend architecture
- Caching and load balancing
- Broader system design and professional engineering practices
The practical implication is that someone following this path spends time on fundamentals before specialised tools. That orientation suits learners who want lasting engineering judgement rather than the fastest possible route to a specific stack.
How the Learning Model Differs from Typical Bootcamps
Most short bootcamps optimise for portfolio projects and job-ready syntax. AmCoder’s stated curriculum prioritises the underlying concepts that remain useful when frameworks change. You still build applications, yet the sequence places engineering fundamentals earlier and keeps them central.
Comparing the Three Entities
A side-by-side view removes most of the ambiguity.
| Entity | Primary Audience | Main Activity | Key Themes | Quick Identifier |
|---|---|---|---|---|
| AmCoder | Learners and aspiring engineers | Structured computer-science and software-engineering education | Foundations, algorithms, databases, system design | Learning roadmap and conceptual curriculum |
| AmCodr IT Solutions | Businesses needing software | Custom web, mobile, and application development | Laravel, React, Flutter, ERP/CRM solutions | Founded 2016, Ahmedabad, established software company |
| AmcoderZ Infotech | Businesses needing software | Web, mobile, custom software, IoT, healthcare | Flutter, React Native, Node.js, BLE/IoT integrations | Ahmedabad-based, services list includes healthcare and IoT |
The table shows why the same search query returns different results. One result may describe a curriculum; another may describe a delivery team. Checking the identifier column against the actual website or profile usually resolves the question in minutes.
Practical Differences When You Need Software Built
Both AmCodr and AmcoderZ offer development services, yet their published specialisations diverge. AmCodr materials highlight web applications, mobile apps, and longer-term custom systems such as ERP and CRM platforms. AmcoderZ materials emphasise a broader mix that includes healthcare applications and device integrations alongside standard web and mobile work.
A concrete example: if you need a Laravel-based SaaS platform with React frontend and ongoing support, both companies list relevant experience. If the project involves BLE sensors or a healthcare workflow, AmcoderZ’s published service list is the clearer match on paper. Always verify current capacity and references directly, because published technology lists only show what a company says it works with.
Pros and Cons of Each Approach
AmCoder Learning Path
Pros
- Emphasises lasting computer-science fundamentals
- Provides a sequenced conceptual map rather than isolated tutorials
- Aligns with long-term engineering roles
Cons
- Not a rapid job-placement bootcamp
- Requires sustained personal commitment
- Less focus on immediate portfolio pieces in popular frameworks
AmCodr and AmcoderZ Development Services
Pros
- Existing teams with published project experience
- Ability to deliver complete web and mobile applications
- Established (AmCodr) or specialised (AmcoderZ) service lines
Cons
- Quality and communication still depend on the specific engagement
- Technology lists do not guarantee depth on every listed tool
- Similar naming creates risk of contacting the wrong company
Common Mistakes When Researching Amcoder
People repeatedly make the same errors:
- Assuming all three names belong to one organisation
- Relying only on the first search snippet without opening the actual site
- Judging an education platform by the same criteria used for an outsourcing firm
- Treating a published technology list as verified proof of large-scale expertise
- Ignoring location and founding-year details that quickly separate the companies
Any one of these mistakes can send you to the wrong place or create unrealistic expectations.
Best Practices for Clear Identification
Follow a short sequence whenever you encounter the term amcoder:
- Note the exact spelling and domain.
- Confirm the primary activity (education versus software delivery).
- Check headquarters and founding year.
- Match the published service or curriculum list to your actual need.
- Request recent references or sample materials before committing time or budget.
These steps take little effort and prevent most mix-ups.
| Research Step | What to Check | Why It Matters |
|---|---|---|
| Exact name and domain | Spelling and official website | Prevents attributing one entity’s work to another |
| Audience and activity | Learners versus business clients | Aligns expectations with the real offering |
| Location and founding year | Ahmedabad details and year established | Distinguishes AmCodr (2016) from AmcoderZ (later) |
| Service or curriculum list | Topics or technologies claimed | Confirms relevance to your specific goal |
| References or samples | Client feedback or learning materials | Moves beyond self-published claims |
How to Decide Which One Fits Your Situation
If you are building personal engineering depth and want a structured path through computer science fundamentals, start with AmCoder’s published curriculum and evaluate whether the sequencing matches your timeline.
If you need a development team for a web or mobile product, compare AmCodr and AmcoderZ against your required stack and domain (for example, standard SaaS versus IoT or healthcare). Request recent case studies that match your project size and ask how they handle communication and hand-off.
In both cases, treat public pages as starting points only. Direct conversation and verification remain essential.
Conclusion
The term amcoder covers more than one organisation. AmCoder offers a structured software-engineering learning path focused on computer-science foundations. AmCodr IT Solutions and AmcoderZ Infotech are separate Ahmedabad-based software development companies with overlapping yet distinct service lines.
Knowing the differences lets you choose the right resource the first time. Verify the exact entity, match it to your goal, and confirm details directly before you invest time or money. Clear identification turns an ambiguous search into a practical decision.
Frequently Asked Questions
What does amcoder mean?
Amcoder is an ambiguous search term linked to several similarly named technology entities. The main ones currently visible are AmCoder (learning platform), AmCodr IT Solutions, and AmcoderZ Infotech.
Is AmCoder a software company?
AmCoder presents itself primarily as a computer-science and software-engineering learning platform rather than a conventional software outsourcing firm.
What services does AmCodr IT Solutions provide?
AmCodr describes web application development, mobile application development, website development, and custom software solutions including ERP and CRM work.
What does AmcoderZ Infotech specialise in?
AmcoderZ Infotech lists mobile applications, web development, custom software, healthcare applications, and BLE/IoT integrations among its services.
Are AmCoder and AmcoderZ the same organisation?
Published information shows different activities and identities. One focuses on structured learning; the other focuses on software development services.

Technology moves fast, and keeping up can feel exhausting. That’s why platforms like whatsontech.co.uk exist — to cut through the noise and deliver clear, useful updates on everything from gadgets to cybersecurity.
Whatsontech.co.uk has become a go-to destination for people who want practical technology coverage without the jargon overload. Whether you’re checking the latest phone launches, exploring AI tools for work, or looking for straightforward guides, the site aims to make complex topics approachable.
What Is Whatsontech.co.uk?
Whatsontech.co.uk is a technology blog that covers news, product reviews, practical guides, and analysis across consumer electronics, software, artificial intelligence, business tech, and emerging trends. Founded in 2014, it focuses on explaining how technology shapes everyday life rather than simply repeating press releases.
The platform targets a broad audience. Students, business owners, casual gadget fans, and professionals all find relevant material here. Content stays free and accessible, with no paywalls blocking the main articles.
Key areas include:
- Breaking and curated tech news
- Honest product comparisons and buying advice
- How-to guides and explainers
- Coverage of AI, cybersecurity, and digital tools
- Business and startup technology insights
This mix helps readers stay informed without feeling overwhelmed.
Content Categories You’ll Find on Whatsontech.co.uk
The site organizes material into clear sections so visitors can quickly locate what they need. Major categories include Technology, Software, Artificial Intelligence, Business, Guides, and News.
| Category | Primary Focus | Typical Reader Benefit |
|---|---|---|
| Technology & Gadgets | Device launches, comparisons, hardware analysis | Smarter purchase decisions |
| Artificial Intelligence | Practical AI tools, automation, real-world uses | Better productivity workflows |
| Software & Apps | Reviews, alternatives, troubleshooting guides | Find tools that actually work |
| Business Tech | Digital transformation, SaaS, startup tools | Improve efficiency and strategy |
| Guides & How-tos | Step-by-step instructions, login help, setup tips | Solve specific problems quickly |
| Cybersecurity & Privacy | Threat explanations, protection tips, regulation updates | Stronger personal and business security |
This structure supports different search intents. Someone looking for a quick review lands in one section, while another person seeking a detailed migration guide finds content elsewhere.
Who Benefits Most from Whatsontech.co.uk?
The site works well for people who are not full-time developers or engineers. Everyday users and professionals alike gain value from the plain-language approach.
Typical readers include:
- Consumers researching phones, laptops, or smart devices before buying
- Small business owners evaluating software or cloud tools
- Students exploring tech careers or learning new skills
- Professionals who need quick, reliable updates on industry shifts
- Anyone concerned about online privacy and security
Because the content avoids heavy technical language, it remains useful even if you only follow technology casually.
The Team Behind the Platform
Whatsontech.co.uk lists a named editorial team. Jenny Crimson serves as Founder and Editor-in-Chief, bringing more than 15 years of industry experience. Other contributors include senior technology writers and content curators who focus on emerging tools, gadgets, and practical advice.
Named bylines and an editorial presence help build trust. Readers can see who is writing rather than encountering anonymous posts. The team emphasizes fact-backed coverage and aims to enlighten readers about technology’s impact on daily life and various industries.
Why a UK Perspective Matters
While many large tech sites focus primarily on the United States market, whatsontech.co.uk incorporates a broader view that resonates with UK and European readers. Topics often touch on local regulations, regional startup activity, and how global developments affect users outside North America.
This angle proves helpful when discussing data protection rules, device availability, or business tools that operate differently across markets. At the same time, the site maintains global coverage so readers stay aware of major international shifts.
Pros and Cons of Using Whatsontech.co.uk
Every platform has strengths and limitations. Understanding both helps you decide how it fits into your reading habits.
| Aspect | Pros | Cons |
|---|---|---|
| Accessibility | Free content, plain language, no subscription required | Occasional lighter coverage on highly specialized technical topics |
| Range of Topics | Covers gadgets, AI, business, software, and guides in one place | Depth can vary between breaking news and evergreen guides |
| Trust Signals | Named team, HTTPS, editorial presence | Independent verification of every claim still recommended |
| Audience Fit | Strong for general readers, students, and business users | Advanced engineers may prefer more technical sources |
| Update Frequency | Regular posts across multiple categories | Not every niche receives daily deep dives |
Overall, the advantages center on clarity and breadth. Limitations mainly appear when readers need extremely specialized or real-time enterprise-level analysis.
Common Mistakes When Using Tech Sites Like Whatsontech.co.uk
Many people waste time or make poor decisions when browsing technology content. Avoid these frequent errors:
- Treating every product review as an absolute recommendation without checking your own needs
- Ignoring the publication date on fast-moving topics such as AI tools or software versions
- Relying on a single source for major purchase or security decisions
- Skipping practical guides in favor of only reading headlines
- Overlooking regional differences in availability, pricing, or regulations
Staying mindful of these points leads to better outcomes.
Best Practices for Getting the Most Value
To make the most of whatsontech.co.uk and similar platforms, follow a few simple habits:
- Start with the category that matches your current need (for example, Guides for how-tos or Artificial Intelligence for tool ideas).
- Cross-check important claims against official manufacturer pages or other reputable sources.
- Look for recent posts when evaluating gadgets or software, since features change quickly.
- Use the site’s explainers to build foundational knowledge before diving into complex tools.
- Bookmark specific sections you return to often so you can skip general browsing.
These steps turn casual reading into more intentional learning and decision-making.
How Whatsontech.co.uk Fits Into a Broader Tech Reading Routine
No single website covers everything perfectly. Pair content from whatsontech.co.uk with manufacturer announcements, specialist forums, or in-depth technical blogs when a topic requires deeper expertise. The platform shines as a filter and explainer that saves time and reduces confusion.
For instance, a business owner might read an overview of automation tools here, then test specific software afterward. A student could use a guide on a learning platform, then explore official documentation for more detail. This layered approach works better than depending on any one site alone.
Conclusion
Whatsontech.co.uk serves as a practical resource for anyone who wants technology coverage that stays clear and relevant. From product insights and AI explainers to business tools and everyday guides, the site helps readers stay oriented without drowning in noise.
Its UK-aware perspective, free access, and focus on real-world usefulness make it a solid addition to a regular tech reading list. As technology continues to reshape work, shopping, and daily routines, having a straightforward source for updates remains valuable.
Bookmark the site, explore the categories that match your interests, and combine its insights with your own research for the best results.
5 SEO FAQs
What is whatsontech.co.uk?
Whatsontech.co.uk is a free technology blog that publishes news, reviews, practical guides, and analysis on gadgets, software, artificial intelligence, business tools, and emerging trends.
Is Whatsontech.co.uk free to use?
Yes, the main articles and guides are free to access with no required subscription or paywall for standard content.
Who is Whatsontech.co.uk for?
It suits everyday consumers, students, small business owners, and professionals who want clear explanations of technology without heavy technical jargon.
Does Whatsontech.co.uk cover UK-specific tech topics?
The site includes a UK and European perspective on regulations, availability, and market trends while also covering global developments.
How reliable is the information on Whatsontech.co.uk?
The platform lists a named editorial team and aims for fact-backed coverage. As with any source, readers should cross-check important details for major decisions.
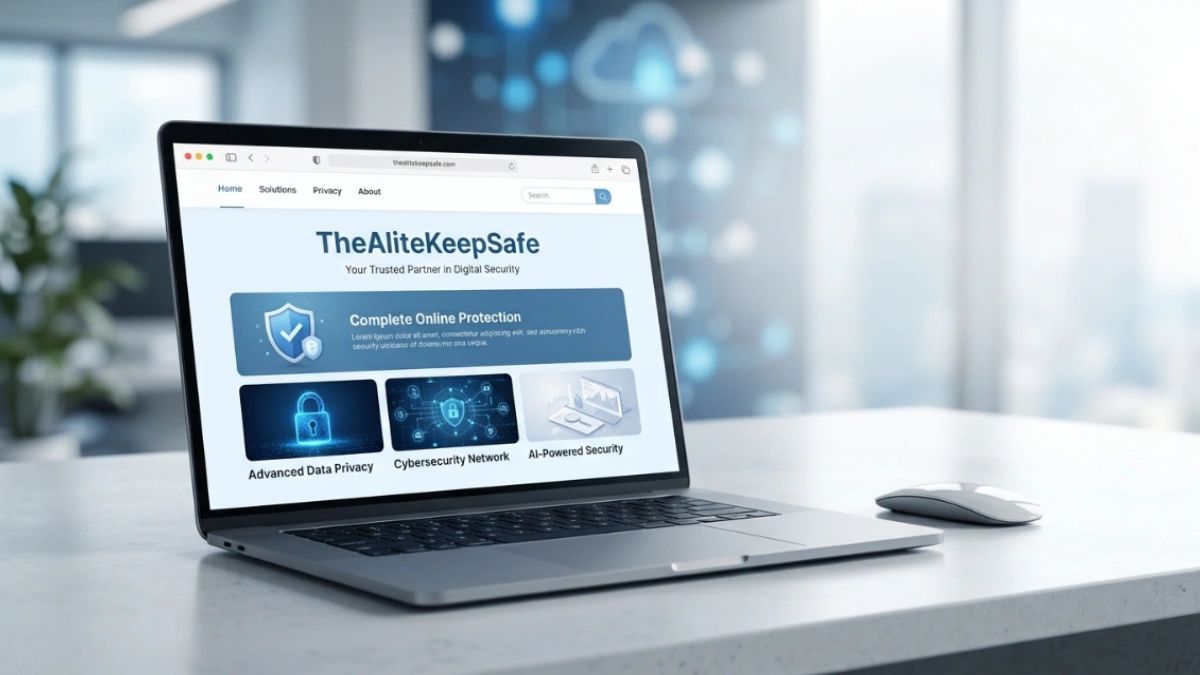
If you searched for thealitekeepsafe.com, you probably want a straight answer about what the site actually is. Thealitekeepsafe.com is an informational publishing website that posts practical guides, how-to articles, and explainers. It started with a focus on online safety and digital privacy, yet its library now stretches across technology, AI tools, home security, business topics, food safety, local SEO, and everyday lifestyle subjects.
Many readers land on the domain expecting a dedicated security product or an official app. That expectation does not match what the site delivers. Instead, thealitekeepsafe.com works like a multi-topic blog. You can browse free articles, check recent posts, and find step-by-step advice without creating an account or downloading software.
The site publishes under the brand name TheAliteKeepSafe. Its homepage and footer describe the goal simply: helpful updates and reader-friendly content in one clean place. A note on the site states that all content is published for informational purposes only. That disclaimer matters because it sets clear boundaries around what the articles can and cannot do for you.
What Is thealitekeepsafe.com?
thealitekeepsafe.com is a WordPress-based content site registered in late January 2026. Public records show a one-year registration period and standard Let’s Encrypt HTTPS encryption. Google Safe Browsing has not flagged the domain for unsafe content. These technical signals confirm that the site is active and that your browser connection is encrypted. They do not, however, automatically certify the accuracy of every article.
The publication maintains the usual transparency pages: About, Contact, Privacy Policy, Disclaimer, and Terms. The contact email is admin@thealitekeepsafe.com, and the Contact page invites readers to report outdated or incorrect information, with a typical response window of one to three business days. Named authors appear on some posts, including Nicai de Guzman (whose profile lists a marketing background and AI-related training) along with simpler labels such as admin and Blitz.
How the Site Differs From Official Keepsafe Products
Confusion often arises because the domain name includes “keepsafe.” The official Keepsafe privacy apps (Photo Vault and related tools) live at getkeepsafe.com. thealitekeepsafe.com is a separate content publisher and is not the official Keepsafe website or product portal. Physical home safes sold under similar-sounding brand names on retail sites are likewise unrelated. Knowing this distinction saves time if your original goal was to download an app or buy a safe.
Topics Covered on thealitekeepsafe.com
The site’s content library is broad rather than specialized. Early pieces emphasized practical online safety steps. Later posts expanded into many other areas. You will find articles on password habits, encryption basics, VPN use on public Wi-Fi, signs that a home security system needs an upgrade, food-handling practices, local search visibility tips, AI face-swap tools, CRM security trends for small businesses, and even niche how-to guides.
This range creates many entry points. A reader looking for data-protection steps can land on a relevant post. Someone researching AI video tools or restaurant fire-code aisle widths can find something too. The trade-off is that the site is not a deep specialist resource in any single field.
| Category | Typical Article Focus | Example Use for Readers |
|---|---|---|
| Online Safety & Privacy | Password managers, MFA, phishing awareness, data encryption | Quick daily habits to reduce account takeovers |
| Home & Personal Security | System upgrade signs, medicine storage, physical safety tips | Practical checks for household protection |
| Technology & AI | Tool comparisons, face-swap reviews, video generators | Overview of new apps before testing them |
| Business & SEO | CRM data trends, local search improvements, software markets | Starting points for small-business research |
| Lifestyle & How-To | Food safety, general how-to explainers | Everyday practical guidance |
The table above shows the main areas readers encounter. Because the site publishes high volume (hundreds of posts, with a large spike in March 2026), individual pieces vary in depth and sourcing.
Is thealitekeepsafe.com Safe and Legitimate?
From a technical standpoint, the site is safe to visit. It uses HTTPS, has a clean Google Safe Browsing record, and does not request logins or payment details for reading content. No reports describe it as malware or a phishing portal. You can open pages normally and read without immediate risk to your device.
Legitimacy as an information source is a separate question. The domain is young. Ownership is not prominently disclosed on public pages. Author credentials vary—some profiles include verifiable background details, while others are minimal. Content volume is high, which is common for guest-post-friendly or multi-topic publishers, yet it also means readers should cross-check important claims.
Quick Trust Signals Checklist
| Signal | What Readers Can Observe | Practical Takeaway |
|---|---|---|
| HTTPS & Safe Browsing | Valid certificate, no malware flags | Safe to browse the pages |
| Standard Legal Pages | About, Privacy, Disclaimer, Contact present | Basic transparency exists |
| Author Information | Named contributors on some posts; bios vary in detail | Check individual author pages when stakes are high |
| Content Disclaimer | Explicitly informational only | Treat advice as starting points, not final authority |
| Contact Route | Admin email and correction form | Readers can flag errors |
These signals help you decide how much weight to give any single article. For low-stakes how-to tips, the site can be convenient. For financial, medical, or high-security decisions, verify against primary sources or licensed professionals.
How Readers Can Get the Most From the Content
Start with the article date and any update notes. Then scan the introduction and headings to see whether the piece matches your specific question. Practical posts often include short lists or numbered steps. For example, a data-security guide might recommend unique passwords, multi-factor authentication on email, and regular device updates. You can test one or two of those steps the same day.
Cross-reference claims that involve numbers, legal rules, or product recommendations. If an article discusses fire-code aisle widths or medication storage, look for official guidance from relevant authorities. When a post reviews AI tools or business software, try the free versions yourself or read independent user feedback.
Because the site accepts contributions and appears on guest-post marketplaces, some pieces may serve SEO or promotional goals. Read with that awareness. Focus on the concrete advice that you can verify quickly, and skip sections that feel promotional without evidence.
Pros and Cons of Using thealitekeepsafe.com
| Aspect | Pros | Cons |
|---|---|---|
| Accessibility | Free, no login required, clean layout | High volume can make quality uneven |
| Topic Range | Covers safety, tech, business, and lifestyle in one place | Not a deep specialist in any single area |
| Practical Style | Short guides and how-tos suit quick reading | Important claims often need external verification |
| Transparency | Legal pages and contact email exist | Ownership and full editorial process not fully disclosed |
| Safety to Visit | HTTPS and clean browsing record | Content accuracy is the reader’s responsibility |
The pros make the site useful for casual research and idea gathering. The cons remind you to stay active as a reader rather than passive.
Common Mistakes When Relying on the Site
One frequent error is treating the domain as an official product site. Searching “thealitekeepsafe.com” and expecting a downloadable vault or physical safe leads to wasted time. Always confirm the exact URL and purpose before acting.
Another mistake is accepting every recommendation at face value. Because articles cover wide subjects, some may lack citations or expert review. Relying solely on a single post for decisions about money, health, or security increases risk.
Readers also sometimes overlook the informational disclaimer. The site does not claim to provide professional advice. Ignoring that boundary can create false confidence.
Finally, some people skip the author or date. A post from early 2026 on fast-moving tech topics may no longer reflect current tools. Checking those details takes seconds and improves the value you get.
Best Practices for Evaluating Articles
Begin every visit with a quick domain check. Confirm you are on thealitekeepsafe.com and not a look-alike. Next, note the publication date and scan for any update language.
Look for specific, actionable steps rather than vague claims. Strong practical articles explain “how” and often include examples you can test. Weak ones stay general or push external links without context.
Cross-check high-stakes information. Official government sites, established industry organizations, and peer-reviewed sources remain the gold standard for legal, medical, or financial topics. Use thealitekeepsafe.com as a readable introduction, then verify.
Finally, use the Contact page if you spot a clear error. The site invites corrections, which is a positive signal when the team responds. Over time, this habit helps you build a personal sense of which articles hold up.
Conclusion
thealitekeepsafe.com is a real, active informational website that publishes practical guides across online safety, technology, business, and lifestyle topics. It is not an official security product, app, or physical safe. The domain uses standard HTTPS, carries a clean browsing record, and offers the usual legal and contact pages. At the same time, its young age, broad scope, and variable author detail mean readers should treat content as helpful starting points rather than final answers.
You can browse safely and find useful how-to steps. The best results come when you read actively, check dates, verify important claims, and remember the site’s informational purpose. With that approach, thealitekeepsafe.com becomes one convenient resource among many rather than the only source you trust.
5 SEO FAQs
What is thealitekeepsafe.com?
It is an informational publishing site that posts free guides and articles on online safety, technology, AI, business, home security, and other general topics.
Is thealitekeepsafe.com the official Keepsafe website?
No. Official Keepsafe privacy apps are available at getkeepsafe.com. thealitekeepsafe.com is a separate content publisher.
Is thealitekeepsafe.com safe to visit?
Yes. It uses HTTPS and has a clean Google Safe Browsing record. Always verify important advice from other sources.
Who writes the articles on thealitekeepsafe.com?
Some posts list named authors such as Nicai de Guzman; others appear under labels like admin or Blitz. Author detail varies.
Does thealitekeepsafe.com sell security products?
No. The site publishes informational content only and does not require purchases or downloads to read its articles.
-

 NEWS1 year ago
Historical Churches in Manila
-

 TOPIC3 months ago
Unveiling AvTub: Your Ultimate Guide to the Best AV Content
-

 TOPIC1 year ago
Symbols of Hope: The 15th Belenismo sa Tarlac
-

 TOPIC1 year ago
Simbang Gabi and Kakanin
-

 TOPIC1 year ago
RIZAL at 160: a Filipino Feat in Britain
-

 TOPIC2 months ago
Understanding Fascisterne: Origins and Ideological Roots
-

 NEWS4 months ago
What Caused Delta Flight DL275 to Diverted LAX? A Detailed Breakdown
-

 TOPIC1 year ago
“The Journey Beyond Fashion” – Ditta Sandico