
TOPIC
BDDiabetes.com Guide: Blood Glucose Testing and Insulin Injection Basics

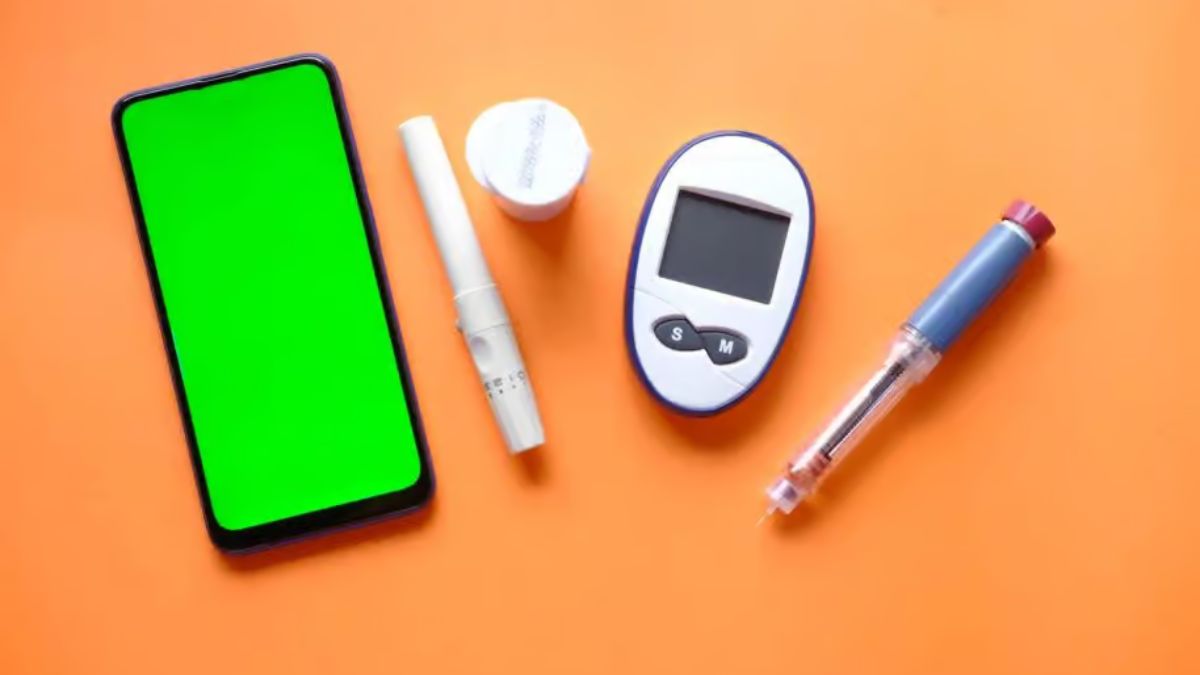
BDDiabetes.com has long been a practical starting point for people who want clear lessons on blood glucose testing and insulin injection technique. If you just heard a new diagnosis, or you have managed diabetes for years and still second-guess your routine, structured education matters more than another random tip from a comment thread. This guide walks through what a resource like bddiabetes.com is built to explain, how to use those lessons with your care team, and which habits actually move daily numbers.
Nothing here replaces medical advice. Targets, medicines, and device choices belong to you and your clinician.
What BDDiabetes.com Covers for Everyday Diabetes Care
BD, short for Becton Dickinson, is known for injection and blood glucose products. Its education site grew around that work. The goal is simple: help people understand testing, injection, and day-to-day self-care without drowning them in jargon.
A useful education page usually covers four jobs.
- It defines the condition in plain language.
- It shows how to check blood glucose safely.
- It explains insulin delivery technique, including site care.
- It connects food, activity, and medicine to the numbers you see.
Searchers often land on bddiabetes.com looking for technique, not a sales pitch. They want to know where to inject, how to rotate sites, when to check, and what a meter reading means before the next meal.
A short definition you can use
Diabetes is a group of conditions in which blood glucose stays higher than it should because the body does not make enough insulin, does not use insulin well, or both. Glucose is the sugar your cells use for energy. Insulin is the hormone that helps glucose move from the blood into those cells.
Type 1 diabetes is an autoimmune condition. The pancreas makes little or no insulin, so insulin therapy is required. Type 2 diabetes is more common and often involves insulin resistance, sometimes with a gradual drop in insulin production. Gestational diabetes appears during pregnancy and needs close follow-up because it can affect both parent and baby.
How Blood Glucose Testing Fits a Real Day
Testing is feedback. It tells you what breakfast did, whether a walk helped, and whether a dose needs a conversation with your clinician. Meters and continuous glucose monitors answer different questions. A fingerstick meter gives a point-in-time number. A CGM shows trend and direction. Many people use both at different stages of care.
Before you test, wash and dry your hands. Food residue on a fingertip can push a reading higher than your true blood glucose. Use the side of the fingertip rather than the pad when your clinician agrees, because it often hurts less. Rotate fingers so one spot does not get sore.
Timing that tends to teach you the most
These windows are common teaching points. Your plan may differ.
- Fasting, before breakfast, shows the overnight baseline.
- Before a meal helps with dose decisions if you use mealtime insulin.
- One to two hours after the start of a meal shows how that meal landed.
- Bedtime can flag a risk of overnight lows if you use insulin or certain other medicines.
- Any time you feel shaky, sweaty, confused, or unusually tired.
The American Diabetes Association often cites general targets for many nonpregnant adults of about 80 to 130 mg/dL before meals and under 180 mg/dL one to two hours after the start of a meal. Pregnancy targets are tighter. Older adults or people with hypoglycemia risk may have higher targets. Ask before you treat a chart as a personal rule.
| Check window | What it often shows | A practical next step |
|---|---|---|
| Fasting | Overnight control and dawn effect | Log it with sleep, late snack, and evening dose |
| Pre-meal | Starting point for a meal dose | Match carbs and planned activity |
| 1–2 hours after eating | Meal response | Note portion size and food type |
| Bedtime | Risk of overnight low or high | Confirm a snack plan if advised |
| Symptoms of a low | Safety check | Treat per your hypo plan, then recheck |
Keep a simple log for two weeks if numbers feel random. Write the time, the reading, the meal, the dose, and any walk or stress. Patterns show up faster on paper than in memory.
Insulin Injection Technique and Why BDDiabetes.com Still Gets Searched
People look up injection technique because small errors add up. A bent needle, a reused needle, or the same patch of skin every day can cause lumps, poor absorption, and frustrating swings. Education sites tied to pen needles and syringes exist to reduce those errors.
A clean injection sequence
Follow the device instructions that came with your pen or syringe. A typical teaching sequence looks like this.
- Wash your hands.
- Check the insulin type, clarity, and expiration date.
- For cloudy insulin, roll it gently. Do not shake unless the label says to.
- Attach a new needle. Prime the pen with the air shot your device requires.
- Dial the prescribed dose.
- Clean the skin if your clinician recommends it, then let it dry.
- Insert at the angle you were taught, usually 90 degrees with shorter needles.
- Press the dose button and hold for the full count, often 5 to 10 seconds, so the dose finishes.
- Remove the needle straight out and discard it in a sharps container.
- Do not recap a used needle by hand.
Never share pens, syringes, or lancets. Insulin pens are single-person devices even when the needle is changed.
Site rotation that protects absorption
Insulin absorbs differently from different areas. The abdomen is often fastest. Thighs and buttocks are often slower. Arms sit somewhere in between for many people. Your educator can map this to your doses.
Rotate within a region and between regions. Stay at least a finger-width from the last spot, and stay about two inches away from the navel. Avoid scars, moles, stretch marks, and lipohypertrophy, the firm fatty lumps that form when the same spot is overused.
| Body area | Common teaching note | Rotation tip |
|---|---|---|
| Abdomen | Often faster absorption | Stay clear of the navel and waistband line |
| Thigh | Often slower, useful for some longer doses | Use the outer front, not the inner thigh |
| Buttock | Slower and discreet | Upper outer area, alternating sides |
| Upper arm | Needs a correct angle and sometimes help | Outer back of the arm, rotate often |
If a site feels firm or looks lumpy, skip it for weeks and tell your clinician. Absorption from damaged tissue is unreliable, which can look like “the insulin stopped working.”
Food, Movement, and the Numbers Between Visits
Education sites work best when they connect technique to the rest of the day. A perfect injection cannot fix a meal pattern you never look at, and a perfect meal plan fails if doses are missed.
The diabetes plate is an easy visual. Fill half the plate with non-starchy vegetables, a quarter with lean protein, and a quarter with carbohydrate foods such as whole grains, beans, fruit, or starchy vegetables. Drink water. This is a starting picture, not a rigid diet. A registered dietitian can adjust it for culture, budget, and glucose patterns.
Activity lowers glucose for many people, sometimes for hours. A 10 to 20 minute walk after meals is a common, low-cost tactic. If you use insulin or a sulfonylurea, unplanned exercise can cause lows. Carry fast-acting carbohydrate and know your personal hypo plan.
Stress and poor sleep push numbers up for some people. Illness does the same. Ask for a sick-day plan before you need it. That plan should say when to check more often, when to call, and how to handle ketones if you have type 1 diabetes.
Pros and Cons of Learning from BDDiabetes.com
Online education is convenient. It is not a full care plan.
Pros
- Technique pages are specific. Needle length, hold time, and site rotation are easier to learn with diagrams than from a rushed visit.
- You can review a step the night before a clinic appointment and arrive with better questions.
- Product-neutral habits, such as single use of needles and sharps disposal, transfer across brands.
- Short lessons fit a lunch break better than a long textbook chapter.
Cons
- A company education site may emphasize the product categories that company makes.
- Pages can lag behind newer devices, biosimilar insulins, or updated targets.
- Generalized ranges are not your ranges.
- Reading is not the same as a hands-on check with a diabetes care and education specialist.
Use the site as a workbook. Bring printouts or screenshots to your next visit and ask what applies to you.
Common Mistakes That Skew Readings and Doses
Small habits cause a lot of confusion. These are the ones educators correct most often.
- Testing with food on the fingers, then chasing a false high.
- Reusing pen needles until they hurt. Reuse dulls the tip, raises infection risk, and can leave insulin in the needle.
- Injecting into the same two spots for months.
- Skipping the prime shot and wondering why the dose felt short.
- Mixing up basal and bolus insulin in a rush.
- Treating every high with extra insulin without a correction plan.
- Ignoring lows because they “pass.” Repeated hypoglycemia is a safety issue, not a willpower issue.
- Changing diet, exercise, and doses all at once, then not knowing which change worked.
If a reading does not match how you feel, wash your hands and repeat the test. Meter error and residue are common. A CGM arrow and a fingerstick can also disagree during rapid change. Follow the device manual on when to confirm.
Best Practices for Using BDDiabetes.com with Your Care Team
Treat education pages as prep, not as orders.
- Write your current doses, meter or CGM model, and needle length before you read. Context keeps you from copying a generic step.
- Pick one skill per week. Week one can be site rotation. Week two can be post-meal checks.
- Log for 14 days. Bring the log. Patterns beat single scary numbers.
- Ask your pharmacist to watch one injection or pen setup if clinic time is short.
- Store insulin as the label says. Most unopened insulin belongs in the refrigerator. In-use pens often stay at room temperature for a limited number of days. Heat and freezing both ruin insulin.
- Dispose of sharps in an approved container. Do not toss loose needles in household trash.
- Review the site date. If a page looks old, confirm the step with your educator.
- Build a low-glucose plan: 15 grams of fast carbohydrate, recheck in 15 minutes, and a rule for when to use glucagon or call emergency services.
| Habit | Why it helps | How often to review |
|---|---|---|
| New needle each injection | Sharper, more reliable dose | Every dose |
| Site rotation map | Steadier absorption | Weekly self-check of skin |
| Handwash before testing | Cleaner fingerstick numbers | Every meter check |
| 14-day log | Shows food and dose patterns | Before each visit |
| Sick-day plan | Fewer emergency guesses | At least twice a year |
Set a reminder for supply checks. Running out of strips or needles on a weekend creates risky gaps. A small backup plan, including where you store glucagon if prescribed, belongs next to the technique steps.
When to Call Instead of Searching
Go beyond a website when something is urgent. Call your clinician or urgent care for vomiting with high glucose, moderate or large ketones if you have type 1 diabetes, glucose that will not come down despite your plan, or signs of dehydration. Use emergency services for severe confusion, seizure, trouble breathing, or a low you cannot treat yourself. Chest pain, one-sided weakness, or sudden vision change need emergency care whether or not diabetes is involved.
Routine questions can wait for a portal message. Urgent patterns should not.
Conclusion
BDDiabetes.com is most useful as a clear lesson set on testing and injection, not as a personal prescription. Learn the sequence, rotate sites, log the numbers that confuse you, and take those notes to someone who knows your medicines. Technique is a skill. Skills improve with short reviews and honest logs. Start with one change this week, either cleaner testing or a written rotation map, and build from there.
FAQs
What is bddiabetes.com?
BDDiabetes.com is BD’s diabetes education site, focused on blood glucose testing, insulin injection technique, and practical self-care information from a company known for diabetes injection products.
Does BDDiabetes.com replace a diabetes educator?
No. It can prepare you for a visit and reinforce technique, but dosing, targets, and device choices should come from your clinician or a diabetes care and education specialist.
How often should insulin injection sites be rotated?
Rotate with every injection. Move at least a finger-width from the last spot and avoid lumpy or scarred skin so insulin absorbs more evenly.
Why do fingerstick results sometimes look wrong?
Food residue, wet hands, expired strips, or a meter that needs cleaning can skew a result. Wash, dry, and repeat if the number does not match your symptoms.
Can online diabetes lessons help with type 2 as well as type 1?
Yes. Testing habits, meal structure, activity, and injection technique apply across types, while medicine plans differ. Confirm which lessons match your treatment.


What should you do when a dog bite leaves you hurt, scared, or unsure of what comes next? Acting quickly can help protect your health and prevent further harm. Even a small bite can cause infection, nerve damage, or other problems that need medical care.
Knowing how to respond to a dog bite also helps you keep useful records and understand your rights. From cleaning the wound to reporting the incident, each step matters. By reading this guide, you will learn how to care for your injury, document the attack, and protect your rights.
Clean the Wound and Get Medical Care
Move away from the dog and find a safe place before checking your injury. Wash the wound with soap and running water for several minutes to help remove dirt and germs.
Seek urgent medical care for deep wounds, heavy bleeding, severe pain, or signs of nerve damage. A doctor can check for infection, assess the need for stitches, and review your tetanus and rabies risks. Do not wait for symptoms if the bite breaks your skin, especially when the dog’s vaccination status is unknown.
Record Details About the Dog Bite
Write down the date, time, and place where the attack happened while the details are fresh. Record the dog’s color, size, breed if known, and the owner’s name and contact details.
Keep copies of medical bills, prescriptions, visit notes, and receipts for travel or other costs. Save messages with the owner, witness contact details, and any reports you receive from local officials. These records may help explain what happened if you need to make an insurance claim or seek legal help.
Report the Attack to Local Officials
Contact your local animal control office or health department to report the bite and ask about local rules. Reporting can help officials check the dog’s vaccination status and decide whether it needs to be watched for rabies symptoms.
If the owner is unknown or the dog runs away, tell officials where the attack happened and which way the dog went. Do not try to catch an aggressive dog yourself, as this could lead to another injury. Follow the advice of health workers and local officials about treatment, follow-up checks, and safety steps.
Understand Your Rights After an Injury
A dog bite may lead to medical costs, lost pay, and lasting pain, so keep track of how the injury affects daily life. Rules about who is responsible vary by location, and the facts of the attack may matter. Avoid signing a release or accepting a quick payment before you understand the full cost of your injury.
If you were bitten in California, California dog bite injury legal guidance may help you understand possible legal options, including concerns about nerve damage. Keep your notes and documents organized so you can share accurate information if you seek legal advice.
Take the Right Steps to Protect Yourself
Responding to a dog bite starts with safety, wound care, and prompt medical advice. Report the attack, record what happened, and keep all papers linked to your treatment and costs. These steps can support your recovery and help answer questions about responsibility.
Knowing how to respond to a dog bite can help you make informed choices. Follow your doctor’s care plan and report any new pain, numbness, swelling, or redness. Keep track of how the injury affects your daily life, and seek legal advice when needed.
Did this guide help you? Browse the rest of this section for more advice on a variety of topics.
A vehicle purchase can affect nearly every part of daily life, from the morning commute to school drop-offs, grocery runs, client visits, and long weekend drives. Before comparing trims, colors, or screens, take time to Learn More about the types of vehicles that fit the work, family, and travel needs that matter most to your household. The best vehicle is not automatically the biggest, newest, or most powerful choice. It is the one that handles your usual responsibilities comfortably while leaving room for realistic changes over the next several years.
Why One Vehicle Often Has to Do Several Jobs
Many drivers rely on one vehicle for nearly everything. A compact car may be ideal for a solo commuter, but it can feel restrictive when a stroller, sports equipment, luggage, or visiting relatives become part of the routine. On the other hand, a large truck or SUV may offer more capability than necessary while incurring higher fuel, tire, insurance, and parking costs. A useful rule is to choose your busiest regular day rather than your easiest one. For example, someone who commutes alone during the week but carries two children and camping gear twice a month may need flexible cargo space more than the lowest possible fuel bill.
Step 1: List the Real Jobs the Vehicle Must Handle
Start with a written list of how the vehicle will actually be used. This helps separate essential features from options that look appealing but rarely improve daily life.
- Count the passengers who will ride in the vehicle most often.
- List recurring cargo, including work tools, groceries, luggage, pet crates, or outdoor gear.
- Consider commute distance, traffic, parking conditions, and the type of roads you travel.
- Note whether you truly need to tow a trailer, haul materials, or carry heavy equipment.
- Think three to five years ahead, especially if your family, job, or hobbies may change.
Step 2: Pick the Right Vehicle Shape
Sedans and Compact Cars
Sedans and compact cars can be practical for commuters, couples, and smaller households. They are usually easier to park, lighter to drive, and often more efficient than larger alternatives. Their limits typically appear in rear-seat space and the ability to carry tall, bulky, or muddy cargo.
Crossovers and SUVs
Crossovers and SUVs offer a middle ground between passenger comfort and flexible storage. A two-row model may fit a small family well, while a three-row model can help with carpools or larger households. Still, added size can mean higher operating costs and more difficulty in crowded parking lots.
Pickup Trucks and Vans
Trucks and vans make sense when hauling, towing, tools, or frequent passenger transport are routine needs. Check the exact configuration before assuming a vehicle can handle a certain load, because engine, drivetrain, bed length, and equipment packages can change payload and towing limits.
Step 3: Match Space to Daily Life
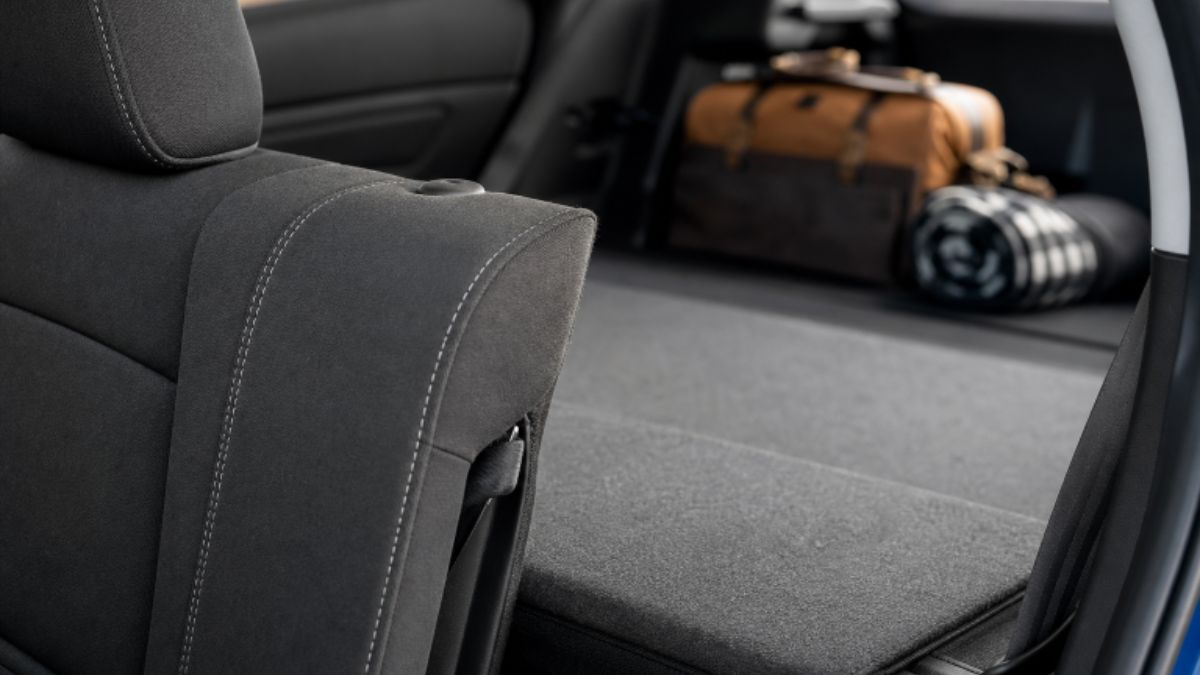
Do not judge interior usefulness from exterior dimensions alone. Bring the items you use most often when you shop, such as a car seat, stroller, cooler, tool bag, or suitcase. Test rear-seat legroom with adults and children in place, and check whether doors open wide enough for easy entry. Also, pay attention to the cargo floor height and the width of the rear opening. A large cargo number may not help much if lifting a heavy item over a tall bumper becomes difficult. If you are considering a third row, confirm it will be used frequently enough to justify the extra length and cost.
Step 4: Compare Fuel Use and Driving Costs
Fuel economy becomes especially important for long commutes and frequent road trips. Compare city, highway, and combined estimates, then use your expected annual mileage to make a realistic budget. The fuel economy label gives shoppers a consistent way to compare expected consumption across vehicles. A simple estimate is annual miles divided by average miles per gallon, multiplied by the expected price per gallon. Real-world results can vary with weather, traffic, tire pressure, cargo weight, driving habits, and short trips, so leave some room in the budget for changing conditions.
Step 5: Review Safety Features and Ratings
Crash-test performance and driver-assistance features are related, but they are not the same thing. Look for useful equipment such as automatic emergency braking, forward collision alerts, blind-spot warnings, rear cross-traffic alerts, parking sensors, and clear camera views. Before buying, use crash-test ratings and recall information to compare vehicles you are seriously considering. During the test drive, make sure the safety controls are easy to understand and that the alerts are helpful rather than distracting.
Step 6: Think About Comfort and Visibility
Adjust the seat, steering wheel, mirrors, and climate controls before deciding whether a vehicle feels right. Check sightlines over the hood, through the rear window, and over both shoulders. Pay attention to seat support, road noise, cupholders, storage compartments, and how easy it is to enter and exit.
Step 7: Consider Towing, Payload, and Weather Needs
Towing capacity refers to how much a vehicle can pull, while payload is the weight carried inside the vehicle and in its cargo area. If you need either capability, verify the limits for the exact vehicle rather than relying on a broad model claim. All-wheel drive or four-wheel drive can help in certain conditions, but suitable tires, ground clearance, and careful driving also matter.
Step 8: Calculate the Full Ownership Cost
Compare more than the monthly payment. Include insurance, fuel or charging, maintenance, tires, registration, taxes, warranty coverage, likely repair costs, and expected resale value. A lower-priced vehicle can become the more expensive option if it consumes far more fuel, requires costly replacement tires, or does not fit your needs well enough to keep up over the long term.
Step 9: Take a Focused Test Drive
Drive on roads that resemble your everyday route. Try parking, tight turns, merging on the highway, braking, and rough pavement when possible. Load the items you carry regularly, and have every household member sit in the rows they would use. Write down concerns immediately, then compare notes before the next test drive.
Common Mistakes to Avoid
- Buying the largest vehicle without measuring what must actually fit.
- Focusing only on the monthly payment instead of total ownership costs.
- Ignoring rear-seat comfort, cargo access, or real parking conditions.
- Paying for towing or off-road capability that will rarely be used.
- Skipping safety, recall, and test-drive checks.
A Simple Vehicle Match Checklist
- Mostly commuting: Prioritize comfort, efficiency, safety, and easy parking.
- Growing family: Prioritize child-seat fit, rear access, cargo room, and flexible seating.
- Frequent road trips: Prioritize ride quality, storage, visibility, and highway efficiency.
- Work and projects: Prioritize payload, towing, durable materials, and useful cargo space.
- Mixed daily use: Choose the option that handles the busiest day without feeling excessive on every other day.
Conclusion
Matching a vehicle to work, family, and weekend travel requires an honest look at how you drive now and what may change soon. Consider your daily commute, passenger needs, cargo requirements, parking situation, road conditions, and the types of trips you take throughout the year. By comparing space, comfort, safety, towing or hauling capability, fuel or charging costs, maintenance needs, financing, and total ownership costs, you can avoid choosing a vehicle based solely on appearance or a tempting monthly payment. Think about how the vehicle will fit into your routine several years from now, not just on the day you purchase it. The right choice should feel practical on Monday morning, comfortable during a busy family week, and ready for the weekend travel, errands, and unexpected adventures ahead.

Have you ever wondered what you would do after a car accident? Many people feel confused and overwhelmed following a crash. There are so many things to handle, from injuries to car repairs.
Insurance companies may call you, asking for information. You might worry about medical bills or missing work. It can be hard to know what steps to take next.
This blog post explains why getting legal help matters after a car accident. Learn how professional support can protect your rights and help you get fair compensation. Keep on reading!
Understanding Your Rights After an Accident
After an accident, you need to know your legal rights. Many people do not realize what they are entitled to under the law.
A lawyer can explain your options and guide you through each step. Without help, you might accept less money than you deserve. Protecting your rights from the start can make a big difference in your recovery.
Dealing With Insurance Companies
Insurance companies often try to settle claims quickly and for as little as possible. They may use confusing terms or pressure you into accepting a low offer.
A legal professional can speak to insurers on your behalf. This support helps you avoid mistakes that could hurt your case. Working with a lawyer can increase your chances of getting the compensation you need.
Getting Help With Medical Bills
Medical bills can pile up fast after a car accident. You may need treatment, medicine, or even surgery. Sometimes insurance does not cover all your costs.
A lawyer can help you find ways to pay for your care. Their help ensures you don’t pay out of pocket for someone else’s mistake.
Proving Who Was at Fault
Showing who caused the accident is not always simple. You may need police reports, witness statements, or photos from the scene.
Legal experts know how to gather and use this evidence. Their experience helps you build a strong case. This can make it easier to prove your claim and get the help you need.
Understanding Special Injury Claims
Some injuries, like back or neck problems, take time to show up. These cases may need extra care and attention.
In these situations, car accident back injury claims can be complicated, involving both short-term and long-term effects. Legal professionals know how to handle these special claims.
Fighting for Fair Compensation
After an accident, you deserve fair treatment. Legal help can make sure all your damages are considered, including lost wages, pain, and suffering.
Lawyers know how to calculate the true value of your claim. They will fight for what you deserve, not just what is easy to get. With their support, you are more likely to receive the compensation you need to move forward.
Your Next Steps for Legal Support
Getting legal help after a car accident is one of the best decisions you can make. It protects your rights and helps you deal with insurance companies and medical bills.
You do not have to face these challenges alone. Lawyers give you the guidance you need during a stressful time.
By working with an expert, you increase your chance of fair compensation. Make sure you get the help you deserve after a car accident.
Did you like this guide? Great! Please browse our website for more!
-

 NEWS1 year ago
Historical Churches in Manila
-

 TOPIC3 months ago
Unveiling AvTub: Your Ultimate Guide to the Best AV Content
-

 TOPIC1 year ago
Symbols of Hope: The 15th Belenismo sa Tarlac
-

 TOPIC1 year ago
Simbang Gabi and Kakanin
-

 TOPIC1 year ago
RIZAL at 160: a Filipino Feat in Britain
-

 TOPIC2 months ago
Understanding Fascisterne: Origins and Ideological Roots
-

 TOPIC1 year ago
“The Journey Beyond Fashion” – Ditta Sandico
-

 NEWS4 months ago
What Caused Delta Flight DL275 to Diverted LAX? A Detailed Breakdown