
TOPIC
The Ultimate DIY Guide: Professional Grade Outdoor LED Lighting for Your Home

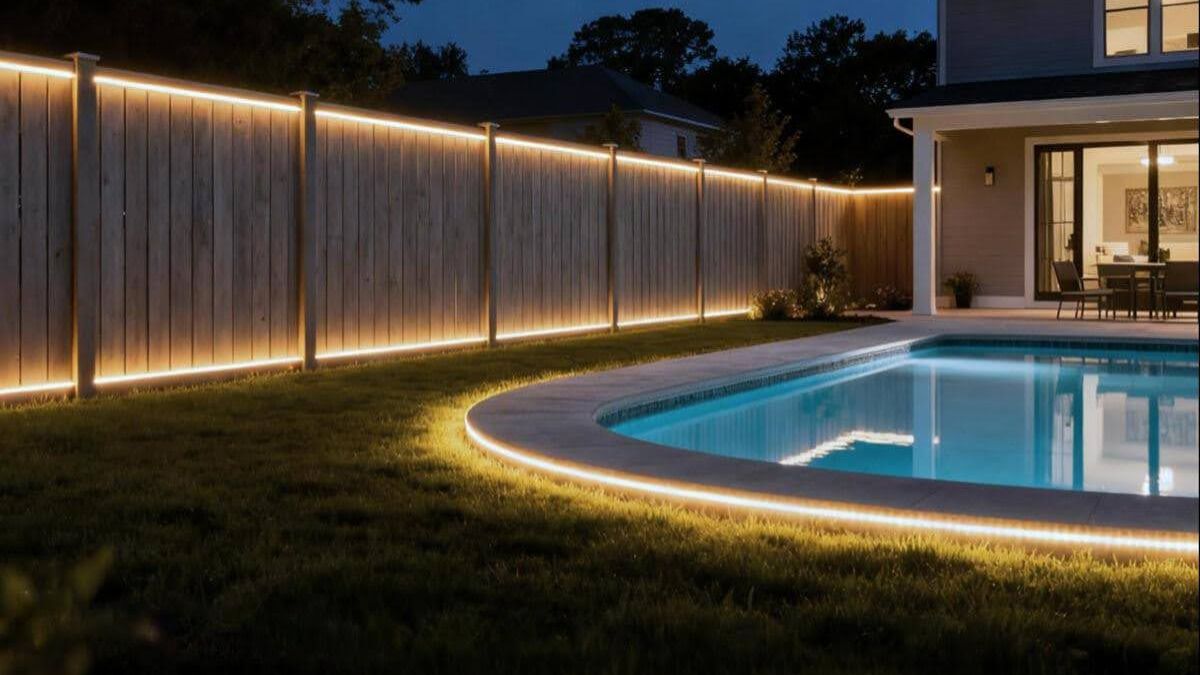
There is a unique sense of pride that comes from walking onto your patio at sunset, hitting a switch, and seeing your backyard transformed by a glow you created with your own two hands. In the past, professional-looking landscape lighting was the exclusive domain of expensive contractors says Personal Touch Property Management experts. However, with the advent of high-quality linear lighting, the “DIY-er” now has access to the same tools as the pros.
The secret to a project that looks like it cost ten thousand dollars—but actually cost a fraction of that—is in the details of the outdoor LED light strips waterproof system you choose. This isn’t just about sticking some lights under a railing; it’s about understanding power, weatherproofing, and placement. This guide is your “Masterclass” in taking your outdoor space from dark and dated to modern and magical.
Planning Your Canvas: The Pre-Installation Phase
A common mistake among DIY enthusiasts is starting with the lights instead of the tape measure. Before you buy a single foot of LED strip, you need a lighting plan.
Identifying the Key Zones
- The Perimeter: Look at the edges of your deck or the top of your fence. This provides “frame” lighting.
- The Steps: This is the most functional part of your project. Every step needs a consistent line of light for safety.
- The “Hero” Features: Do you have a beautiful stone planter or a modern pergola? These are your focal points.
Calculating Your Lengths and Wattage
Measure twice, buy once. When you calculate your total length, you also need to calculate your wattage. Most LED strips list their “Watts per foot” or “Watts per meter.” If you have 30 meters of light and each meter pulls 10 watts, you need a 300-watt power supply.
Pro Tip: Always buy a power supply that is 20% larger than your calculated need to prevent overheating.
Selecting Your Materials: Why Quality is Your Best Friend
In an indoor DIY project, you can sometimes get away with cheap materials. Outdoors, the environment is your enemy.
Understanding IP Ratings for DIYers
If you are doing a DIY waterproof LED strip installation, you will see ratings like IP65, IP67, and IP68.
- IP65: Fine for a covered patio ceiling where rain never hits it.
- IP67: The “Sweet Spot” for DIY. It can handle rain, snow, and the occasional splash from a garden hose.
- IP68: Only buy this if you are literally putting the lights inside a pond or pool. It is harder to cut and seal on-site.
Silicone vs. PVC: The Long-Term Test
Cheap DIY kits often use PVC. It smells like plastic and turns yellow after three months in the sun. For a professional result, look for silicone-encapsulated strips. Silicone stays clear, doesn’t crack in the winter, and ensures your “Warm White” stays warm white for years.
Tools of the Trade: Your DIY Kit
To do this right, you’ll need more than just the lights. Gather these tools before you start:
- Digital Multimeter: To check for voltage drop.
- Outdoor-Rated Wire Nuts or Lever Connectors: For secure, corrosion-resistant wiring.
- Neutral-Cure Silicone Sealant: Crucial for sealing cut ends.
- Heat Gun and Heat Shrink Tubing: For creating a “double-seal” on connections.
- Aluminum Channels: To act as a mounting guide and heat sink.
Step-by-Step Installation: The “Pro” Workflow
Step 1: Bench Testing
Never install a strip before testing it on the ground. Connect your power supply, controller, and the full length of the outdoor LED light strips waterproof. Check for color consistency and ensure every diode is working. It’s much easier to return a defective strip before it’s glued 10 feet up on a pergola.
Step 2: Preparing the Surface
Outdoor surfaces are dirty. If you rely on the 3M adhesive tape alone, it will fall off within a month. Clean the mounting surface with isopropyl alcohol. Better yet, screw in aluminum mounting clips or channels for a mechanical bond that won’t fail in the summer heat.
Step 3: Cutting and Sealing (The DIY “Make or Break”)
When you cut a strip, you’ve created an entry point for water.
- The Cut: Use sharp scissors exactly on the copper line.
- The Seal: Fill an end-cap with silicone sealant, push it onto the cut end, and wipe away the excess.
- The Wait: Let it dry for a full 24 hours before turning on the power. Heat from the LEDs can create air bubbles in wet silicone, creating a “micro-leak.”
Step 4: Managing the “Spaghetti” (Wiring)
Use UV-rated outdoor wire for your “jumper” cables (the wires that connect the strips to the power supply). Hide your wires inside plastic conduit or tuck them into the grooves of your deck. A “pro” DIY job is defined by how little wiring you can see.
Dealing with Voltage Drop: The Long Run Challenge
One of the most common questions in DIY waterproof LED strip installation is: “Why is the end of my light strip dim or pink?” This is voltage drop. Electricity loses “pressure” as it travels through thin copper.
- Solution A: Use a 24V system instead of 12V.
- Solution B: “Power Injection.” Run a separate wire from the power supply to the end of the strip as well as the beginning. This feeds the LEDs from both sides, ensuring uniform brightness.
Smart Controls and Dimming
Since you’re doing it yourself, why not make it smart? Most DIYers opt for Wi-Fi or Bluetooth controllers.
- Placement: The controller is the most sensitive part. Even “waterproof” controllers should be placed inside a weather-rated junction box.
- App Integration: Choose a controller that works with “Smart Life” or “Tuya” for the widest compatibility with other home devices.
Troubleshooting Common DIY Mistakes
- Mistake 1: Wrong Polarity. If the lights don’t turn on, check if you’ve swapped the Positive (+) and Negative (-) wires. LEDs only work in one direction.
- Mistake 2: Overloading the Circuit. If the power supply is “clicking” or flickering, you’ve likely exceeded the wattage limit.
- Mistake 3: Acidic Silicone. Never use “vinegar-smelling” silicone. It will eat through the copper on your LED strip within weeks. Use “Neutral Cure” only.
Conclusion: Your New Evening Retreat
A successful DIY outdoor lighting project is more than just a home improvement; it’s a lifestyle upgrade. By following professional protocols—choosing high-quality outdoor LED light strips waterproof, sealing your connections properly, and planning for voltage drop—you create a landscape that rivals any professional installation.
The sun may go down, but your outdoor living is just beginning. Grab your tools, follow the plan, and turn your backyard into the oasis you’ve always dreamed of.


How many people reach retirement age with insufficient savings to maintain their current lifestyle? The answer reveals a critical gap between earning income and building lasting financial security. Long-term wealth is not something that happens by accident or through a single windfall. Instead, it develops through consistent application of foundational financial principles over many years. Understanding these fundamentals separates those who merely earn money from those who actually build wealth that endures through economic cycles and life changes.
1. Start With a Clear Financial Foundation
Before pursuing wealth-building strategies, you need to establish where you currently stand financially. This means calculating your net worth by listing all assets and subtracting all liabilities. Creating a detailed picture of your income, expenses, and debts gives you a realistic baseline from which to work. Without understanding your starting point, any wealth-building plan becomes abstract rather than actionable. Many people skip this step because it feels uncomfortable, yet this honest assessment is precisely what enables meaningful progress. Once you know your numbers, you can set specific, measurable financial goals aligned with your values and timeline.
2. Develop Disciplined Spending Habits
Wealth building fundamentally depends on spending less than you earn and directing that difference toward productive assets. This does not require extreme deprivation or giving up all enjoyment, but it does demand intentionality about where your money goes. Creating a budget and tracking your spending reveals patterns you likely never noticed, such as recurring subscriptions, dining expenses, or impulse purchases. For example, someone might discover they spend $150 monthly on streaming services or coffee shop visits, money that could instead accumulate into thousands over time. The key insight is that small leaks compound into large drains across months and years. By addressing spending behaviors now, you create breathing room in your budget for the wealth-building activities that matter most.
3. Prioritize Regular Saving and Investing
Saving money is necessary but insufficient by itself for building real wealth. Money sitting in a savings account loses purchasing power over time due to inflation, which erodes the value of your cash. Investing allows your money to work for you by earning returns through various vehicles such as stocks, bonds, or real estate. The specific investments you choose depend on your risk tolerance, timeline, and financial situation, but the principle remains constant. Regular, consistent investing over decades has historically proven more reliable than trying to time markets or chase hot investment trends. Even modest monthly contributions grow substantially through the power of compound returns, where earnings themselves generate additional earnings. For those who want structured guidance during the investing process, a wealth manager in Denver, CO can help align investment choices with long-term financial goals and individual risk tolerance.
4. Protect Against Unexpected Financial Shocks
Building wealth becomes significantly harder if a single unexpected event wipes out years of careful progress. Insurance serves as a critical component of any serious wealth strategy because it prevents catastrophic losses from derailing financial plans. Health insurance protects against medical emergencies that could bankrupt individuals without coverage, while disability insurance replaces income if injury or illness prevents you from working. Homeowners and auto insurance cover physical assets that represent major portions of many people’s net worth. Beyond insurance, an emergency fund held in accessible accounts provides a buffer for unexpected expenses without forcing you to liquidate investments at an inopportune time. Financial advisors commonly recommend maintaining three to six months of living expenses in emergency savings, with the precise amount depending on factors such as job stability, industry volatility, and family obligations. Treating protection as a wealth-building tool rather than an afterthought ensures that a single bad year does not erase a decade of disciplined effort.
5. Adapt Your Strategy as Life Evolves
Your wealth-building approach must change as you progress through different life stages and as your circumstances shift. Someone in their twenties with decades until retirement can take more investment risk than someone approaching retirement age with less time to recover from market downturns. Earning a promotion, getting married, having children, or experiencing job loss all require reassessing your financial plan and making targeted adjustments. What worked perfectly five years ago may no longer serve your current priorities or constraints. Regularly reviewing your financial situation allows you to make course corrections before small deviations become major problems. This adaptive mindset prevents wealth-building from becoming a rigid system that ignores your evolving reality.
Conclusion
Building long-term wealth requires more than wishful thinking or occasional financial decisions. The fundamentals center on understanding your current situation, controlling your spending, saving and investing consistently, protecting against losses, and adapting as circumstances change. These principles may sound straightforward, yet their execution demands patience and discipline across many years. The difference between those who accumulate wealth and those who struggle financially often comes down to consistent application of these basics rather than any secret strategy or special knowledge. By committing to these foundational practices today, you can create a stronger financial future, build resilience through life’s uncertainties, and move steadily toward the financial security and independence that long-term wealth can provide.

A routine walk can change in seconds. A dog spots another animal, hears something across the street, or suddenly decides to move in another direction. When that happens, the leash and collar take the full force of the movement. If either piece of equipment is poorly made, a moment of excitement can quickly become a safety problem for both the dog and the person holding the leash.
The risk is not limited to damaged equipment. A broken clip can allow a dog to run into traffic, while a rough collar or poorly fitted leash can cause discomfort, chafing, or painful pressure. These concerns are especially important when walking strong, energetic, or easily startled dogs.
Dog-walking injuries are also a real concern. Research shared by Harvard Health found that emergency department visits related to dog walking increased substantially between 2001 and 2020, showing that the activity carries risks that are easy to underestimate.
Good equipment cannot prevent every accident, but it can reduce some avoidable risks. Paying attention to materials, hardware, fit, and overall construction gives owners a better chance of maintaining control without making everyday walks uncomfortable.
What Makes Low-Quality Dog Gear a Safety Concern
Walk into almost any large pet store and you will find rows of inexpensive collars and leashes in every color and size. Price and appearance can make these products appealing, but neither tells you much about how they will perform under repeated use.
Low-cost equipment may rely on thin webbing, lightweight hardware, or basic buckles that are not designed for frequent exposure to pulling, moisture, dirt, and sudden changes in tension. That does not mean every inexpensive product will fail, but it does mean construction quality deserves closer attention.
A worn leash may begin to fray long before it breaks. A buckle can become difficult to close securely. A clip can develop corrosion or lose its spring tension. These problems may be easy to overlook during normal use, yet they become much more important when a dog suddenly pulls with full force.
Replacing gear after visible wear is important, but prevention is better. Owners should inspect the stitching, attachment points, buckles, and clips regularly rather than waiting for a failure.
Why Hardware Quality Matters
Most equipment failures happen at connection points. A leash may be made from strong material, but that strength does not help much if the clip, ring, buckle, or attachment point is the weak link.
Sudden pulling creates much more force than ordinary walking. A dog lunging toward a squirrel or another dog can put immediate stress on every part of the setup.
That is one reason dog-walking injuries often involve falls, strains, and other injuries caused by losing balance when a dog pulls unexpectedly. Research highlighted by PBS NewsHour has also drawn attention to the significant rise in dog-walking injuries over the past several years.
Owners should look for hardware that feels solid and operates smoothly. Metal components should not have sharp edges, loose parts, or visible signs of corrosion. On the leash itself, pay attention to the stitching around the clip and handle because these areas receive considerable stress.
The Problem With Friction and Poor Materials
Safety is not only about whether a leash breaks. The material can also affect comfort during ordinary walks.
Stiff webbing can rub repeatedly against a dog’s neck or chest, particularly when the dog pulls or the leash changes position. Over time, repeated friction may contribute to coat breakage, tangling, or skin irritation.
The same problem can affect the handler. A leash that slides abruptly through the hand can create painful friction, especially during a sudden lunge. A material that provides a secure grip gives the person walking the dog more control without requiring them to squeeze the leash excessively.
Material selection can therefore make a noticeable difference. Smoothly finished surfaces and flexible construction tend to move more comfortably with the dog instead of resisting every change in direction.
That does not mean one material is automatically right for every dog. Coat type, size, activity level, and walking habits all matter. A dog that spends most of its time on short neighborhood walks may have very different needs from one that regularly hikes, trains, or works outdoors.
Material Choice: Leather and Synthetic Webbing
Synthetic webbing has become common because it is inexpensive, lightweight, and easy to manufacture. It can also perform well when properly constructed. The issue is that quality varies considerably between products.
Thin or poorly finished webbing can fray with repeated use, while rough edges may create more friction against the dog’s coat. Exposure to moisture, dirt, and sunlight can also affect the material over time.
Leather offers a different set of characteristics. A well-made leather leash or collar can feel flexible and comfortable while providing substantial strength. With regular care, leather can also develop a softer feel as it ages.
For owners comparing handmade dog leashes and collars, the details of construction matter just as much as the material itself. Look at how the leash is joined to the hardware, how the collar edges are finished, and whether the overall design suits the dog’s size and activity level.
| Feature | Lower-Quality Synthetic Gear | Well-Made Leather Gear |
| Durability | Can vary significantly by webbing and hardware | Typically built for repeated, long-term use |
| Comfort | May feel stiff or abrasive | Can become softer and more flexible with use |
| Hardware | Quality varies widely | Often paired with durable metal fittings |
| Maintenance | Usually easy to clean | Requires appropriate leather care |
| Long-Term Use | May need more frequent replacement | Can provide long service with proper care |
The table is only a starting point. Construction, fit, and maintenance can affect performance just as much as the material listed on the product label.
Why Fit Matters as Much as Strength
Even strong equipment can become a problem when it does not fit correctly.
A collar that is too loose may allow a determined dog to back out of it. One that is too tight can create unnecessary pressure and discomfort. The right fit should keep the collar secure without constantly pressing into the neck.
Fit is especially important for dogs with unusual neck shapes, thick coats, or narrow heads. Owners should check the fit regularly because weight changes, coat growth, and age can all affect how equipment sits.
Leash length matters too. A very short leash can limit natural movement and encourage constant tension, while an excessively long line may make it harder to respond quickly when a dog changes direction.
The goal is not maximum restraint. It is controlled movement that allows the dog to walk comfortably while giving the handler enough control to respond when needed.
Choosing Gear for Strong Pullers
Strong pullers need equipment that can handle sudden changes in tension without creating unnecessary pressure.
A secure connection between the collar and leash is essential. Some owners may also prefer designs that offer more adjustability, especially for dogs that tend to pull, back away, or slip out of standard collars.
Limited-slip and martingale-style collars can be useful in situations where escape is a concern because they can tighten within a controlled range when tension is applied. However, they still need to be fitted correctly and used responsibly.
The leash itself should also match the dog’s size and strength. A lightweight line designed for a small dog may not be appropriate for a powerful breed. At the same time, oversized hardware can add unnecessary weight for a smaller dog.
Reflective materials can also improve visibility during evening walks, while textured or comfortable handles can give the handler a more reliable grip in wet conditions.
Inspect, Maintain, and Replace
Even well-made equipment does not last forever. Regular inspection is one of the simplest ways to reduce the chance of sudden failure.
Check the leash for fraying, stretched sections, damaged stitching, or changes in texture. Inspect metal hardware for cracks, rust, or loose connections. On collars, look closely at the buckle and the points where the leash attachment is secured.
Cleaning also matters. Dirt and moisture can work their way into materials and hardware, gradually reducing their performance. Follow the manufacturer’s care instructions and allow wet equipment to dry properly before storing it.
Most importantly, replace equipment when there are clear signs that its condition is deteriorating. Continuing to use a damaged leash because it has “one more walk left” is an unnecessary risk.
Moving Forward With Confidence
The safest dog gear is not necessarily the most expensive. What matters is whether the equipment is built well, fits properly, and matches the dog’s size, strength, and walking habits.
Cheap products can become problematic when weak hardware, rough materials, or poor fit create risks that are avoidable with better construction. On the other hand, even premium equipment will not work properly if it is incorrectly fitted or poorly maintained.
A thoughtful approach starts with the basics. Check the connection points. Pay attention to how the material feels against the skin and coat. Choose a size appropriate for the dog, and inspect the gear regularly for signs of wear.
A leash and collar are simple tools, but they play an important role in everyday safety. Choosing them carefully can help prevent equipment-related problems while making walks more comfortable for everyone involved.

The way we love, communicate, trust, and manage conflict in adulthood rarely begins in our adult years. Our early interactions with primary caregivers create an invisible emotional blueprint that dictates how we navigate romantic intimacy decades later.
Understanding these developmental roots helps explain why we repeatedly choose certain partners, react strongly to minor disagreements, or struggle to express basic needs in relationships.
The Foundation of Attachment Theory in Adult Love
Quick Answer: Attachment theory demonstrates that the reliability and warmth of childhood caregivers directly shape how secure, anxious, or avoidant an adult feels in romantic relationships.
During infancy and early childhood, our brains constantly assess whether our emotional and physical needs are safe with others. When caregivers respond consistently with empathy and attunement, children develop a secure attachment style. As adults, securely attached individuals view intimacy as safe, communicate boundaries comfortably, and trust their partners easily.
Conversely, inconsistent or emotionally distant caregiving fosters insecure attachment styles. These early experiences directly dictate the attachment style impact on intimacy later in life:
- Anxious-Preoccupied: Formed when caregiving is unpredictable. Adults with this style often fear abandonment, require constant reassurance, and hyper-fixate on minor shifts in their partner’s mood.
- Dismissive-Avoidant: Formed when caregivers are emotionally unavailable or overly strict. Adults suppress their emotional needs, value extreme independence, and pull away when intimacy deepens.
- Fearful-Avoidant (Disorganized): Formed in environments marked by trauma, chaos, or abuse. Adults crave closeness but simultaneously fear the vulnerability required to sustain it.
How Unspoken Family Rules Dictate Adult Conflict
Quick Answer: Children internalize their family’s conflict resolution style—whether explosive, passive-aggressive, or completely avoidant—and unconsciously replicate those patterns in adulthood.
Long before we enter our first romantic relationship, we observe how authority figures handle stress and disagreements. These childhood observations become our subconscious definition of “normal” conflict behavior.
If a child grows up in a home where arguments feature screaming, door-slamming, or silent treatments, they may view intense conflict as the default language of love. Alternatively, growing up in a home where disagreements are swept under the rug leads adults to view any disagreement as a catastrophic threat to the relationship. Re-learning how to navigate disagreements requires unlearning these childhood survival strategies.
The Hidden Impact of Childhood Emotional Neglect
Quick Answer: Childhood emotional neglect occurs when caregivers fail to validate a child’s emotional experiences, leading to adult struggles with emotional regulation and self-worth.
Unlike physical abuse or obvious trauma, emotional neglect is an invisible experience of what didn’t happen. When a child’s sadness, fear, or excitement is met with indifference, minimization, or punishment, the child learns a dangerous lesson: “My feelings do not matter, and expressing them makes me a burden.”
In adult relationships, this manifests as extreme hyper-independence, chronic people-pleasing, or an inability to identify one’s own emotional state. Committing to childhood emotional neglect recovery involves learning how to acknowledge your own feelings, set healthy boundaries, and allow romantic partners to support you during vulnerable moments.
Core Beliefs and Projection in Romantic Partners
Quick Answer: Unresolved childhood wounds create rigid core beliefs that cause adults to project past fears onto their current partners’ neutral behaviors.
Our brains naturally seek patterns. When early life teaches us that people eventually leave, break promises, or become overly controlling, we develop core beliefs about the world. As adults, we frequently project these childhood fears onto our partners.
A partner taking two hours to reply to a text message might be interpreted by a securely attached person as simply being busy at work. To someone carrying an abandonment wound, however, that same delay feels like an impending breakup.
Myth vs. Fact: Unpacking Early Relationship Traumas
- Myth: Your childhood experiences permanently determine how your adult relationships will function.
- Fact: The human brain retains neuroplasticity throughout life. With conscious self-awareness and active effort, adults can develop “earned security.”
- Myth: Identifying childhood wounds means blaming your parents for everything wrong in your life.
- Fact: Exploring childhood origins is about gaining self-understanding and taking personal accountability for your current choices, not assigning endless blame.
Rewiring Your Blueprint: Healing Relationship Conflict Patterns
Quick Answer: Breaking destructive relational cycles requires recognizing personal triggers, practicing emotional self-regulation, and learning transparent communication.
Recognizing that your relationship challenges stem from early life is the first step toward genuine freedom. Healing relationship conflict patterns demands shifting from reactive survival behaviors to intentional, conscious responses.
- Identify Your Triggers: Pay close attention when your emotional reaction seems disproportionate to the current situation. Ask yourself: “How old do I feel right now?”
- Practice Pause and Self-Soothe: When an old defense mechanism kicks in, pause before reacting. Take deep breaths to regulate your nervous system.
- Communicate Your Underlying Need: Instead of attacking or shutting down, express the core feeling to your partner using “I” statements.
Unpacking deeply rooted childhood patterns alone can feel overwhelming, especially when two partners bring conflicting attachment styles to the table. Working with a qualified therapist for marriage counseling in Draper provides a structured, compassionate space to identify shared triggers, build emotional safety, and replace defensive habits with secure connection.
Frequently Asked Questions
Can an avoidant partner become securely attached?
Yes. An avoidant partner can transition toward a secure attachment style by recognizing their coping mechanisms, learning to tolerate emotional closeness, and practicing expressing vulnerabilities in low-stakes environments.
How do I talk to my partner about my childhood triggers?
Choose a calm moment outside of an active argument. Share your triggers by focusing on your internal experience—for example: “When voices are raised during an argument, my nervous system panics because of how arguments felt growing up. It helps me if we keep our tone soft.”
Building Conscious Love Today
Our childhood experiences shape the initial lens through which we view romantic love, but they do not have to dictate our destination. Recognizing how early attachment styles, family conflict models, and emotional neglect influence your adult behavior allows you to pause before reacting automatically. By developing self-awareness, practicing emotional regulation, and seeking professional support when needed, you can rewrite your relational story and build a secure, deeply fulfilling partnership grounded in choice rather than old survival habits.
-

 NEWS1 year ago
Historical Churches in Manila
-

 TOPIC2 months ago
Unveiling AvTub: Your Ultimate Guide to the Best AV Content
-

 TOPIC1 year ago
Symbols of Hope: The 15th Belenismo sa Tarlac
-

 TOPIC1 year ago
RIZAL at 160: a Filipino Feat in Britain
-

 TOPIC1 year ago
“The Journey Beyond Fashion” – Ditta Sandico
-

 TOPIC4 weeks ago
Understanding Fascisterne: Origins and Ideological Roots
-

 TOPIC1 year ago
Simbang Gabi and Kakanin
-

 TOPIC1 year ago
5 Must-Have Products From Adarna House to Nurture Your Roots