
TOPIC
DIY Party Planning Ideas For Birthdays, Showers, And Small Gatherings


DIY party planning in 2026 works best when the host chooses a tight concept, fixes the guest count before buying supplies, builds one reliable food plan, and saves handmade effort for details guests will notice.
For birthdays, baby showers, bridal showers, graduations, game nights, and family dinners, the strongest formula is simple: one theme, one main table, one activity, one photo spot, and one cleanup plan. At-home hosting also has momentum.
The IHA 2026 survey found that 28% of respondents expect to host more at-home gatherings in 2026, while 50% expect to host about the same amount.
Food budgets need care too, because BLS data shows food-at-home prices rose 2.9% in the 12 months ending April 2026.
The 2026 DIY Party Plan: Start Smaller, Not Later
A DIY party should start with a fixed guest count, budget ceiling, and room plan before the host buys anything. That order prevents the usual mistake: buying decorations first, then realizing food, seating, lighting, serving pieces, and cleanup were barely planned.
This is also the right stage to decide whether printed cards belong in the plan. Hosts can use a card generator for menu cards, favor notes, table signs, or simple guest instructions before the décor budget gets scattered.
For a small home gathering, 12 to 24 guests usually gives enough energy without turning the event into a full production. A shower needs space for conversation, gifts, photos, and food. A child’s birthday needs movement, snacks, and a short activity. An adult birthday often works better with one strong food station, relaxed music, and a clear place for guests to settle in.
| Planning choice | Better DIY decision |
| Guest count | Set before décor shopping |
| Budget | Split between food, supplies, activity, and cleanup |
| Theme | Keep it narrow enough to explain in 5 words |
| Food | Pick one main station, not 6 scattered snack areas |
| Décor | Build one visual area for photos |
| Cleanup | Place bins, bags, wipes, and containers out early |
Build The Party Around One Anchor Idea
A good anchor idea is a short phrase that guides food, colors, music, activities, and favors. “Pink baby brunch,” “backyard pizza birthday,” or “movie night dessert bar” gives more direction than a vague plan like “cute shower” or “fun birthday.”
| Occasion | Anchor idea | DIY details that fit |
| Birthday | Backyard pizza night | Dough station, basil pots, name cards, simple cake table |
| Baby shower | Sunday garden brunch | Seed-packet favors, advice cards, citrus water, pastel linens |
| Bridal shower | Champagne and charcuterie | Custom labels, ribboned glasses, handwritten menu cards |
| Small gathering | Board game taco bar | Salsa labels, scorecards, snack bowls, casual seating |
| Family dinner | Memory table supper | Printed photos, shared recipe cards, playlist from one decade |
A strong anchor also controls spending. Without one, the cart fills with unrelated items: plates in one color, napkins in another, random balloons, favors nobody asked for, and disposable décor that gets tossed within hours.
Budget First: Where DIY Saves Money And Where It Wastes Time
DIY saves money when it replaces high-markup personalization, not when it turns the host into a caterer, florist, baker, decorator, and cleaner in one day.
Grocery costs are still relevant for hosts because food-at-home prices increased 2.9% year over year in April 2026, while food away from home rose 3.6%.
A $300 party for 20 guests might start like:
| Category | Suggested share | Example |
| Food and drinks | $150 | Pasta bar, taco bar, brunch board, drinks |
| Décor | $55 | Banner, table cover, paper flowers, candles |
| Activity | $35 | Craft kit, trivia cards, cupcake station |
| Serving and cleanup | $40 | Plates, napkins, cups, trash bags, containers |
| Buffer | $20 | Ice, extra drinks, last-minute item |
Good DIY moves include printable signs, handwritten place cards, ribboned favors, homemade playlists, batch drinks, and one handmade centerpiece. Better buys include helium balloons, large cakes for bigger groups, chairs, specialty linens, and food that must stay hot for hours.
DIY Food Ideas That Feel Planned
A DIY menu should be easy to serve, easy to hold, and safe at room temperature for a limited period.
For buffet safety, the FDA says cold foods should stay at 40 °F or colder, and its 2-hour rule says perishables left at room temperature for more than 2 hours should be discarded. If the temperature is above 90 °F, that safe holding window drops to 1 hour.
Good DIY party menus rely on stations:
- Birthday party: sliders, cupcakes, fruit skewers, popcorn bar, flavored lemonade
- Baby shower: mini quiches, salad cups, tea sandwiches, yogurt parfaits
- Bridal shower: crostini board, mocktail bar, pasta salad, mini desserts
- Small gathering: taco bar, baked potato bar, soup and bread, build-your-own bowls
Avoid fragile food that needs perfect timing. Soufflés, deep frying, plated entrées, and last-minute sauces create pressure. A host should be with guests, not trapped in the kitchen.
Décor: Use Fewer Pieces With Higher Visual Payoff
DIY décor works best when it creates one strong visual area rather than covering every corner. Handmade party details are popular in 2026: Michaels reported that party decoration searches rose 125% year over year, while party banner searches doubled.
Focus on 3 zones:
- Entrance: one sign, one small floral or balloon detail, one clear place for coats or gifts
- Main table: layered cloth, labeled food, candles or flowers, matching serving pieces
- Photo spot: banner, backdrop, chair, props, good lighting
Low-cost décor with real payoff includes paper garlands, framed printed photos, handwritten menus, fabric scraps as runners, thrifted glassware, and one color repeated across napkins, flowers, favors, and drinks.
Activities Should Give Guests Something To Do
The best DIY activities need little instruction and allow guests to join without feeling trapped.
Project-centered gatherings fit 2026 behavior because Craft Night searches are up 103% year over year, Paint Party Kit searches climbed 329%, and guided craft kit sales increased 86%, according to Michaels.
Good options by event:
- Birthday: trivia about the guest of honor, decorate-your-own cupcake, playlist guessing game
- Baby shower: advice cards, baby-name voting, onesie decorating, prediction cards
- Bridal shower: date-night jar, recipe cards, bouquet-building station
- Small gathering: blind snack tasting, mini canvas painting, board game bracket
- Family dinner: memory prompts, old photo guessing game, shared playlist vote
Keep activities optional. Forced games can make a small gathering feel stiff. A simple station on a side table often works better than a scheduled performance.
How Many DIY Details Are Enough?
Two or 3 visible handmade details are enough for most parties. More can work, but only when prep time is realistic.
A strong mix might be:
- One handmade banner
- One food label set
- One guest activity or favor
For a birthday, that could mean a custom “Year in Photos” wall, handwritten cupcake labels, and a trivia card. For a shower, it could mean a welcome sign, advice cards, and seed-packet favors. For a dinner, it could mean printed menus, a playlist card, and a shared dessert station.
Party Timeline For A Low-Stress Host
A simple timeline keeps DIY work from piling up during the final 24 hours.
| Time before party | Main tasks |
| 4 weeks | Choose date, location, guest limit, budget |
| 3 weeks | Send invitations, choose anchor idea, check seating |
| 2 weeks | Plan menu, borrow serving pieces, order special supplies |
| 1 week | Buy shelf-stable goods, print signs, make playlist |
| 2 days | Grocery shop, prep sauces, chill drinks |
| 1 day | Set table, label bins, arrange décor |
| Party day | Finish fresh food, place trash bags, set music, open door |
For showers and milestone birthdays, add a deadline for RSVPs. Food counts, chairs, favors, and drinks become easier when the host stops guessing.
Small Details Guests Actually Remember
Guests usually remember comfort, timing, and personal touches more than perfect matching plates.
Good lighting, enough drinks, clear food labels, a place to sit, and a bathroom with extra hand towels matter more than another balloon pack.
Personal details carry the most weight:
- A playlist tied to the guest of honor
- A printed menu with a family recipe
- A small note at each place setting
- A photo wall from different years
- A favor that guests can eat, plant, or use
NRF’s 2026 Mother’s Day survey gives broader proof of the same impulse: 46% of shoppers said a unique or different gift mattered most, while 39% prioritized creating a special memory.
Party planning follows similar logic, and personalized gifting behavior shows why thoughtful details often beat generic decorations.
Final Takeaway
DIY party planning works when the host edits. Choose a narrow theme, plan food around real serving conditions, make one visual area, add one activity, and leave room for guests to relax.
For birthdays, showers, and small gatherings in 2026, the goal is not a perfect event. The goal is a celebration that feels intentional, manageable, and personal.
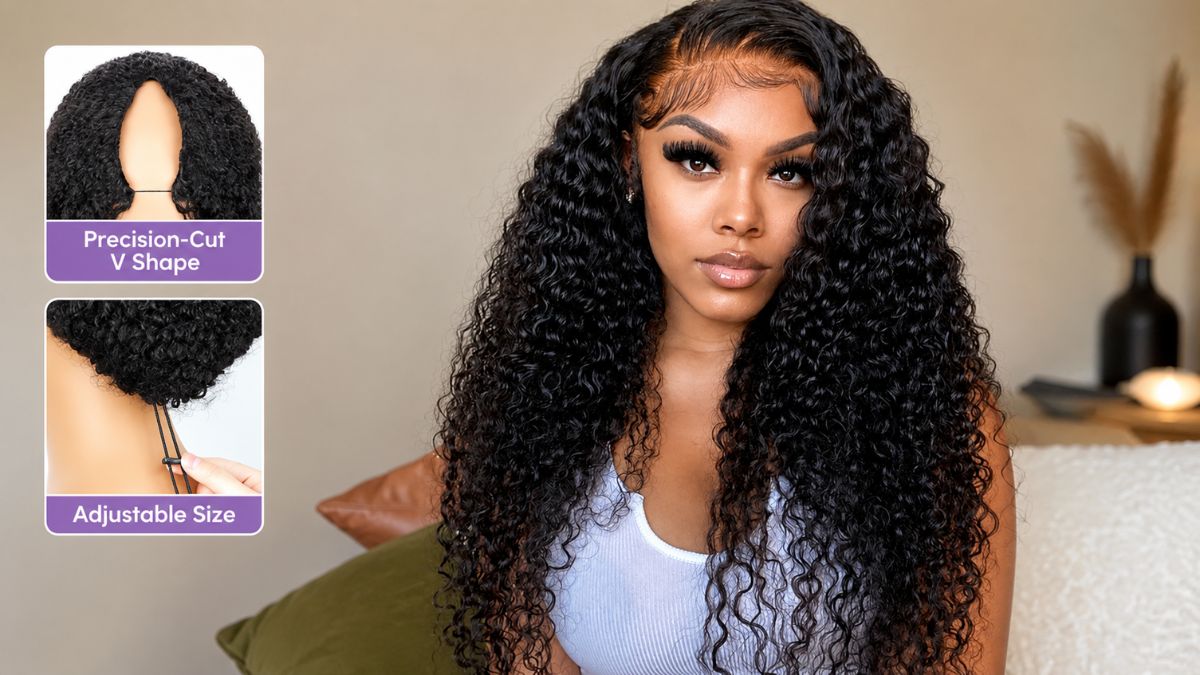
If you’re looking for a wig that offers a natural appearance, easy installation, and everyday comfort, a V part wig is one of the best options available. Unlike traditional lace wigs that often require glue, adhesive, or extensive customization, a V part wig is designed with a V-shaped opening at the top that allows you to blend a small section of your natural hair seamlessly with the wig. This creates a realistic hairline while minimizing styling time.
Whether you’re a first-time wig buyer or an experienced wig wearer, choosing the perfect V part wig requires understanding its features, benefits, hair types, textures, cap construction, and maintenance requirements. This guide covers everything you need to know to make an informed decision.
What Is a V Part Wig?
OQ Hair v part wigs are a type of wig featuring a V-shaped opening near the crown or front of the cap. This opening allows a small amount of your natural hair to be left out and blended with the wig, creating the illusion that the hair is growing directly from your scalp.
Unlike lace front wigs, V part wigs do not require lace cutting, glue, or complicated installation techniques. Most come with adjustable straps and built-in combs or clips that securely hold the wig in place.
The result is a hairstyle that looks natural while being much easier to install and remove.
Why Choose a V Part Wig?
V part wigs have become increasingly popular because they combine convenience with a realistic finish.
Some of their biggest advantages include:
- Natural-looking hairline
- Glue-free installation
- Beginner-friendly design
- Comfortable for all-day wear
- Minimal styling time
- Better airflow than many traditional wigs
- Easy daily removal
- Protective styling option
For many people, a V part wig provides the perfect balance between convenience and beauty.
How Does a V Part Wig Work?
The V-shaped opening exposes a small section of your own hair. After securing the wig, you simply blend your natural hair into the wig using a comb or brush.
Because your own hair creates the visible parting, the overall hairstyle looks much more realistic than many conventional wigs.
Most wearers only need a small leave-out section, making the wig suitable for protective styling while still maintaining a natural appearance.
Human Hair vs. Synthetic V Part Wigs
One of the first decisions you’ll make is choosing between human hair and synthetic hair.
Human Hair V Part Wigs
Human hair wigs offer the most natural appearance and feel.
Benefits include:
- Realistic texture
- Natural movement
- Heat styling compatibility
- Can be dyed or toned
- Longer lifespan with proper care
- Easier blending with natural hair
Although they typically cost more, human hair V part wigs are often considered a worthwhile investment because of their versatility and durability.
Synthetic V Part Wigs
Synthetic wigs are a more affordable alternative.
Advantages include:
- Lower purchase price
- Ready-to-wear styles
- Minimal daily styling
- Lightweight construction
- Easy maintenance
However, synthetic fibers generally have a shorter lifespan and cannot always tolerate heat styling unless specifically labeled as heat-resistant.
Choosing the Right Hair Texture
Selecting the correct texture helps your wig blend naturally with your own hair.
Popular texture options include:
Straight
Perfect for sleek, polished styles and professional looks.
Body Wave
Offers soft, flowing waves that add natural movement and volume.
Loose Wave
Creates relaxed waves suitable for everyday wear.
Deep Wave
Provides fuller curls with noticeable definition.
Curly
Ideal for bold volume and textured hairstyles.
Kinky Straight
Closely resembles natural blown-out textured hair.
Kinky Curly
Excellent for individuals with naturally curly or coily hair who want a seamless blend.
Choosing a texture similar to your natural hair usually produces the most realistic results.
Selecting the Right Hair Length
V part wigs come in various lengths to suit different preferences.
Short (8–12 inches)
- Easy to maintain
- Lightweight
- Great for beginners
- Professional appearance
Medium (14–18 inches)
- Most versatile option
- Suitable for everyday styling
- Easy to manage
Long (20–30 inches)
- Dramatic appearance
- More styling flexibility
- Ideal for glamorous hairstyles
Your lifestyle, styling habits, and maintenance preferences should influence your length selection.
Understanding Hair Density
Hair density determines how thick the wig appears.
Common density levels include:
130% Density
- Natural everyday fullness
- Lightweight
- Beginner-friendly
150% Density
- Most popular option
- Balanced volume
- Natural appearance
180% Density
- Fuller look
- Great for styling
- More glamorous appearance
200%+ Density
- Maximum volume
- Best for dramatic hairstyles
- Slightly heavier
For everyday wear, 150% density provides an excellent balance between realism and fullness.
Choosing the Best Hair Color
Selecting the right color can enhance your overall appearance.
Popular colors include:
- Natural Black
- Off Black
- Dark Brown
- Chocolate Brown
- Auburn
- Honey Blonde
- Ash Blonde
- Burgundy
- Ombre Brown
- Highlighted Shades
Choose a color that complements your skin tone and matches your natural leave-out hair for seamless blending.
Features to Look for in a Quality V Part Wig
Not all V part wigs are created equal.
When shopping, consider these important features:
Adjustable Cap
An adjustable cap provides a secure and comfortable fit for different head sizes.
Secure Combs and Clips
Multiple clips help keep the wig firmly in place throughout the day.
Breathable Cap Construction
Breathable materials improve airflow, making the wig more comfortable during long hours of wear.
High-Quality Hair
Premium hair experiences less tangling and shedding while maintaining a soft, natural appearance.
Minimal Shedding
A well-constructed wig should retain its hair with proper maintenance.
How to Install a V Part Wig
Installing a V part wig is simple.
- Braid or flatten your natural hair.
- Leave out a small V-shaped section.
- Place the wig on your head.
- Secure the clips and adjustable straps.
- Blend your natural hair into the wig.
- Style as desired.
Most users can complete the installation within just a few minutes.
Daily Care Tips
Proper maintenance significantly extends the life of your V part wig.
Some helpful habits include:
- Brush gently from ends to roots.
- Wash every 8–12 wears or when product buildup occurs.
- Use sulfate-free shampoo for human hair wigs.
- Deep condition regularly.
- Allow the wig to air dry whenever possible.
- Store it on a wig stand when not in use.
- Avoid excessive heat styling.
- Use lightweight serums to reduce frizz.
Consistent care keeps the wig soft, shiny, and manageable.
Who Should Buy a V Part Wig?
A V part wig is an excellent choice for:
- Beginners
- Busy professionals
- Students
- People seeking protective hairstyles
- Anyone wanting a natural-looking wig without glue
- Wig wearers who prefer quick installation
- Individuals transitioning from extensions or sew-ins
Its versatility makes it suitable for both everyday wear and special occasions.
Common Mistakes to Avoid
Avoid these common errors when purchasing or wearing a V part wig:
- Buying the wrong cap size
- Choosing a texture that doesn’t match your natural hair
- Leaving out too much natural hair
- Neglecting regular cleaning
- Using excessive heat without protection
- Sleeping in the wig regularly
- Using heavy styling products that cause buildup
Proper care and thoughtful selection will help you enjoy your wig for much longer.
Is a V Part Wig Worth It?
For many people, the answer is yes.
A V part wig offers an excellent combination of convenience, comfort, realism, and versatility. It allows wearers to achieve a natural hairstyle without the complexity associated with lace wigs or permanent hair extensions. Whether you choose a sleek straight style, soft body waves, or defined curls, a well-made V part wig can easily become a staple in your beauty routine.
Final Thoughts
Finding the perfect V part wig begins with understanding your personal needs, hair type, preferred style, and lifestyle. Consider factors such as hair material, texture, density, length, cap construction, and color before making your purchase. Investing in a high-quality V part wig and following a consistent care routine will help you enjoy a beautiful, natural-looking hairstyle for months to come.
Whether you’re searching for an easy everyday hairstyle, a protective styling solution, or a realistic alternative to traditional wigs, a v part wig and half wigs delivers exceptional comfort, effortless installation, and timeless style. With the right choice, you’ll enjoy the confidence of a seamless blend and a polished look that’s ready for any occasion.

Your elders need your time, affection, and care in every aspect of your life. They are unable to do many tasks on their own, so they need help from others as they age. At your home, you have seen that when your parents get older, they need to rely on you for care, just as you relied on them when you were a child.
If your parents are going to get older and you’ve determined your parents are no longer able to care for themselves, you are in the right place. Here are some tips that will help you take care of your older adults at home:
1. Find Out Your Parents’ Wishes
When you care for your parents, you should find out their wishes as well. Ask what they want and what they like, and involve them in their care decisions. Before making any arrangements, it’s important to ask them if they’re comfortable with it or want something different.
Whether you’re going to send them to an old house or take care of them at home, asking about their wishes is essential. If your parents are open to receiving support and depend on your decision, proceed to the next step.
2. Seek Professional Help
If you are a busy person and can’t care for your elders at home, you should seek help from professionals. One option is to ask a family member or friend who may be willing to offer support. But if they are not willing and your parents have a chronic disease, you should seek help from professionals.
They are experienced persons who can provide personalized senior care. This personalized care will help your parents receive the care they deserve. You will also have peace of mind that your elders are in safe hands and getting the care they need.
3. Understand your Parents’ Financial Position
When aging parents need help with financing, you should be ready to help. Talk to them and ask about their financial situation. Some seniors may have enough financing to fulfill their needs, while others don’t. So it’s up to you to ask about their needs and pay them monthly so they can easily survive. Having money for their necessities will help with their overall well-being.
If your parents can’t afford elder care, you don’t need to worry; fortunately, there are many programs that can help seniors pay for the care they need.
4. Assess your Parents’ Needs
Every person has different needs, such as eating, traveling, and doing laundry. When your parents get older, they may be unable to perform tasks easily and may need others’ help. Assess how much support your parents need to remain safe and healthy.
Do they need help with laundry? Do they need your help in meal preparation or other household tasks? Do they need help with grooming or personal care activities? Do they have difficulty managing their chronic health conditions? Consider all these things, support them, and make life easier for them.
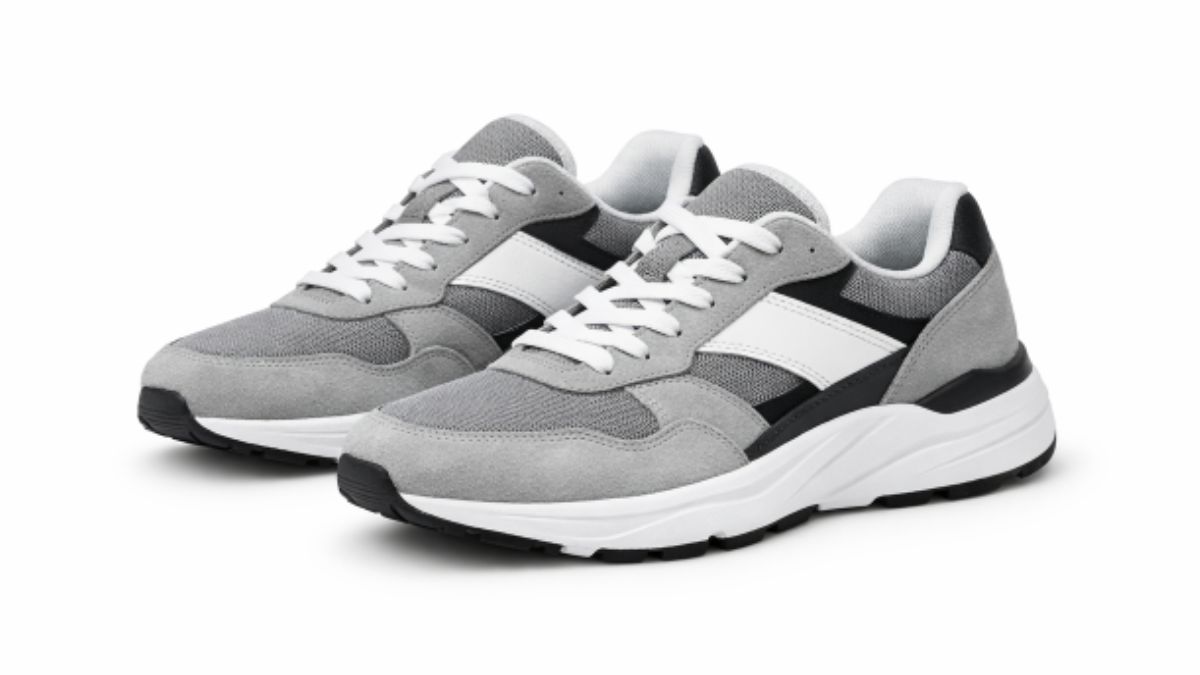
Removing backgrounds from photos can elevate your images, making them more versatile and professional for a wide range of uses. Whether you are creating visual content for e-commerce, social media, or a personal project, having the ability to isolate your subject with a background remover gives you control over the final look and impact of your images. This technique helps concentrate attention on the subject and provides opportunities for creative backgrounds and design elements.
Mastering background removal is especially valuable for product photography, portraits, and marketing materials. Clean cutouts eliminate distractions while allowing you to create a cohesive branding style that makes your content stand out. Digital content creation is becoming increasingly competitive, making attention to detail, such as background removal, more important than ever before.
With an array of intuitive tools and software available, you do not need to be a design expert to achieve professional results. Selecting the best background remover tool for your needs can save time and improve the quality of your photos, whether you are preparing product shots for an online store or enhancing personal photos for creative projects.
If you are interested in exploring background removal in more detail, this guide walks you through essential techniques, recommended tools, and common mistakes to avoid.
Why Remove Backgrounds?
Background removal streamlines photos by placing the emphasis squarely on the subject, whether it is a person, product, or object. This is vital for online sales, as images without distracting elements are proven to convert better according to Shopify’s product photography tips. For social media, images with clean backgrounds can improve engagement and enhance brand storytelling.
Design flexibility is another advantage. By removing the original background, you can overlay your subject onto new scenes, vibrant designs, or brand colors, creating a final image suitable for advertisements, catalogs, presentations, and more. This versatility is why modern content creators, marketers, and photographers rely on background removal for high-quality results.
Tools for Background Removal
The market offers several options for removing backgrounds, each with unique strengths:
- Adobe Photoshop: Advanced software ideal for precise edits through manual selection tools like the Magic Wand or Pen Tool. Requires a subscription and is best suited for experienced users.
- Canva: Provides a user-friendly background remover, perfect for quick edits and creating composite layouts without a steep learning curve.
- Remove.bg: AI-driven online tool that automatically detects and removes backgrounds in seconds, even from detailed areas like hair or fur.
- GIMP: Free and open-source, offering many Photoshop-style features for those seeking robust editing capabilities without the cost.
For beginner or occasional users, web-based tools like Remove.bg and Canva are great starting points. For detailed, professional work on projects that demand high precision, Photoshop or GIMP is a better choice. Refer to this detailed guide for a comprehensive comparison of common background removal methods.
Step-by-Step Guide to Background Removal
The process of removing a background may vary by tool, but there are common steps that apply universally:
- Choose the Right Tool: Assess your project needs and pick the software or online tool that best suits your level of expertise and the complexity of your images.
- Upload Your Image: Open your image file in the selected application or upload it to an online platform.
- Select the Background: Use selection features such as the Magic Wand, Quick Selection, or Lasso Tool to define the background area you wish to remove.
- Remove the Background: Delete or hide the selected background section by applying a mask or directly erasing it.
- Refine the Edges: Enhance the contours of your subject using feathering, smoothing, or refining edge tools to ensure the cutout looks natural.
- Save the Image: Export your finished image in a format that supports transparent backgrounds, such as PNG, to maintain image integrity for future use.
Tips for Precise Background Removal
- Use High-Quality Images: Start with high-resolution photos, which make it easier to distinguish the subject from the background and yield better final results.
- Pay Attention to Edges: Zoom in on detailed areas like hair, fur, or intricate jewelry to make careful adjustments. Crisp edges ensure the subject looks natural against any new background.
- Use Layer Masks: When possible, use layer masks to hide the background rather than permanently delete it, enabling non-destructive edits and easy revisions.
- Adjust Tolerance Levels: When using selection tools, tweak tolerance settings to prevent parts of the subject from being unintentionally removed along with the background.
Professional editors recommend frequent previews of your work at different zoom levels to spot areas that need further refinement, as discussed in Creative Bloq’s image editing tutorial.
Common Mistakes to Avoid
- Over-Editing: Excessive retouching or blurring can give the subject an unnatural, artificial appearance. Stick to minimal corrections where possible.
- Ignoring Shadows: Removing a shadow can flatten an image, making it appear unrealistic. Where appropriate, retain natural shadows or recreate them after background removal to add depth to your composition.
- Low-Quality Outputs: Saving the image in a low-resolution format can result in pixelation and loss of detail. Always ensure your final file maintains the quality needed for its intended use.
Conclusion
Becoming adept at background removal adds immense value to your photography and content creation skills. By understanding the importance of focusing on the subject, using the right tools, and following best practices, you can achieve clear, engaging, and professional visuals suitable for both personal and commercial projects. Regular practice, attention to detail, and learning from industry resources will ensure your work continues to improve and stand out in any competitive environment.
-

 NEWS12 months ago
Historical Churches in Manila
-

 TOPIC12 months ago
Symbols of Hope: The 15th Belenismo sa Tarlac
-

 TOPIC12 months ago
RIZAL at 160: a Filipino Feat in Britain
-

 TOPIC12 months ago
“The Journey Beyond Fashion” – Ditta Sandico
-

 TOPIC1 week ago
Unveiling AvTub: Your Ultimate Guide to the Best AV Content
-

 TOPIC12 months ago
5 Must-Have Products From Adarna House to Nurture Your Roots
-

 TOPIC12 months ago
Filipino, alternative language course at Moscow State University
-

 TOPIC12 months ago
“Recuerdos de Filipinas – Felix Laureano”