
TOPIC
Creative Ways to Hide 20 Plus Pairs of Shoes in a Small Hallway

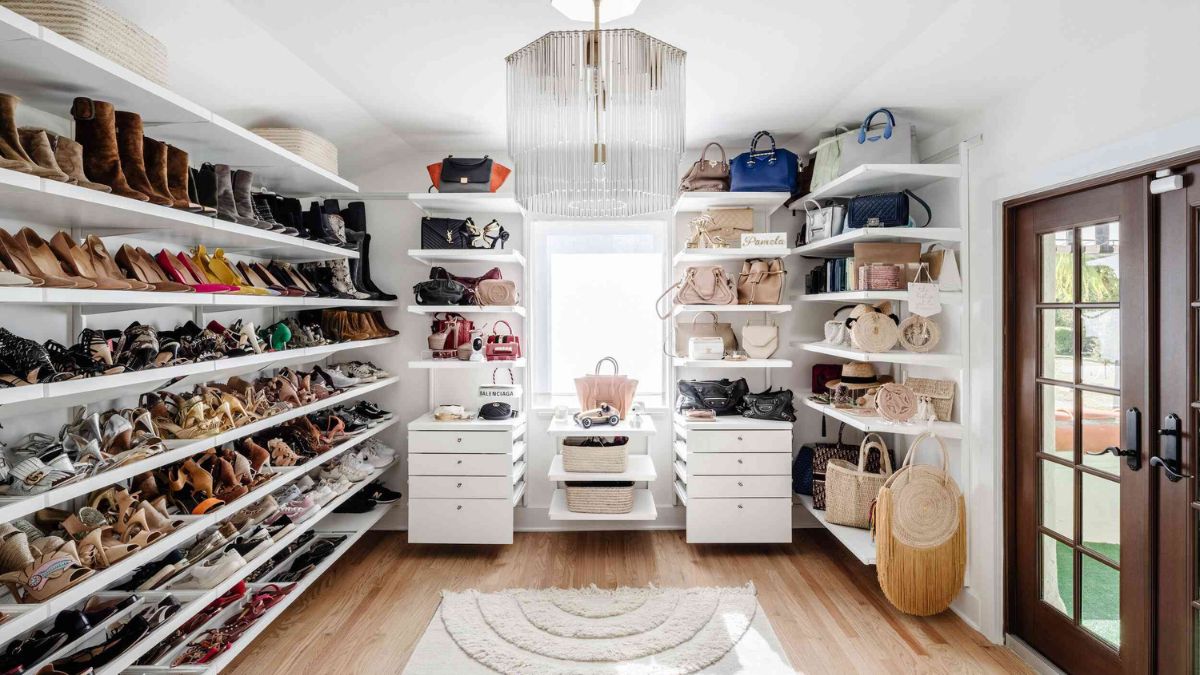
A small hallway can quickly become cluttered when shoes pile up by the door. With more than 20 pairs to store the challenge feels even bigger especially when you want the space to look stylish welcoming and organised. The good news is that with smart planning clever furniture choices and creative thinking you can hide a large shoe collection without sacrificing aesthetics or walking space. This in depth guide explores practical and design focused solutions to help you maximise every inch of your hallway while keeping shoes completely out of sight.
Understanding the Challenges of Small Hallway Storage
Hallways are often narrow and awkwardly shaped with doors stairs and walkways competing for space. Unlike other rooms they rarely have built in storage and yet they need to handle daily traffic coats bags keys and shoes. Storing over 20 pairs of shoes in such a limited area requires solutions that are slim vertical and multifunctional.
The key is to avoid floor clutter. Shoes left out in the open make a hallway feel smaller and messier than it really is. Hidden storage keeps the area calm and visually spacious while protecting shoes from dust damage and everyday wear.
Go Vertical to Maximise Storage Without Losing Floor Space
When floor space is limited the walls become your best asset. Vertical storage draws the eye upward and frees up the walkway making the hallway feel more open.
Tall slim cabinets are ideal for small hallways. These units can store dozens of pairs while taking up very little width. Many modern designs include adjustable shelves allowing you to mix trainers heels boots and flats in one compact unit.
Floor to ceiling cabinetry works especially well in narrow corridors. When finished in light colours or glossy surfaces these tall units blend into the wall and reduce visual bulk. This approach allows you to hide over 20 pairs of shoes in one clean uninterrupted structure.
Slim Depth Cabinets That Fit Even the Narrowest Hallways
One of the most effective ways to hide shoes is by choosing storage with reduced depth. Traditional cupboards can be too bulky but slim depth cabinets are specifically designed for tight spaces.
These cabinets often store shoes at an angle or sideways which reduces how far they protrude into the hallway. Despite their compact size they can hold an impressive number of pairs making them perfect for families or shoe lovers.
This is where modern shoe storage cabinets truly shine. They combine sleek design with space saving engineering making them a practical and stylish solution for small hallways.
Use Multi Functional Furniture for Double Duty Storage
In a small hallway every piece of furniture should work hard. Multi functional designs allow you to hide shoes while serving another purpose at the same time.
Storage benches are a popular choice. They provide a comfortable place to sit while putting shoes on and off while concealing rows of footwear inside. Lift up lids pull out drawers or flip down compartments all keep shoes hidden from view.
Console tables with built in cupboards are another smart option. From the outside they look like a decorative hallway table but inside they can store multiple pairs of shoes along with accessories like umbrellas and bags.
Hidden Shoe Storage Behind Doors and Panels
Sometimes the best storage solutions are the ones you do not see at all. Hidden storage uses existing architectural features to conceal shoes completely.
Behind door shoe racks are excellent for small households. They utilise space that would otherwise be wasted and can hold a surprising number of pairs. This works particularly well for frequently worn shoes.
Another clever idea is to install push to open panels along one wall of the hallway. These panels look like part of the wall but open to reveal shallow shelving behind them. This technique is perfect for minimalist interiors where visible furniture is kept to a minimum.
Built In Solutions for a Seamless Look
If you are renovating or redesigning your hallway built in storage offers the most seamless result. Custom cabinetry can be designed to fit exact dimensions and awkward corners ensuring no space is wasted.
Built in shoe cupboards under stairs are a classic example. This often unused space can accommodate dozens of pairs while remaining completely hidden behind flush doors.
When designed well built in units make the hallway feel larger and more organised. With handleless doors and neutral finishes the storage blends effortlessly into the surroundings.
Clever Use of Corners and Awkward Spaces
Small hallways often have corners or recessed areas that are overlooked. These spaces are perfect for custom or corner shoe cabinets.
Corner units use triangular shelving or rotating mechanisms to store shoes efficiently. They allow you to make use of space that would otherwise remain empty.
Recessed wall niches can also be converted into shoe storage with shallow shelving and discreet doors. This approach keeps the storage within the wall depth and maintains a clear walkway.
Organising Shoes Inside Cabinets for Maximum Capacity
Choosing the right storage is only half the solution. How you organise shoes inside the cabinet has a huge impact on how many pairs you can actually fit.
Stackable shoe racks inside cupboards help double the capacity of each shelf. Adjustable shelves allow you to customise spacing for different types of footwear.
Storing shoes toe to heel rather than side by side can also save space. Clear organisation means you can comfortably hide more than 20 pairs without the cabinet feeling overcrowded.
Using Mirrored and Gloss Finishes to Reduce Visual Clutter
Visual tricks can make a small hallway feel bigger even when it contains a lot of storage. Mirrored cabinet fronts reflect light and create the illusion of depth.
High gloss finishes bounce light around the space making it feel brighter and more open. These finishes also help cabinets blend into modern interiors rather than looking heavy or bulky.
Many modern shoe storage cabinets come with these finishes making them ideal for compact hallways where both function and appearance matter.
Seasonal Rotation to Keep Storage Manageable
If you own more than 20 pairs of shoes chances are you do not wear them all year round. Seasonal rotation is a simple strategy that makes hallway storage more manageable.
Keep everyday and seasonal shoes in the hallway cabinet and store off season footwear elsewhere such as under beds or in wardrobes. This reduces congestion and keeps the hallway cabinet easy to use.
By rotating shoes you ensure that the hallway storage remains neat even with a large overall collection.
Maintaining a Clean and Clutter Free Hallway
Hiding shoes is not just about storage furniture. It is also about daily habits. Encouraging everyone in the household to put shoes away immediately keeps the hallway looking tidy.
Using labelled sections inside cabinets helps each person know where their shoes belong. This reduces mess and makes it easier to maintain order long term.
A well organised hallway sets the tone for the entire home creating a calm and welcoming first impression.
Final Thoughts on Stylish Shoe Storage Solutions
Storing more than 20 pairs of shoes in a small hallway may seem challenging but with the right approach it is entirely achievable. By using vertical space slim depth units multi functional furniture and clever hidden storage you can keep your hallway organised without compromising style or comfort.
Whether you prefer built in solutions or freestanding designs choosing quality storage makes all the difference. For a wide range of stylish and practical options consider buying shoe storage cabinets from Furniture in Fashion to transform your hallway into a clutter free and elegant space.

Businesses often need labels that do more than display a product name. They may need to include barcodes, prices, inventory codes, dates, product information, or other changing data. Custom thermal labels provide a flexible way to produce this information for different products and operational requirements. Because thermal printing can create text, numbers, graphics, and machine-readable codes without conventional ink cartridges, it has become a practical option for businesses that need fast and repeatable labeling.
From small online stores to large warehouses and manufacturing facilities, customized thermal labeling can support many stages of daily operations.
Why Standard Labels Do Not Always Fit
Every business handles products differently.
A retailer may need small labels for individual items, while a warehouse may require larger labels for cartons or storage locations. A manufacturer might need labels containing batch information, while an online seller may primarily need barcode and inventory identification.
Using one standard format for every application can create unnecessary limitations.
Custom labels allow businesses to select dimensions, materials, adhesives, colors, and other specifications based on how and where the label will be used.
This flexibility is particularly useful when products have different shapes or when available labeling space is limited.
Thermal Printing in Everyday Operations
Thermal printing works by using heat to create an image on specially designed label material. Depending on the printing technology and label type, businesses can produce information quickly and consistently.
The process is well suited to environments where employees need to print labels throughout the day.
A warehouse worker can generate a product label after receiving inventory. A retailer can print price information when products enter the store. An e-commerce business can create identification labels as orders are prepared.
The ability to produce labels on demand makes thermal printing useful for dynamic business environments.
Where Custom Thermal Labels Can Be Used
The applications are broad because businesses can customize the label according to the information and surface involved.
Inventory Management
Inventory labels can identify products, cartons, bins, shelves, and storage locations. Adding barcodes can allow employees to connect physical items with digital inventory systems.
Retail
Retail businesses can use thermal labels for prices, product identification, internal stock management, and other store operations.
Warehousing
Warehouses can label racks, containers, pallets, cartons, and individual products. Consistent identification can help employees locate inventory and organize storage areas.
Manufacturing
Manufacturers may use labels for production identification, work-in-progress items, components, batches, or finished products.
E-Commerce
Online retailers can create labels during the fulfillment process, allowing information to be generated according to individual orders and inventory requirements.
Choosing the Right Material
Customization is not limited to the printed design. The physical material can also be selected according to the application.
Paper labels can be suitable for many indoor applications where exposure to moisture and abrasion is limited.
Synthetic materials can offer additional resistance in environments where labels may encounter humidity, friction, or other demanding conditions.
The correct choice depends on the product, surface, environment, and expected lifespan of the label.
For example, a label placed on a warehouse shelf may have very different requirements from one attached to a product that will be exposed to outdoor conditions.
Adhesive Selection Matters
A label’s adhesive determines how effectively it remains attached to the intended surface.
Different packaging materials can present different adhesion challenges. Cardboard, plastic, glass, metal, and coated surfaces may require different adhesive characteristics.
Temperature can also matter. Labels used in refrigerated environments may need adhesive properties suited to cold conditions.
Before ordering large quantities, businesses can test sample labels on the actual surfaces they plan to use. This provides a practical way to identify peeling, lifting, or other adhesion issues.
Making Room for Variable Information
One of the advantages of thermal printing is its ability to produce changing information as needed.
Businesses may need to print:
- Serial numbers
- Product codes
- Batch numbers
- Dates
- Prices
- Barcodes
- QR codes
- Inventory identifiers
This makes thermal labeling especially useful when every item or production batch contains different information.
Instead of maintaining large inventories of pre-printed labels for every variation, companies can keep suitable blank label stock and print the required information when needed.
Supporting Barcode-Based Systems
Modern businesses increasingly rely on barcode scanning for inventory and operational management.
A barcode can connect a physical product with information stored in software. When an employee scans it, the system may retrieve details such as product descriptions, quantities, locations, or order information.
For this system to work effectively, the barcode must be printed clearly.
Label material, printer settings, and maintenance can all influence print quality. Businesses should test their labels and scanners together to ensure reliable performance.
Combining Function and Branding
Thermal labels are not limited to basic black text.
Depending on the printing method and application, businesses can incorporate visual elements that support their brand identity. Product names, logos, color elements, or other graphics can help create a more recognizable presentation.
For operational labels, functionality may be the main priority. For consumer-facing products, appearance may play a larger role.
The right design balances information density with readability. Trying to place too much information into a small area can make the label difficult to read.
Designing Labels for Different Surfaces
The shape and dimensions of the product should influence label design.
A flat cardboard box provides a large, straightforward surface. A small bottle or curved container presents a different challenge. Labels may need to wrap around a container or fit into a narrow area.
Custom dimensions can help businesses make better use of the available surface.
Designers should also consider where the label will be placed. Important information should not be positioned over seams, corners, closures, or areas likely to experience excessive friction.
Reducing Label Waste
Customization can also help businesses use materials more efficiently.
A label that is significantly larger than necessary may waste material and occupy valuable packaging space. Conversely, an undersized label may require additional labels to display all required information.
Finding the appropriate dimensions can help balance information requirements and material consumption.
Businesses can review their existing labels and determine whether the current size is genuinely necessary for each application.
Testing Before Full Production
A sample is valuable when developing a new labeling system.
Businesses can print test information and apply the label to the actual product or packaging. They can then examine readability, adhesion, durability, barcode scanning, and overall appearance.
Testing can also reveal whether the label size works with existing printers and applicators.
This step is particularly useful for businesses introducing a new product or changing packaging materials.
Working With an Experienced Label Supplier
A label supplier should be able to discuss more than just printing.
Businesses may need help selecting suitable materials, adhesives, dimensions, and production specifications. A manufacturer with customization capabilities can adjust products to fit different applications.
When evaluating a supplier, businesses can consider product range, material options, printing capabilities, quality control, production capacity, and sample availability.
Clear communication is especially important when labels contain variable data or need to work with specific printers and scanning systems.
Looking Ahead
As businesses become more automated, labeling will continue to play an important role in connecting physical products with digital information.
Barcode systems, inventory software, warehouse automation, and order-management platforms all depend on accurate identification. Thermal printing provides a convenient way to produce that identification as products move through different stages of a business.
For companies with changing product lines or diverse operational requirements, customization can provide greater flexibility than relying entirely on fixed, pre-printed formats.
Conclusion
Labels are an important link between physical products and the information businesses use to manage them. Choosing suitable materials, adhesives, dimensions, and printing specifications can help companies build labeling systems that work reliably in real-world conditions.
For inventory, retail, manufacturing, warehousing, and e-commerce applications, custom thermal labels can provide a practical way to combine variable information with efficient on-demand printing.
The best labeling approach depends on the specific application. By testing materials, considering the operating environment, and working with a capable manufacturer, businesses can develop label solutions that support organization, identification, and efficient day-to-day operations.


Vacations should offer a refreshing escape without causing unnecessary harm to nature. Standard travel practices often create excess waste and consume too much power. Choosing green rentals changes that balance completely. You secure a cozy spot to rest and keep your personal impact low.
Many travelers seek clean accommodations that align with their personal values. Modern eco-friendly rentals provide comfortable rooms, smart technology, and peaceful surroundings. Staying in eco-conscious properties helps protect local communities and regional resources.
Smart Accommodations Near Popular Spots
Travelers heading to lively college towns in Alabama want calm settings near urban attractions. When booking weekend stays in Tuscaloosa, choosing The Cottages at Lake Tamaha keeps your footprint low with modern comfort. You can enjoy your trip knowing your stay supports sustainable habits.
Green stay choices combine thoughtful design with eco-friendly management. Solar panels, low-flow plumbing, and smart heat controls reduce daily resource waste. Guests get great perks without feeling guilty about energy consumption.
Green properties often sit near scenic parks and outdoor biking trails. Staying close to nature makes daily walks convenient and refreshing. You get fresh air and peaceful views right outside your front door.
Financial Savings for Mindful Travelers
Going green on vacation does not mean paying premium prices. Choosing sustainable accommodation costs an average of $151 less per night, making green stays 39% cheaper than standard choices. Lower utility bills allow owners to offer competitive nightly rates.
Houses built with energy-smart design pass those savings directly to guests. You get full kitchens, cozy living rooms, and clean air for less money. Spending less on room rates leaves more funds for dining and fun.
Lower rates mean you can extend your vacation by a few extra days. Extended trips become much more affordable when your room costs stay low.
High Demand for Green Travel Options
Modern guests think about the planet when they pick a place to sleep. About 62% of travelers plan to stay in a green spot at least once next year. This shift pushes owners to update their places.
When guests ask for green features, whole towns win. Local areas see less trash and cleaner water. Your choice helps build strong conservation habits in the region.
Green rentals often help local farmers and craft makers. Hosts buy local soaps, coffee, and handmade items for guest rooms. Your booking helps small local businesses grow and thrive.
Modern Upgrades and Clean Energy Systems
Rental owners lead the industry by adopting smart energy tools. Interest in sustainable heat sources remains strong, with 82% of survey respondents budgeting for heat pumps or similar low-carbon technologies. These upgrades keep rentals quiet and energy-smart year-round.
Modern heat pumps maintain steady room temperatures with minimal electric power. Quality insulation keeps cold drafts out on chilly winter nights. Guests get top comfort along with lower power consumption.
Clean power systems keep indoor air fresh and free of dust particles. You wake up feeling rested and ready for daily adventures. Healthy indoor spaces make your vacation far more relaxing.
Start Planning Your Next Trip Today
Green holiday rentals offer better prices, great comfort, and peace of mind. Every trip gives you a chance to make responsible travel choices. Plan your next getaway by selecting a stay that protects the planet. Explore green rentals today and plan a getaway that feels truly rewarding.

Heavy machinery represents a significant financial investment for contractors, agricultural workers, and industrial operators. Leaving tractors, excavators, loaders, and attachments exposed to harsh environmental elements causes accelerated wear, rusted components, and electrical issues. A custom metal shelter offers a durable and cost-effective structural solution to shield heavy machinery from weather damage while maintaining operational security.
Essential Features for Machinery Enclosures
To protect valuable industrial machinery, an enclosure must handle substantial weight, clear vertical obstacles, and endure severe weather conditions. Customization options ensure the building accommodates the specific dimensions and practical requirements of your fleet.
Structural Load Capacity and Frame Strength
Heavy machinery shelters require high-tensile steel framing to maintain structural integrity over large open spans. Standard light-duty frames often fail to deliver the clearance or roof load ratings needed during extreme wind or rain events. Heavy-gauge galvanized steel tubing provides reliable resistance against bending, twisting, and corrosion. Incorporating reinforced wall framing and solid anchor systems into the foundation guarantees that the building remains stable during severe storms.
Overhead Clearance and Access Door Dimensions
Standard garage doors are rarely sufficient for industrial equipment. Hydraulic arms, cabs, and exhaust stacks require extended vertical clearance. When planning a custom metal shelter, measure the peak height of the largest machinery and add at least two to three feet of safety cushion. Sliding barn doors, roll-up metal doors, or open-span bay designs allow machinery to enter and exit without risking contact with structural beams or door headers.
Floor and Foundation Requirements
The foundation beneath a metal shelter must support continuous heavy axle loads. Pouring a reinforced concrete slab with vapor barriers prevents sinking, cracking, and ground moisture migration. Ensure the concrete mix is rated for industrial load limits and treated with a sealant to resist hydraulic fluids, oil spills, and chemical exposure from parked machinery.
Environmental and Moisture Management Strategies
Condensation and humidity inside an enclosed structure can damage sensitive electronic control units, cause rust on raw steel parts, and lead to dry rot in hydraulic hoses. Proper environmental controls inside the shelter protect both the structure and the machinery stored within it.
Insulation to Control Thermal Spikes
Metal panels conduct heat rapidly, causing significant temperature fluctuations between day and night. These sudden temperature swings cause air moisture to condense on the underside of roof sheets, dripping directly onto stored equipment. Installing reflective bubble insulation or rigid foam panels stops thermal transfer, balances indoor temperatures, and prevents internal condensation cycles.
Ventilation Systems for Exhaust and Humidity
Operating heavy engines inside a shelter creates concentrated carbon monoxide and diesel fumes. Furthermore, wet equipment brought indoors releases humidity into the air. Incorporating continuous ridge vents, wall louvers, or commercial exhaust fans maintains steady airflow. Good ventilation clears toxic fumes quickly during equipment staging and accelerates drying times for damp machinery.
Protecting Equipment from Physical and Operational Hazards
Storing machinery involves more than dropping a roof over it. Organising the internal floor plan and establishing safety protocols reduces accidental collision risks and keeps maintenance tasks organized.
Fire Safety and Chemical Containment
Heavy equipment contains combustible diesel fuel, hydraulic oil, and battery systems. Custom metal shelters provide a non-combustible frame, significantly reducing overall fire risks compared to wood structures. Keep dedicated fire extinguishers mounted near all entrance doors. Additionally, install spill containment kits and secondary drip pans beneath primary parking spots to trap fluid leaks before they degrade the floor.
Anti-Theft Measures and Site Perimeter Security
Industrial machinery is a high-value target for theft and vandalism. Fully enclosing a metal shelter with steel side walls provides a secure physical barrier. Install heavy-duty locking mechanisms on main doors, integrate exterior security lighting, and install motion-sensor security cameras around the building perimeter to deter unauthorized access.
Optimizing Interior Layout for Operational Efficiency
A well-designed layout prevents internal traffic accidents, allows fast equipment deployment, and provides enough room for routine maintenance tasks.
Staging and Traffic Flow Design
Avoid parking machines so close together that accessing one requires moving three others. Design the layout with designated drive-through bays if lot space permits. Clear floor marking tape or industrial paint lines establish safe walking zones, parking positions, and clearance boundaries around moving components like backhoe booms or crane arms.
Integrated Maintenance and Storage Zones
A custom shelter can serve as a full-service field shop. Allocate space along the side walls for heavy-duty steel shelving, tool chests, spare parts inventory, and fluid storage racks. Ensure that work areas have adequate LED lighting and accessible power drops so mechanics can perform oil changes, track tensioning, and routine repairs comfortably out of the elements.
Investing in Long-Term Machinery Protection
Selecting an engineered metal enclosure guarantees long-term durability and low upkeep costs. Steel structures resist pest infestations, rot, and flame propagation, keeping maintenance needs minimal compared to traditional building materials. Businesses searching for dependable asset storage can explore portable metal buildings for sale in Lake Charles, LA, to review available sizing, custom layout configurations, and structural options tailored to industrial equipment demands.
Investing in a tailored metal shelter protects equipment utility, reduces unexpected repair expenses, and preserves maximum resale value over the operating life of your machinery. Proper planning regarding clearance, ventilation, security, and concrete foundation specs turns a basic storage shelter into an efficient central hub for fleet management.
-

 NEWS1 year ago
Historical Churches in Manila
-

 TOPIC2 months ago
Unveiling AvTub: Your Ultimate Guide to the Best AV Content
-

 TOPIC1 year ago
Symbols of Hope: The 15th Belenismo sa Tarlac
-

 TOPIC1 year ago
RIZAL at 160: a Filipino Feat in Britain
-

 TOPIC1 year ago
“The Journey Beyond Fashion” – Ditta Sandico
-

 TOPIC1 month ago
Understanding Fascisterne: Origins and Ideological Roots
-

 TOPIC1 year ago
Simbang Gabi and Kakanin
-

 NEWS4 months ago
What Caused Delta Flight DL275 to Diverted LAX? A Detailed Breakdown