
TECHNOLOGY
Hard Drive Recovery: How to Recover Data from SSD After Deletion

SSD Data Recovery Guide: DIY Software Steps or Call a Pro?
Losing files on an SSD feels different to losing them on an old mechanical drive, and the panic is often justified. Modern solid-state drives run a background process called TRIM that cleans out deleted data much faster than traditional hard drives ever did. That one difference is why timing matters so much when you’re doing hard drive recovery on solid-state storage.
This guide outlines the exact steps for SSD data recovery and explains when software is most effective. It also tells you precisely when a professional lab is your only remaining choice. Whether you have accidentally deleted a file or folder, or your drive suddenly stopped showing files, knowing what to do is half the battle. Learning how to deal with recovery data harddisk situations properly can save your photos, documents, and your peace of mind.
Critical First Step: Stop Using Your SSD Immediately
Stop writing new data to the affected SSD immediately, first of all, even for a moment. Every time you save a file, open a program or update a background process, you run the risk of overwriting the sectors that contain your lost data. That urgency stems from TRIM, a command your operating system sends to the SSD when you delete something. TRIM tells the drive which blocks are free, and the drive often proactively erases them instead of waiting. If TRIM has already run on those sectors, recovery is much more difficult, sometimes impossible.
So the first real move in any serious attempt to recover data from hard drive storage built on flash memory is simple. As soon as you realize that files are missing, you should avoid these things:
- Don’t install anything new. Every installer writes new data which might be written to the sectors you need.
- Don’t run disk cleanup or defrag tools. These actively invoke TRIM on the remaining free space.
- Don’t keep browsing or downloading. Cached files and temporary data quietly consume free space in the background.
- Do unplug the drive if possible. Cutting the power will stop any pending TRIM commands from completing their task.
- Do think before you click. Now take a few careful minutes to protect your chances for full recovery later.
When to Use Software: DIY Recovery with 4DDiG
If you catch the deletion quickly and TRIM has not yet run to completion, thanks to software, you have a good chance of recovery. Tools like 4DDiG scan the raw sectors of your SSD, looking for file fragments that are no longer listed by the operating system. This method is best for accidental deletion, fast formatting, or files lost after a partition error, but not for physical damage.
There are a few clear reasons why software-based hard drive recovery makes good sense as a first step for most people:
- It’s non-invasive. No part of the process opens or physically alters your drive.
- It’s affordable. You don’t have to pay lab fees at all if there is no hardware damage.
- It’s fast. Results are often available within an hour, rather than the days required for lab evaluation.
- It’s accessible—no need to ship your drive anywhere or wait for a shop’s schedule.
Most casual users should try a reputable recovery program first before paying for a professional lab. I would imagine many deletion cases are resolved successfully at this early stage with no physical intervention or costly diagnostic fees. Software is the logical first step for almost any SSD deletion case you’re likely to face, thanks to speed and accessibility.
Step-by-Step Software Recovery Process
Good news: you don’t need a lot of technical skill to recover files yourself, just a lot of attention to detail at each step of the process. Here’s the practical workflow most recovery programs follow, including 4DDiG Windows Data Recovery, a tool built specifically for these situations.
Step 1: Prepare for Recovery.
Proper preparation before scanning can save time and protect the files you want to recover. First, run through this quick checklist:
- Install to a different drive. If you install the software on the affected SSD, you risk overwriting the files you want to recover.
- Close background apps. Fewer running programs, less new writes hitting the affected drive.
- Prepare a save location. Have a second drive or USB stick ready for the files you will recover.
- Note the deletion timing. Knowing roughly when files went missing tells you how deep your scan should go.
If you deleted files a few minutes ago, a quick scan may be enough to recover all you need.
Step 2: Select Your SSD
Launch the recovery software, and you will see a list of all connected drives and partitions on your system. Find the specific SSD, or the specific partition on it, where your lost files used to be. Choosing the right drive is extremely important, as scanning the wrong location is a waste of time and effort. Most programs display the drive size and format type so you can verify you are targeting the right drive before the scan begins. 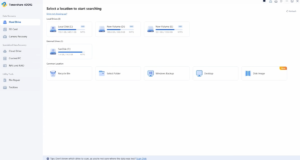
Step 3: Scan for Lost Photos
You can start the scan and let the software run a quick pass, then a deeper, more thorough search. The quick scan usually locates recently deleted files in a few minutes, while the deep scan works on raw data to restore older files. That is where the real SSD data recovery work happens, as the algorithm reconstructs file signatures from scattered sectors. The length of the scan depends on the drive’s size and the amount of damage, so don’t interrupt the process prematurely; let it run its course. 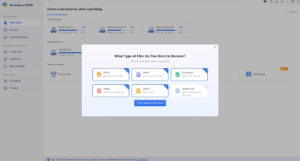
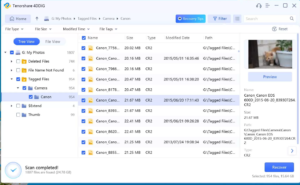
Step 4: Preview and Recover
When the scan is finished, you can browse the organized results, often divided by type such as photos, documents or videos.
With trustworthy software, you can view pictures and documents before recovery, ensuring the files are not damaged. Choose all the files you want to restore and save the recovered files to a different drive, not the original SSD. This last step completes the DIY process and, for many users, fully solves the recovery data hard disk problem at no additional cost.
When to Stop and Call a Professional
There will be many deletions handled by software, but there are warning signs that mean you need to stop and bring in an expert.
Physical Failure Signs
Watch for these warning signs — they’re signs of hardware damage, and software can’t fix them:
- Unusual sounds. Clicking, grinding, or buzzing noises generally indicate a physical part is failing.
- The drive doesn’t appear at all.A missing drive in your system settings usually indicates a more serious hardware fault.
- A damaged controller chip, firmware, or memory cells. Any consumer software can fix any of these.
- Repeated scan attempts. Additional scans on a physically failing drive can accelerate its complete failure.
These symptoms require immediate attention from a lab with cleanroom facilities and specialized hardware tools.
Severe Logical Failure Signs:
Sometimes a drive seems to be working but is more corrupt than consumer software can fix. Watch out for:
- Unallocated or RAW status. The drive is detected, but there is no readable file system.
- Zero-byte capacity. The SSD suddenly reports no free space, even though the drive is detected and working fine.
- Heavy overwriting or a failed firmware update. Both can do more damage to the file system than software alone can fix.
- Extensive TRIM activity. Once TRIM has cleared out large portions of the drive, the chances of recovery go way down.
In these advanced cases, only specialized hard drive recovery equipment and manual sector-level work can recover your data. In this situation, trying to force a drive scan usually does not help and sometimes makes things measurably worse. Professionals use controlled, low-level techniques designed specifically to avoid further stress on already compromised memory cells.
Software Recovery Has Failed
If you have already tried a trusted recovery tool and it didn’t find anything usable or the files came back corrupted, stop trying. Multiple recovery attempts on a struggling drive, even with additional passes, increase the risk of further damage. A professional lab can get to the hardware level of the drive, something consumer software can’t do. This hard drive data recovery resource clearly lays out the decision points for when to escalate for a closer look.
What Professional Recovery Involves
Professional labs are housed in cleanroom environments designed to prevent dust and static from further damaging sensitive components. It is slower and more expensive than software recovery, but it reaches data that no consumer program could ever access. What that process generally looks like is:
- Cleanroom hardware work. Technicians can also transfer memory chips to donor boards, or fix broken controllers.
- Direct chip reading. In extreme cases, they even read raw NAND flash directly with special tools.
- An upfront diagnostic. Preliminary assessment and quotation before any physical work.
- Honest odds, not guarantees. Good labs will tell you what your odds are, not promise you success every time.
- A realistic timeline. Turnaround time usually runs a few days to a couple of weeks, depending on the damage.
- No recovery, no fee policy. Many existing labs will offer this as standard before you sign on the dotted line.
It protects you financially in the unlikely event that even hardware-level recovery can’t successfully restore your files.
How to Choose the Right Path
Match your situation with the right recovery path using this quick decision guide:
- If your SSD is still working fine and the data loss was due to deletion, formatting, or another logical error, start with software.
- Call a professional service if you hear strange noises, the drive is not recognized, or the data is irreplaceable.
- Consider your budget, as the software will cost a fraction of what professional SSD data recovery services will charge you for physical repairs.
- When in doubt, run a free scan first; it shows whether your files are recoverable before you spend money.
This balanced approach keeps you from overpaying for a pro when you can do the job with software alone. It shows you how to recover data from hard drive issue without incurring unnecessary costs. It also prevents your drive from being scanned repeatedly if you know the right path. 
Frequently Asked Questions
Q1: Can I really recover data from an SSD after deletion?
Yes, but success will depend on several factors. The data is very recoverable with tools like 4DDiG since the TRIM command has not been run yet. The most important thing is to act immediately.
Q2: Is 4DDiG safe for SSD recovery?
Absolutely. 4DDiG works in read-only mode. It does not write to or modify your drive in any way when scanning or recovering, so it is completely safe to use on SSDs.
Q3: Why didn’t the free recovery tool find my photos?
Many free tools lack scanning algorithms or support for the latest file systems. 4DDiG supports 2000+ file types and is powered by patented technology, significantly increasing your chances of success.
Q4: How much does professional SSD recovery cost?
The costs vary widely, usually from $300 to over $2000. What is the ultimate price? The extent of physical damage and the complexity of the recovery determine the cost. Always get a free evaluation and quote before agreeing to any repair work.
Q5: What is the TRIM command and why does it matter?
TRIM is a command that allows the operating system to tell the SSD about data blocks that are no longer needed. Then the SSD can erase those blocks in the background, making recovery from that part impossible. That is precisely why you must stop using the drive right after any deletion.
Q6: Does 4DDiG offer a free version?
Yes. The free version can scan and preview recoverable files up to 2GB. This way you can check if your photos can be recovered before buying the full software.
Final Thoughts
Losing data from your SSD is stressful, but if you act quickly and choose the right path, it’s rarely hopeless. First, halt all activity on the drive. Next, test it with a trusted program like 4DDiG for a quick try. If there is physical damage or severe corruption, escalate to a professional recovery lab instead. Knowing these steps puts you back in control of your situation, whether it’s a need for hard drive recovery software or hands-on expert repair. Also, be sure to maintain a routine backup habit in the future, as software can’t guarantee results every time. Redundancy is cheap. Professional data recovery is seldom needed.


Have you ever come across the phrase ponas robotas and wondered what it actually means? The term comes from Lithuanian and translates directly to “Mr. Robot.” People use it today to talk about intelligent robotic assistants that feel more approachable and capable than traditional machines. These systems handle everyday tasks while adapting to the people around them.
The idea mixes cultural references with real technology. It highlights how robots are moving out of factories and into homes, hospitals, and offices. Understanding ponas robotas helps you see where personal robotics is heading and what practical value it already delivers.
What Does Ponas Robotas Mean?
Ponas robotas literally means “Mr. Robot.” “Ponas” is the polite Lithuanian title for a man, similar to “Mr.” or “Sir,” while “robotas” simply means robot. Combining them gives a machine a respectful, almost human title.
In practice, the phrase now describes smart robots and AI-powered assistants that interact naturally with people. These are not purely industrial arms repeating the same motion thousands of times. Instead, they sense their surroundings, respond to voice or gestures, and adjust their behavior based on routines.
You will hear the term in discussions about home helpers, care robots, and collaborative workplace systems. It signals a shift toward machines that support rather than simply replace human effort.
The Cultural Roots Behind the Term
The phrase gained wider recognition through the popular television series Mr. Robot. In Lithuanian-speaking regions the show was known as Ponas Robotas. The series explored technology, privacy, and the influence of digital systems on ordinary people, which helped the words stick in public conversation.
That cultural link still matters. When people say ponas robotas, they often blend the polite linguistic title with modern ideas of capable, context-aware machines. The result feels less like cold automation and more like a helpful presence.
This background also explains why the term appears in both casual talk and technical writing. It carries a sense of personality without claiming the robot is truly human.
Core Technologies Powering These Systems
Modern systems described as ponas robotas rely on several connected technologies. Sensors let them see and navigate. Onboard processors run models that interpret speech and movement. Connectivity allows updates and coordination with other smart devices.
Typical components include:
- Vision and depth cameras for object recognition and safe movement
- Microphones and speech models for natural conversation
- Touch or force sensors that prevent accidents during physical interaction
- Adaptive software that learns preferred routines over time
These pieces work together so the robot can move through a home, respond to a request, and improve its performance without constant reprogramming.
| Feature | Traditional Industrial Robots | Ponas Robotas-Style Assistants |
|---|---|---|
| Primary Setting | Factories and warehouses | Homes, hospitals, offices |
| Interaction Style | Fixed programs, limited human contact | Voice, gesture, and adaptive responses |
| Learning Ability | Minimal or none | Improves from daily use and feedback |
| Safety Approach | Physical barriers or cages | Built-in sensors and soft-collision design |
| Typical Tasks | Welding, assembly, heavy lifting | Cleaning, reminders, monitoring, light assistance |
This comparison shows why the newer systems feel different in everyday settings. They prioritize safe, flexible help over raw speed or strength.
Real-World Applications of Ponas Robotas Systems
These assistants already appear in multiple environments. In homes they manage schedules, control lighting, vacuum floors, or remind someone about medication. In healthcare they support nurses by delivering supplies or helping patients with basic mobility. Warehouses use related mobile robots for navigation and item transport.
Here are practical examples:
- A household unit that greets you, checks the weather, and starts the coffee maker based on your usual morning routine
- A hospital robot that carries linens and alerts staff if a patient requests help
- A classroom companion that answers basic questions and keeps younger students engaged during group activities
| Setting | Common Tasks | Main Benefit |
|---|---|---|
| Home | Cleaning, reminders, device control | More free time and consistent routines |
| Healthcare | Supply delivery, patient monitoring support | Reduced staff workload and faster response |
| Education | Tutoring support, interactive lessons | Personalized attention for learners |
| Logistics | Inventory movement, sorting assistance | Faster fulfillment with fewer errors |
| Hospitality | Guest guidance, room service support | Consistent service without fatigue |
Each use case focuses on repetitive or physically demanding work so people can concentrate on judgment, creativity, or direct care.
Pros and Cons of Ponas Robotas Assistants
These systems offer clear advantages, yet they also introduce trade-offs you should consider before adopting them.
Pros
- They free up time by handling routine chores reliably.
- Adaptive learning means performance improves with regular use.
- Consistent availability helps with monitoring or reminders that people might forget.
- Many designs include safety features that reduce the risk of accidents in shared spaces.
Cons
- Higher upfront cost compared with basic appliances or simple software tools.
- Dependence on connectivity can limit function during outages.
- Privacy questions arise when cameras and microphones stay active.
- Maintenance and occasional software updates require attention.
Most households and workplaces find the time savings worthwhile once the system is set up properly. Still, the privacy and cost factors deserve careful review.
Common Mistakes When Adopting These Systems
People sometimes expect perfect performance from day one. These assistants need a short learning period to match routines accurately. Skipping that setup leads to frustration.
Another frequent error is placing the robot in cluttered or poorly lit areas. Sensors work best with clear pathways and adequate lighting. Ignoring basic placement reduces reliability.
Some users also overlook regular software updates. Outdated systems miss improvements in navigation or speech recognition. Setting a simple monthly check prevents most issues.
Finally, treating the machine as fully independent without any oversight can create problems. Human review still matters for sensitive tasks such as medication reminders or security alerts.
Best Practices for Getting the Most Value
Start with clear goals. Decide which two or three tasks matter most, then configure the system around them. This focused approach produces faster results than trying to automate everything at once.
Keep pathways open and consistent. Mark preferred routes if the robot supports custom maps. Good physical organization improves performance more than any software tweak.
Review privacy settings early. Limit data sharing to essential functions and check what information stays on the device versus the cloud. Many models let you adjust these options without losing core features.
Schedule short weekly reviews. Note any missed tasks or odd behavior, then adjust preferences. Small corrections compound quickly and keep the assistant aligned with real needs.
Combine the robot with existing tools rather than replacing everything. Link it to your calendar or smart lights so the systems reinforce each other. This integration multiplies convenience without extra complexity.
Conclusion
Ponas robotas captures both a simple linguistic idea and a broader shift in robotics. The polite title reflects how people want machines that feel approachable and useful rather than purely mechanical. From household helpers to hospital support tools, these systems already handle practical work and continue to improve.
The key is matching expectations with real capabilities. Focus on clear tasks, maintain the hardware and software, and stay aware of privacy settings. When you do, the assistant becomes a steady part of daily routines instead of a novelty. As the technology matures, the helpful presence suggested by the original Lithuanian phrase will likely become even more common in homes and workplaces.
Frequently Asked Questions
What does ponas robotas mean in English?
It means “Mr. Robot.” The phrase comes from Lithuanian and is now used to describe intelligent robotic assistants that interact with people in everyday settings.
Is ponas robotas a specific product or brand?
No single product owns the name. The term refers more broadly to modern personal and collaborative robots that emphasize safe, adaptive help.
How does a typical ponas robotas system learn routines?
It observes repeated actions, records preferences you set, and refines its responses over days or weeks of normal use. Most models also accept direct voice or app adjustments.
Are these systems safe around children or pets?
Most consumer and care models include collision detection, soft edges, and speed limits. Proper placement and supervision still matter, especially during the first weeks.
What is the usual price range for household versions?
Basic models often start a few hundred dollars, while more advanced units with stronger navigation and interaction features range from roughly one to two thousand dollars depending on features and manufacturer.

Mobile monetization works best when it is treated as part of the product experience, not as a separate revenue layer added after launch. Publishers exploring monetization strategies for mobile apps should begin with a simple principle: an ad system must support the value users expect from the app while creating reliable opportunities for advertisers and revenue for the business.
A higher short-term revenue figure is not automatically a sign of a healthier app. If ads slow down key screens, interrupt tasks, create accidental taps, or make users feel pressured, the result can be lower retention, weaker ratings, and more support requests. A durable strategy reviews revenue, experience, performance, privacy, and ad quality together.
Why Monetization Needs A Health Check
Ad monetization is a system with connected parts. A change that raises effective CPM may also reduce session length or increase uninstall rates. Similarly, a new demand source may improve fill rate while introducing creatives that do not fit the audience. Reviewing only one dashboard can hide these trade-offs.
A practical health check asks whether users can still easily complete their main task, whether ads are appropriate for the app’s audience, whether the app remains stable, and whether revenue is improving without harming longer-term engagement. This balanced view gives product, engineering, and monetization teams a shared way to make decisions.
Build Monetization Around User Value
Users are more likely to accept advertising when the exchange is understandable. In a game, a rewarded ad may offer an extra life, optional currency, or a bonus. In a utility app, advertising may help support free access to a useful service. The key is clarity: users should know what they receive and what action they are choosing.
Map Ads To The User Journey
- Onboarding: Keep early sessions focused on demonstrating the app’s value.
- Active use: Avoid interruptions during focused, time-sensitive, or high-consequence actions.
- Natural pauses: Consider ads between completed tasks, levels, articles, or content segments.
- Return visits: Adjust exposure based on how frequently a person uses the app.
Before adding a placement, ask three questions: What does the user receive in return? Does this placement support or interrupt the app’s purpose? Can the user understand why the ad appeared at that moment?
Review The Main Revenue Models
There is no universal revenue model. The strongest choice depends on the app’s purpose, audience, frequency of use, and the type of value it delivers.
- Advertising: Often suits free apps with regular engagement. Its main risk is ad fatigue or a disruptive experience.
- Subscriptions: Can fit apps that deliver ongoing content, services, or regularly updated features. The key measure is whether users continue to see recurring value.
- In-app purchases: Can work for optional upgrades, digital goods, premium features, and game content. Clear pricing and a useful purchase benefit matter.
- Hybrid monetization: Combines approaches, such as offering an ad-supported free tier and an ad-free subscription. It can serve different user preferences, but the paths must remain easy to understand.
- Sponsored experiences: Can be useful when the sponsor, offer, and audience are naturally aligned.
Improve Ad Placement And Timing
Formats should match the moment. Banners can provide persistent but limited visibility; native placements can fit within content when clearly identified; interstitials need natural breaks; and rewarded ads should follow an explicit user choice. Google Play’s ad experience requirements reinforce the importance of avoiding unexpected, deceptive, and disruptive placements.
Useful Placement Rules
- Show rewarded ads only after the user opts in.
- Use interstitials after a completed activity, not before the intended action takes effect.
- Keep banners away from navigation, checkout controls, and other frequently tapped elements.
- Pause advertising during account creation, payment flows, emergency use cases, and other sensitive actions.
- Apply frequency caps so the same person is not repeatedly interrupted in a short period.
Protect App Performance
An ad that arrives too late, renders incorrectly, drains battery life, or contributes to a crash can cost more than the impression earns. Monitor ad requests separately from the rest of the app so teams can identify whether delays occur in the network request, mediation process, creative load, or rendering step.
- Measure time from ad request to visible render.
- Track failed, timed-out, and abandoned ad loads.
- Test on older devices, smaller screens, mobile data, and weaker connections.
- Review layout shifts, blank placements, accidental taps, crash reports, and battery impact after major changes.
Use Privacy-First Measurement
Measurement should collect only the information needed to operate, evaluate, and improve the monetization system. Teams should document what data is collected, why it is needed, how long it is retained, and which partners or internal roles can access it. The FTC advises businesses to collect only what they need, safeguard it, and dispose of it securely, as outlined in its privacy and security guidance.
Clear consent language, accurate privacy notices, data minimization, and sensible retention limits are practical foundations. Contextual signals and first-party insights can also help publishers understand broad usage patterns without treating every user interaction as a reason to gather more data.
Create A Practical Testing Plan
- Choose one goal. Focus on revenue, retention, load speed, or satisfaction.
- Change one variable. Test a format, placement, frequency cap, timing rule, or reward size.
- Define the audience. Start with a limited, clearly identified traffic segment.
- Set a realistic window. Include enough normal usage to avoid reacting to a brief spike or dip.
- Review side effects. Compare revenue with retention, session behavior, complaints, and technical performance.
- Roll out gradually. Expand only when the overall result remains positive.
Track The Right Metrics
Revenue metrics matter, but they should be interpreted alongside experience and quality signals. A useful measurement set includes:
- Revenue: revenue per active user, revenue per session, effective CPM, fill rate, and ad request success rate.
- User experience: Day 1, Day 7, and Day 30 retention, session length, app rating trends, ad abandonment, and support complaints.
- Quality control: ad load time, crash rate, creative rejection rate, invalid traffic signals, and repeat exposure per user.
Common Mistakes To Avoid
- Choosing the highest immediate revenue option without checking retention or reviews.
- Launching several new formats at once, making it impossible to identify the cause of a result.
- Ignoring users on lower-end devices or weaker networks.
- Using vague privacy language or collecting data without a clear operational need.
- Measuring clicks without investigating accidental interactions.
- Copying another app’s placement strategy without considering the audience and product flow.
Conclusion
Healthy monetization is a long-term product decision. The best systems create revenue while preserving speed, privacy, trust, and the core reason people use the app. By matching ads to user value, carefully testing changes, protecting performance, and evaluating results with a balanced set of metrics, publishers can build monetization programs that are stronger for users, advertisers, and the business.
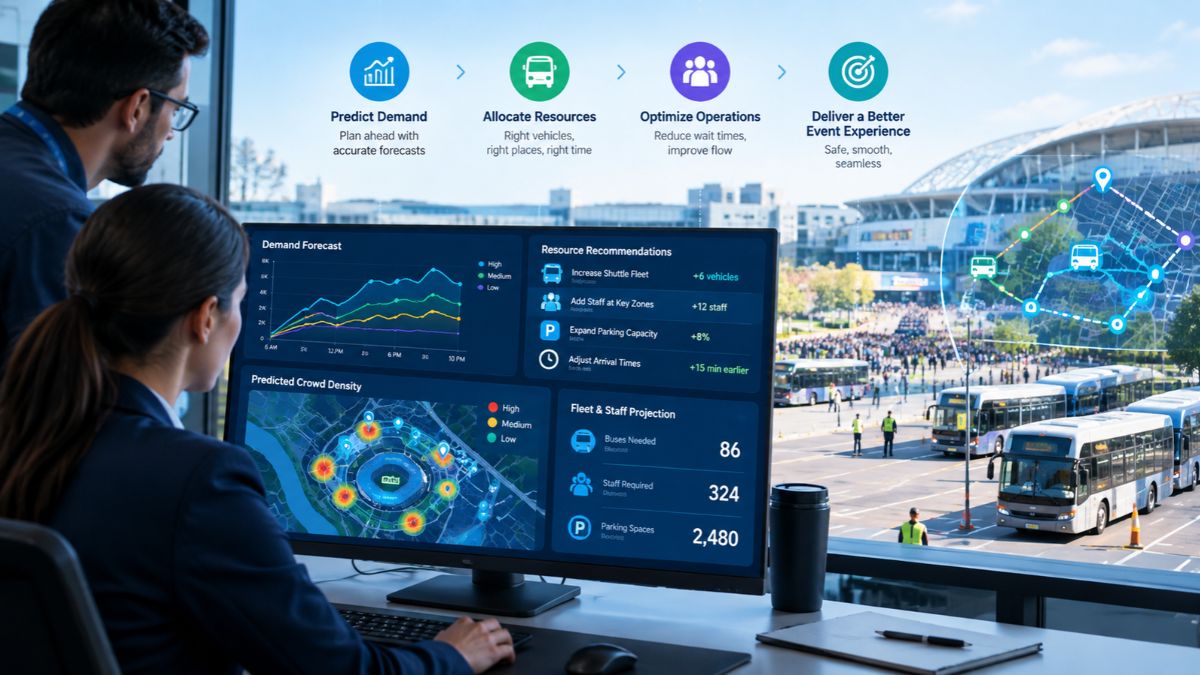
What exactly are predictive insights? Let us understand them correctly. It is known worldwide that major events rarely stick to the original plan. Passenger demand fluctuates, vehicles are delayed, routes become overcrowded, and teams may need to relocate resources on short notice. Predictive insights allow event planners to plan for what is likely to happen next, rather than just what is already happening.
This guide explains how predictive insights play a role in resource planning, how real-time data improves forecasting, and how event transportation management software puts predictions into action.
How Do Predictive Insights Improve Resource Planning for Major Events?
As the term suggests, predictive insights use current and historical event data to identify patterns (predictions) before they actually become issues. With the data, planners are able to make informed decisions by analyzing demand patterns, passenger volumes, traffic conditions, and fleet activity rather than sticking to fixed schedules.
So, if demand is expected to increase following a keynote, transport coordinators and event planners prepare vehicles or staff to handle the surge.
What Event Data Is Used for Predictive Resource Planning?
Predictive planning needs proper operational data; therefore, teams may bring together:
- Data on passenger demand and passenger count
- Real-time vehicle location and movement
- Traffic and travel time patterns
- Route and trip performance
- Pickup and drop-off activities
- Vehicle utilization and idle time
- Event schedules and expected attendance
- Previous event performance
When combined with event transportation management software, this data reveals patterns for future strategizing and planning.
How Does Real-Time Vehicle Tracking Support Event Resource Planning?
Real-time vehicle monitoring offers transportation managers an immediate perspective on fleet activity. When the event starts, resource planning persists. When vehicles experience delays on one route while another has available capacity, teams recognize and rectify the disparity.
Live fleet visibility allows planners to modify assignments and monitor ETAs effectively and efficiently. This turns resource planning into a dynamic operational activity instead of a fixed timetable.
Can Predictive Insights Help to Manage Passenger Demand?
Yes, PAX counting and passenger activity statistics reveal when and where demand is about to increase. Moreover, passenger activity, when combined with predictive data, helps teams get vehicles and staff ready before lines develop.
What Resources Can Event Teams Plan More Effectively?
Predictive insights assist in planning across several operational areas, including:
- Vehicles and Drivers
- Shuttle capacity
- Pick-up and drop-off resources
- Passenger Support Teams
- Dispatch and on-site employees
- Route capacity
- Backup vehicles
- Operational coverage during peak times
Here, the goal is not to add more resources, but to place the appropriate resources whenever and wherever required.
How Does Event Transportation Management Software Turn Insights Into Action?
EventFalcon’s event transportation management software combines prediction and execution. Teams need real-time data, alerts, GPS tracking, passenger information, ETAs, and operational controls in one location. An event transportation command center brings these inputs together, allowing planners to compare expected demand to actual conditions and act more quickly.
So, instead of waiting for a problem to manifest itself, teams can detect and respond to early warning signs.
Why Should Major Events Use Predictive Resource Planning?
Because predictive insights provide a solid foundation for teams to decide and plan where vehicles, personnel, and capacity are needed. EventFalcon combines real-time vehicle tracking, passenger intelligence, fleet visibility, and event transportation management tools to help teams identify movement, understand demand, and respond to changing conditions.
So plan smarter, allocate resources more effectively, and be ready for whatever comes next.
-

 NEWS1 year ago
Historical Churches in Manila
-

 TOPIC4 months ago
Unveiling AvTub: Your Ultimate Guide to the Best AV Content
-

 TOPIC1 year ago
Simbang Gabi and Kakanin
-

 TOPIC1 year ago
Symbols of Hope: The 15th Belenismo sa Tarlac
-

 TOPIC1 year ago
RIZAL at 160: a Filipino Feat in Britain
-

 NEWS5 months ago
What Caused Delta Flight DL275 to Diverted LAX? A Detailed Breakdown
-

 TOPIC3 months ago
Understanding Fascisterne: Origins and Ideological Roots
-

 TOPIC1 year ago
Biodiversity in Urban Singapore: Corporate Contributions to Nature-Based Solutions and Green Infrastructure