
TOPIC
NXBREW: The Complete Guide to Brewing, Benefits, and Best Practices

Introduction
nxbrew is a simple, friendly term for a brewing method and product line that blends small-batch craft techniques with accessible home-brewing tools and recipes. In this guide you’ll learn what nxbrew means, why it matters for hobbyists and small producers, and how to get consistent, great results at home. Read on for step-by-step instructions, practical examples, quick tables you can use while brewing, and common mistakes to avoid.
What Is nxbrew?
nxbrew refers to a practical, repeatable approach to small-batch beer (or similar fermented beverage) production that emphasizes consistency, ingredient clarity, and approachable technique. It’s not a single recipe but a framework: simplified equipment, clear process checkpoints, and flavor-focused ingredient choices. This approach suits beginners who want reliable results and experienced brewers who prefer efficiency without sacrificing quality.
Core Principles of nxbrew
- Consistency over complexity: prioritize repeatable measurements and sanitation.
- Ingredient transparency: use quality malt, hops, yeast, and water adjustments to control flavor.
- Process checkpoints: track gravity, temperature, and timing to reduce guesswork.
- Scaling awareness: design recipes that scale cleanly between 1–10 gallon batches.
Essential Equipment for nxbrew
- Brew kettle (5–10 gallon capacity) for one-pot or partial-mash methods.
- Fermentation vessel (carboy or food-grade bucket) with an airlock.
- Hydrometer or refractometer to measure gravity.
- Thermometer, siphon, sanitizer, and basic bottling/kegging gear.
Table: Quick Comparison — Equipment Options
| Equipment Tier | Typical Cost Range | Best For |
|---|---|---|
| Basic kit (bucket fermenter, basic kettle) | Low | Beginners testing small batches |
| Mid-range (stainless kettle, carboy, refractometer) | Medium | Hobbyists seeking consistency |
| Advanced (controlled temp fermenter, conical fermenter) | High | Semi-pro and frequent brewers |
Why nxbrew Works for Small Batches
nxbrew is designed to make small batches produce professional results by controlling the variables that most affect flavor. Small batches heat and cool faster, so temperature control yields big gains in consistency. Focusing on a short list of high-impact ingredients—one or two malts, a focused hop schedule, and a reliable yeast strain—reduces variation between brews.
Basic nxbrew Process
Follow these steps for a reliable starting batch.
Step-by-Step Workflow
- Recipe selection and scaling: choose a tested recipe and scale to your batch size.
- Mash/steep (if using grains): hold target temperature for enzymatic activity.
- Boil: add hops according to schedule, watch for boil-overs.
- Chill wort quickly to pitching temperature.
- Pitch yeast and ferment at recommended temperature.
- Monitor gravity to confirm fermentation completion.
- Package (bottle or keg) with proper priming or CO₂.
Table: Typical Temperature and Timing Checkpoints
| Stage | Target Temp | Typical Duration | Why It Matters |
|---|---|---|---|
| Mash / Steep | 148–156°F (64–69°C) | 30–60 min | Enzyme activity affects fermentable sugars |
| Boil | 212°F (100°C) | 60–90 min | Sterilizes wort and isomerizes hop alpha acids |
| Fermentation | 64–72°F (18–22°C) for ales | 1–2 weeks | Yeast activity and ester profile development |
Practical Example: Simple nxbrew Pale Ale
This example shows how to apply nxbrew principles to a 1–2 gallon beginner batch.
Ingredients and Schedule
- Base malt: 2–3 pounds of pale malt.
- Specialty: 0.25–0.5 pounds crystal malt for color and sweetness.
- Hops: 1 oz total (split between bittering and aroma).
- Yeast: a clean ale strain.
- Water: adjust to neutral profile, target 5.2–5.4 pH.
Procedure
- Steep or single infusion mash at 152°F for 45 minutes.
- Boil 45–60 minutes, add hops at start and last 10 minutes.
- Rapidly chill to 68°F, pitch yeast, and ferment until gravity is stable.
- Bottle with priming sugar or keg and carbonate to taste.
Flavor Adjustments and Troubleshooting
Common adjustments in nxbrew focus on water chemistry, hop timing, and yeast health.
- If beer tastes too sweet, verify mash temperature and fermentation completeness with a hydrometer.
- If it’s overly bitter, trim hop additions or reduce boil time for bittering hops.
- Off-flavors like diacetyl or sulfur often indicate fermentation stress or temperature swings.
Pros and Cons of nxbrew
Pros
- Repeatable results for small batches, improving with simple tracking.
- Lower upfront cost compared to professional-scale setups.
- Ideal for experimentation and limited-run recipes.
Cons
- Small-batch variability can be higher without good process control.
- Some equipment savings (e.g., small kettles) limit scalability.
- Precise temperature control and sanitation are still essential.
Common Mistakes to Avoid
- Skipping sanitation: most off-flavors come from contamination.
- Ignoring gravity readings: guessing fermentation progress causes under- or over-attenuated beer.
- Overcomplicating recipes: too many specialty grains or hops can mask intended flavors and amplify variability.
Table: Troubleshooting Quick Fixes
| Problem | Likely Cause | Quick Fix |
|---|---|---|
| Sweet, unfermented taste | High mash temp or stuck fermentation | Lower mash temp next batch; verify yeast viability |
| Harsh bitterness | Overboiling hops or late additions | Reduce bittering hops; adjust boil time |
| Fruity esters | High fermentation temp | Lower temp for cleaner profile |
Best Practices for Consistent nxbrew Results
- Record every batch: date, temps, volumes, gravity, and notes.
- Sanitize thoroughly and rinse with clean water.
- Use fresh, high-quality ingredients and check yeast viability.
- Control fermentation temperature with a simple wrap, dedicated fridge, or temperature controller.
- Taste at key milestones and compare against notes to learn trends.
Scaling and Recipe Portability
nxbrew-friendly recipes are designed to scale; keep ingredient ratios consistent and adjust hop bitterness using IBU calculations when changing batch size. Small-batch processes translate to larger volumes if you keep the mash thickness, temperatures, and timing consistent. When moving from 1–2 gallon to 5–10 gallon batches, watch for altered heat-up and cool-down times—adjust insulation and chilling methods accordingly.
Legal and Safety Considerations
- Home brewing is legal in many countries with limits on batch size and distribution; check local regulations before commercializing any nxbrew product.
- Always store and label fermentation vessels safely, avoid pressure build-up in sealed containers, and use food-safe materials and sanitizers.
Comparison: nxbrew vs Traditional Homebrew
| Feature | nxbrew Approach | Traditional Approach |
|---|---|---|
| Batch focus | Small, repeatable, flavor-focused | Wide range of sizes, sometimes experimental |
| Equipment | Prioritizes portability and simplicity | May include larger kettles and advanced gear |
| Recipe design | Scaled and minimal for consistency | Can be complex, layered recipes |
| Suitability | Hobbyists and micro-producers | Hobbyists to semi-pro producers |
Practical Tips for First Three nxbrew Batches
- Batch 1: Follow a single, simple extract or partial-mash recipe to learn process flow.
- Batch 2: Repeat the same recipe, but record every measurement to compare results.
- Batch 3: Make one small change (yeast strain or hop addition) to see the impact—this helps isolate variables.
Packaging and Presentation
Good packaging improves perceived quality even for a small batch. Clean, clear bottles or a polished keg setup, consistent fill levels, and neat labeling (without making legal claims) increase appeal. If selling, ensure compliance with local labeling and distribution laws.
Frequently Asked Questions
1. What does nxbrew mean in brewing?
nxbrew describes a small-batch, process-focused brewing approach prioritizing consistency, ingredient clarity, and simplified equipment choices.
2. Is nxbrew suitable for beginners?
Yes—nxbrew emphasizes repeatable steps and minimal complexity, making it ideal for new brewers who want dependable results.
3. How do I scale an nxbrew recipe?
Keep ingredient ratios consistent, recalculate hop IBUs, and adjust heating/cooling times for larger volumes.
4. What equipment do I need to start nxbrew?
Basic kettle, fermentation vessel, hydrometer or refractometer, thermometer, sanitizer, and bottling/kegging gear.
5. How can I avoid off-flavors in nxbrew?
Sanitize diligently, maintain steady fermentation temperatures, and verify yeast health and gravity readings.
Conclusion
nxbrew is an efficient, reliable path to better small-batch brewing: focus on clear records, consistent technique, and quality ingredients to get great results quickly. Whether you’re experimenting with your first pale ale or refining a small seasonal release, the nxbrew framework helps turn one-off successes into repeatable, satisfying brews.
Which step would you like to try first—the basic 1–2 gallon recipe, or the full checklist for process control?
/ You May Also Read /
Raw Foods and Recovery: How Nutrition Supports the Addiction Healing Journey

The impact of an auto accident has the potential to impact more than just the physical car. Damage that shows up as dents, cracked bumpers or scratched paint is usually the first indication of an accident; however, damage may occur under the car’s surface that can affect vehicle operation over time. No matter if it happens on the highway or on a regular day, the proper way to take care of the damage is essential to the restoration of your vehicle.
While many drivers want to get their vehicles up and running as fast as possible, the quality of the repairs can affect how well their cars work over the next few months and years. Using a professional service provider for collision repair service los angeles can help you get the important structural and mechanical parts of your car back and bring them back into operation to ensure that your car is kept in service for longer.
What’s more to collision repairs than looks?
It’s not always obvious that the damage is due to collision.
A relatively small impact could result in damage to the vehicle’s frame, steering, suspension or safety systems. If these problems are not fixed correctly they can result in further wear, handling problems or unforeseen repair expenses down the road.
Professional collision repairs are intended to fix the damage to your vehicle that you see and the damage that isn’t.
Areas Commonly Repaired After a Collision
The type of repairs depends on the severity of the accident and the condition of the vehicle.
Typical Collision Repairs
| Damaged Component | Common Repair |
| Front or rear bumper | Repair or replacement |
| Body panels | Panel repair or replacement |
| Paint damage | Surface refinishing and repainting |
| Vehicle frame | Structural alignment |
| Headlights and mirrors | Replacement or adjustment |
A complete inspection helps technicians determine the repairs needed before work begins.
Professional repairs play a crucial role in ensuring long-term performance.
Routine repairs can ease a car back into safe and efficient road performance following an accident.
1. Restoring Frame Alignment
The frame is the body structure of a vehicle.
Tires, suspension and steering can all be affected by small alignment errors. The proper alignment is inspected and adjusted as needed using professional repair equipment.
2. Suspension and Steering Components Protection
A collision can cause extra strain on suspension or steering components.
These parts are checked for damage or misalignment during the repair process to ensure they remain safe and don’t negatively impact the handling and driving experience.
3. Inspecting Safety Systems
Newer cars are equipped with sophisticated safety features which might need testing after a crash.
These systems may consist of:
- Airbag-related components
- Parking sensors
- Collision warning systems
- Lane departure cameras
- Blind spot monitoring systems
These systems may need to be calibrated in some vehicles following repairs to ensure proper operation.
4. Preventing Future Problems
Early response to damage can help to minimize the potential for further damage over time.
The following issues can be prevented if the right repairs are done:
- Uneven tire wear
- Water leaks
- Paint deterioration
- Rust formation
- Excessive vibration
Fixing these issues when the vehicle is being repaired can help achieve optimal performance in the long-term.
The following factors are involved in the quality of the repairs:
There are multiple factors that influence the overall quality of collision repairs.
Skilled Technicians
Skilled technicians follow repair procedures and thoroughly check damaged parts before repairs are made.
Modern Equipment
Repair facilities often employ specialized tools and a computer-based measuring system to make accurate repairs of structural components.
Quality Replacement Parts
The use of suitable replacement parts can ensure that the repaired parts are matched and used as intended.
Thorough Inspections
A thorough inspection both before and after the repairs is used to ensure that the vehicle has been properly restored based on the repair plan.
Signs Your Vehicle Should Be Inspected After an Accident
After an accident, here are the signs that you should use to tell if your vehicle needs repairs
Damage from collisions might not be obvious for days or weeks afterwards.
Some of the most frequent symptoms include:
- Steering wheel feels off-center
- Vehicle pulls while driving
- Uneven tire wear
- Unusual vibrations
- Warning lights keep on flashing
- Doors and/or trunk are not closed properly.
If any of these symptoms are present, having a professional inspection will help to determine the cause.
In what way does the response to a disaster change before the repair?
Repair shops may perform a number of final procedures before returning a repaired car.
These may include:
✅ Structural measurements
✅ Paint finish inspection
✅ System testing
✅ Vehicle alignment verification
✅ Final quality inspection
✅ Cleaning and preparation
Completion of these final checks to confirm repairs are completed as per the repair plan.
Long-lasting Support for Your Vehicle!
Professional collision repairs are more than just about making your car look good after a collision. When components are properly repaired, it can help repair structural damage, test important safety systems and restore components to provide reliable long-term service.
When looking for a collision repair service in Los Angeles, it’s important to learn more about the repair process, ask questions about the work they will be doing for you, and find a collision repair shop that values careful inspections, quality workmanship, and clear communication. Today’s informed repair choices can help support your vehicle well into the future.
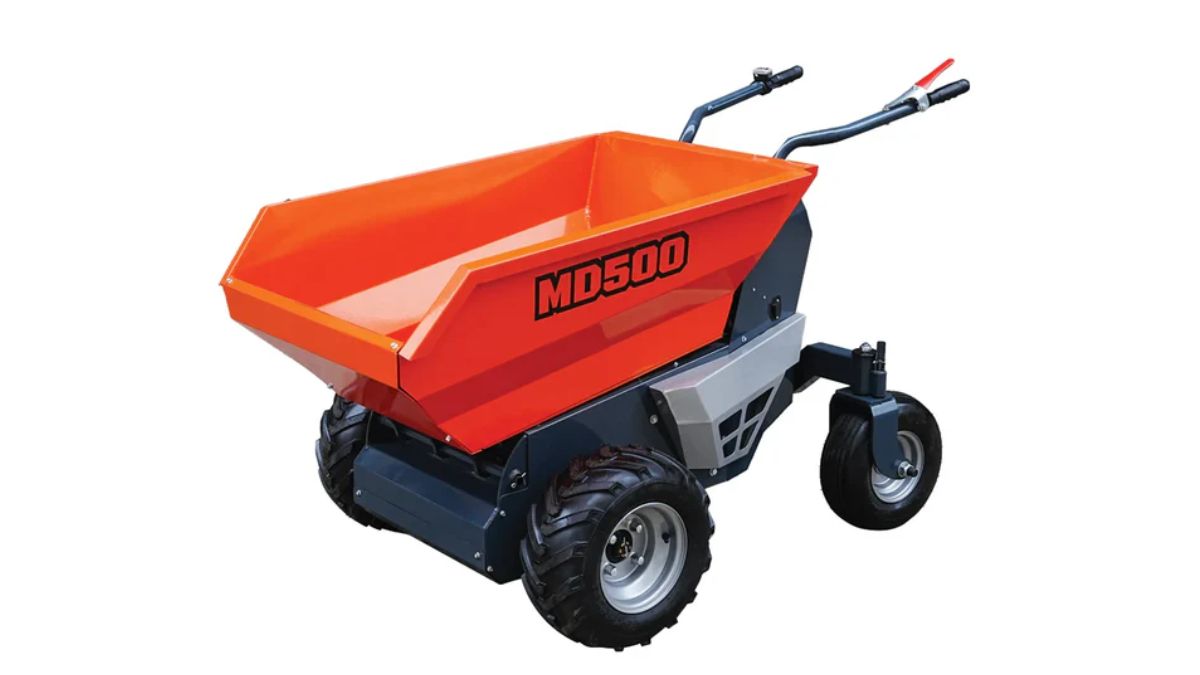
On market gardens in the Annapolis Valley of Nova Scotia, landscaping jobs across the suburbs of Ontario, and construction sites through the foothills of Alberta, crews spend hours moving soil, gravel, mulch, and debris over ground that a wheelbarrow handles poorly. Mud in spring, frozen ruts in late autumn, and long carrying distances all slow the work and tire the crew. A powered hauler changes the pace, and a battery-driven, hydraulic-tipping hauler is increasingly common because it carries a heavy load and tips it without strain. A battery wheeled dumper suits many Canadian tasks, and understanding how it works helps an operator use it safely.
How a Wheeled Dumper Works
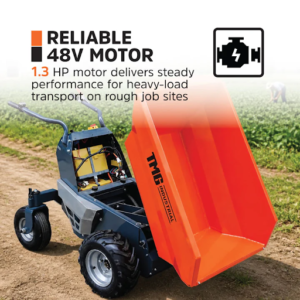
A wheeled dumper combines a powered drive with a tipping hopper. An electric motor draws on a battery pack to move the machine and, on this design, to drive a hydraulic ram that raises the bed and empties the load. The operator walks behind or alongside, steering the unit over rough ground that a hand cart could not cross while loaded. The hydraulic tip removes the heavy lifting and awkward bending that make manual dumping so tiring over the course of a long work day.
Efficiency, Safety, and Productivity
Carrying several hundred pounds in one trip replaces many wheelbarrow runs, so a crew moves more material in less time and with far less back strain. Battery power means no engine fumes, which matters a great deal inside barns, greenhouses, and partly enclosed work sites. The hydraulic tip empties the hopper cleanly at the chosen spot, reducing the spills and double-handling that slow a job.
Consider a landscaping crew building a retaining wall on a sloped lot near Kelowna, British Columbia. They load the dumper with crushed stone at the driveway, drive it up the grade to the wall, and tip each load exactly where it is needed, sparing the crew dozens of slow, tiring trips with a wheelbarrow over the loose, shifting ground of the slope. The quiet battery drive also lets them work early without disturbing the neighbourhood.
Technical Foundation and Performance Factors
Several factors govern real performance:
- Battery capacity, which sets how long the machine runs per charge
- Load rating, which must match the weight being moved
- Traction and ground clearance on soft or sloped terrain
- Temperature, since deep cold reduces battery output
In cold weather a battery delivers less than its summer figure, so operators in colder regions plan shorter sessions or keep a charged spare and store the pack somewhere warm overnight.
Safe Operation and Maintenance
Safe hauling starts with the load. The hopper should not be filled beyond its rating, and heavy material must be spread evenly so the machine stays balanced on a slope. The operator should drive slowly across grades and never tip on uneven ground where the load could shift. Routine care keeps the unit reliable:
- Charge and store the battery as the maker directs
- Check tire condition and pressure before use
- Inspect the hydraulic ram and hoses for leaks
- Clear caked soil from the hopper after wet work
Even loading matters most, because an off-centre load raises the risk of tipping on the slopes common to Canadian sites.
Attachments, Tools, and Accessories
Useful additions include a spare battery for long days, a charger kept under cover, and replacement tires suited to soft ground. Some operators also add a removable liner to protect the hopper and speed cleanup after hauling wet clay, manure, or sticky soil.
What Buyers Should Weigh
Buyers should match the load rating to the heaviest material they move, confirm the battery runtime covers a typical work session, and consider traction on their steepest, softest ground. Tipping height, turning radius, and cold-weather performance all influence long-term value. A machine chosen for the hardest task on the property will handle the lighter jobs comfortably.
As Canadian farms, landscapers, and builders look for quieter, cleaner equipment, battery-powered haulers are likely to gain longer range, faster charging, and better cold-weather output in the years ahead. Buyers comparing models and accessories can explore the full range of wheeled dumpers available from the manufacturer to find a unit well suited to their particular work, terrain, and seasonal climate.
TOPIC
Vaspread: The Complete Guide to Using, Optimizing, and Troubleshooting Vaspread for Better Results

-

 NEWS11 months ago
Historical Churches in Manila
-

 TOPIC11 months ago
Symbols of Hope: The 15th Belenismo sa Tarlac
-

 TOPIC11 months ago
RIZAL at 160: a Filipino Feat in Britain
-

 TOPIC11 months ago
“The Journey Beyond Fashion” – Ditta Sandico
-

 TOPIC2 weeks ago
Unveiling AvTub: Your Ultimate Guide to the Best AV Content
-

 TOPIC11 months ago
5 Must-Have Products From Adarna House to Nurture Your Roots
-

 TOPIC11 months ago
Filipino, alternative language course at Moscow State University
-

 TOPIC11 months ago
“Recuerdos de Filipinas – Felix Laureano”