
BUSINESS
Stay Cool Anywhere with Portable Handheld Battery Fans

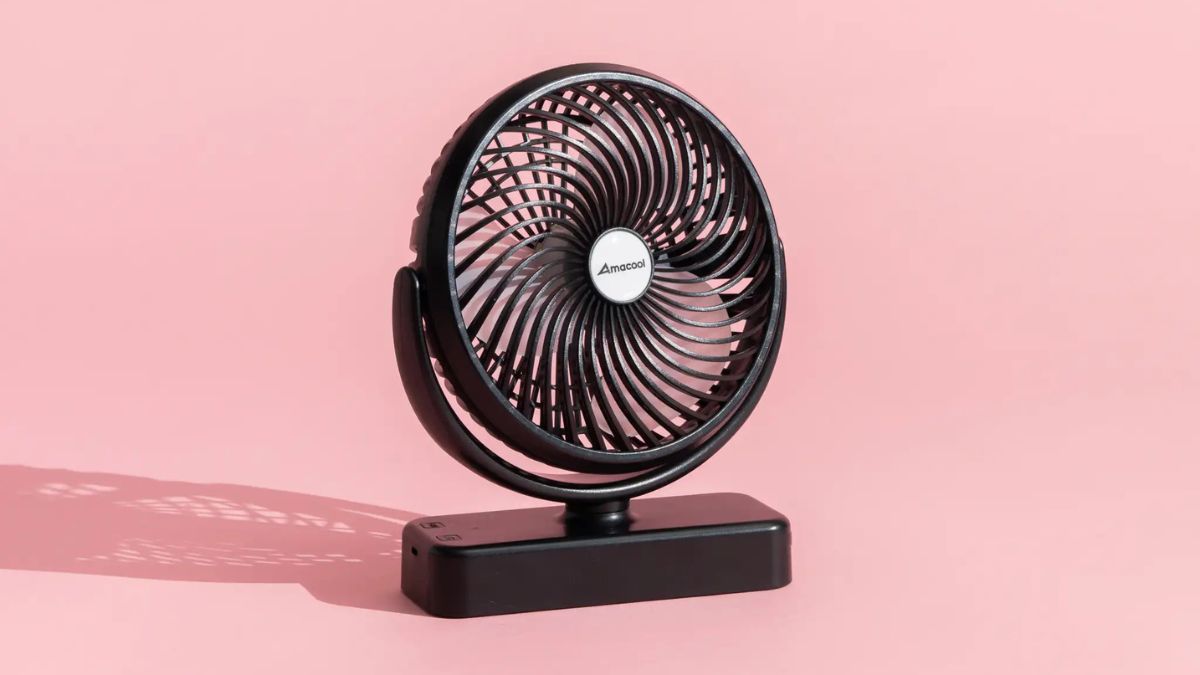
There’s a particular kind of misery that comes with being stuck in a crowded airport terminal, hiking a sun-baked trail, or navigating a sweltering city street with no relief in sight. Heat doesn’t just make you uncomfortable — it drains your energy, dampens your mood, and can turn an otherwise great trip into an exhausting ordeal. For travelers, finding a reliable way to stay cool without lugging around bulky equipment has always been a challenge.
That’s exactly where handheld battery fans have become a game-changer. These compact travel cooling devices deliver instant, personal airflow wherever you are, fitting neatly into a bag pocket or purse without adding noticeable weight. Whether you’re boarding a delayed flight, exploring an outdoor market, or catching your breath on a mountain trail, a quality handheld battery fan offers immediate comfort on demand. This article walks you through everything you need to know — from the key features that separate a great fan from a mediocre one, to practical tips for getting the most out of your device on every adventure.
Why Handheld Battery Fans are Essential for Modern Travelers
Summer temperatures are breaking records year after year, and urban heat islands are making city travel increasingly punishing. For anyone who moves through airports, outdoor markets, or crowded transit hubs regularly, the need for personal cooling has shifted from a luxury to a genuine necessity. Mini fans have stepped in to fill that gap in a way that nothing else quite manages — they’re immediate, personal, and completely portable.
What sets these travel cooling devices apart from other solutions is their sheer practicality. Unlike cooling towels that need re-wetting or misting bottles that soak your clothes, a handheld fan delivers consistent airflow with zero preparation. Slip one into a daypack side pocket in the morning, and it’s ready to go the moment you step off an air-conditioned bus into a wall of afternoon heat. They weigh almost nothing, clear security without a second glance, and don’t require any special storage considerations.
The range of scenarios where they prove genuinely useful is surprisingly broad. Waiting on a delayed tarmac with recycled cabin air, trekking a sun-exposed coastal path, browsing a packed night market, or simply sitting in a hotel room where the AC struggles to keep up — in each case, directing a focused stream of air at your face and neck makes a measurable difference in how you feel and how long you can keep going. For travelers who want to stay energized and comfortable without compromising on what they carry, a compact handheld battery fan is one of the most practical additions to any packing list.
Key Features to Look for in a High-Quality Handheld Fan
Not all handheld fans are created equal, and the difference between a frustrating purchase and a reliable travel companion often comes down to a handful of specific features. Before buying, it’s worth understanding what actually matters for real-world use rather than just impressive-looking specs on a product page. The most important qualities for travelers are battery performance, noise output, airflow strength, build quality, and how comfortably the device fits in your hand during extended use.
Battery Life and Rechargeability
For travelers, battery life isn’t just a convenience — it’s the difference between having cooling support through a long transit day and watching your fan die mid-afternoon with no outlet in sight. Look for quiet rechargeable fans that run at least six to eight hours on a single charge at moderate speed, and prioritize models that charge via USB-C for compatibility with the same cables you’re already carrying. Brands like JisuLife have made built-in rechargeable batteries a standard feature across their handheld fan lineup, eliminating the need to hunt down replacement batteries in unfamiliar locations.
Noise Level and Performance
A fan that sounds like a small aircraft is useless in quiet settings — on planes, in libraries, or during guided tours where you need to hear what’s being said. The best powerful handheld fans manage to deliver meaningful airflow while staying under 45 decibels on their lower settings. Multiple speed settings are essential here: a gentle mode for quiet environments and a stronger mode for serious heat relief outdoors. Durability also matters — a solid build with protected blades and a grippy exterior holds up far better through the bumps and drops of regular travel.
How to Choose the Best Handheld Fan for Your Travel Needs
Choosing the right handheld fan starts with being honest about how and where you’ll actually use it. A fan that’s perfect for urban sightseeing might fall short on a multi-day hiking trip, so matching the device to your specific travel style matters more than chasing the highest-rated option on any given list.
Start by thinking about your primary environment. If most of your travel involves flights, museums, and city streets, noise level and battery life should be your top priorities — you want something whisper-quiet that lasts a full day without recharging. If you’re heading into outdoor or adventure territory, shift your focus toward airflow strength and rugged build quality. A fan with a rubberized grip and reinforced blade guard will survive a backpack far better than a sleek but fragile design.
Consider how long your typical days run. Travelers on long-haul itineraries — think twelve-hour days moving between airports, transit, and sightseeing — need a fan with at least eight hours of runtime on a mid-level setting. If your outings are shorter and you’ll reliably have access to a USB port at your accommodation each night, a six-hour battery is perfectly adequate and often comes in a lighter, more compact package.
Size and weight deserve more attention than they usually get. A fan that feels comfortable after five minutes of holding can become a burden after thirty. Look for models under 200 grams with an ergonomic grip that doesn’t require constant readjustment. Foldable designs are worth considering if bag space is tight, since they collapse flat and slip into narrow pockets without bulk.
Finally, think about budget in terms of total value rather than upfront cost. A cheaper fan that needs replacing after one season costs more in the long run than a mid-range model built to last several years of regular travel use.
Practical Solutions for Staying Cool on the Go with Handheld Fans
Knowing when and how to use your handheld fan makes a real difference in how much relief it actually delivers. During transit — whether you’re waiting at a gate, packed into a subway car, or sitting on a hot bus — aim the airflow at your neck and wrists, where blood vessels run close to the surface. This cools your core temperature faster than simply fanning your face.
At outdoor events like markets, festivals, or open-air concerts, combine your fan with a light misting of water on your skin. The fan accelerates evaporation, amplifying the cooling effect significantly beyond what either method achieves alone. Keep the fan on its lower speed setting to extend battery life during long events, stepping up only when the heat peaks.
In accommodation where the AC underperforms, place a small damp towel near the fan’s intake side and direct the airflow across your body while resting. For overnight comfort, prop the fan on a stable surface rather than holding it, and use the lowest speed to maintain airflow without draining the battery completely by morning.
A few habits keep the experience consistently effective: charge the fan every night alongside your phone so it starts each day at full capacity, carry it in an accessible outer pocket rather than buried in your bag, and switch to a lower speed setting in enclosed or quiet spaces to avoid drawing attention. Small adjustments like these turn a good fan into an indispensable part of your daily travel routine.
Maintenance and Care Tips for Long-Lasting Performance
A handheld fan that’s well cared for will outlast several seasons of heavy travel, while a neglected one can degrade noticeably within a single trip. The most important habit is regular cleaning — dust and debris accumulate quickly in the blade housing, reducing airflow and straining the motor. Every week or two of active use, wipe down the blade guard and fan blades with a dry or slightly damp microfiber cloth. Avoid water near the motor housing or charging port, and never use compressed air directly into the internals, as this can push debris deeper into the mechanism.
Battery care matters just as much as physical cleaning. Avoid letting the battery drain completely to zero on a regular basis, as deep discharge cycles shorten lithium battery lifespan over time. Instead, top up the charge each evening rather than waiting for a low-battery warning. When storing the fan between trips, keep it at roughly 50 to 70 percent charge rather than fully charged or fully depleted — this is the optimal range for long-term battery health.
For storage, keep the fan in a protective pouch or a padded pocket to prevent scratches and accidental blade damage. Avoid leaving it in a hot car or direct sunlight for extended periods, as sustained heat degrades both the battery and plastic components. These small, consistent habits require almost no extra effort but make a significant difference in keeping your fan performing reliably every time you reach for it.
A Small Investment That Transforms Your Travel Comfort
Heat is one of those travel challenges that’s easy to underestimate until you’re standing in the middle of it, exhausted and uncomfortable with hours still left in your day. Handheld battery fans won’t change the weather, but they give you a practical, immediate way to manage your own comfort — and that makes a genuine difference in how much you enjoy the journey.
The key takeaways are straightforward: look for a fan with strong battery life, quiet operation, and a build that can handle the wear of regular travel. Match your choice to your actual travel style rather than defaulting to the most feature-heavy option, and take a few minutes each week to keep it clean and properly charged. Used consistently and maintained well, a quality handheld battery fan becomes one of those small tools you reach for every single day without thinking twice.
Whether you’re navigating a packed transit hub, powering through an outdoor itinerary, or simply trying to sleep in a stuffy hotel room, having personal cooling on demand changes the experience. Travel is demanding enough without heat adding to the toll. With the right compact handheld fan — from a reputable portable cooling brand like JisuLife or any well-reviewed alternative — you’re always one button press away from feeling better, and that’s a simple upgrade worth making.


Choosing the right security system starts with assessing your risks, budget, and building layout, then matching those needs to the right mix of features. Most businesses combine cameras, access control, alarms, and some form of monitoring. The best system fits your specific property rather than a one-size-fits-all package.
A professional assessment helps you avoid paying for features you do not need. Providers like Maffey’s Security Group can review your site, identify weak points, and recommend a system that fits your operations. Comparing a few options keeps pricing and service fair.
This guide walks through the main factors that shape a smart security decision. Each one helps you match the system to how your business actually works.
Why the Right System Matters
The wrong system wastes money and leaves real gaps. A good match protects your staff, assets, and daily operations without overspending. It also gives you records and alerts you can rely on when something goes wrong.
Start With a Risk Assessment
Every good decision begins with knowing what you need to protect. Walk your property to find weak entry points, blind spots, and high-value areas. A clear picture of your risks tells you which features matter most.
Note the times and areas where problems are most likely. This helps you place cameras, sensors, and controls where they count.
Know the Main Types of Systems
Most business security systems build on a few core components:
- Video surveillance to record activity and deter intruders.
- Access control to limit who enters sensitive areas.
- Intrusion alarms to signal break-ins and unauthorized entry.
- Monitoring services that alert responders around the clock.
Match Features to Your Business
The right features depend on your size, industry, and daily routine. A small office may only need cameras and door locks, while a warehouse may need full access control and motion sensors. Match the system to your real risks instead of adding features you will not use.
Think about who uses the building and when. Businesses with shift work, visitors, or remote sites often need flexible access and remote monitoring. The right setup adapts as those patterns change.
Monitored vs. Unmonitored Systems
Both options exist, and the right one depends on your risk and budget:
- Monitored systems send alerts to a central station for a monthly fee.
- Unmonitored systems only sound alarms or notify you directly.
- Higher-risk sites usually benefit from professional monitoring.
Plan for Growth and Integration
A security system should still fit your business a few years from now. Two factors keep it useful over time.
Scalability
Choose a system you can expand with more cameras or doors as the business grows. Modular systems let you add parts without a full replacement.
Integration
Look for systems that connect with lighting, alarms, and existing software for smoother control. One dashboard for everything is easier for staff to manage.
Set a Budget That Fits
Cost covers more than the upfront equipment price. Factor in installation, monitoring fees, maintenance, and future upgrades. A higher upfront cost often pays off through fewer losses and lower risk.
Steps to Choose a Security System
Follow these steps to reach a confident choice:
- Assess your property for risks and weak points.
- Set a realistic budget for equipment and monitoring.
- Compare systems and features from several providers.
- Check reviews, contracts, and warranty terms.
- Schedule installation and staff training.

Cheap office chairs are slowly costing SMEs money every day.
The majority don’t even realize it’s occurring. Owners look at an invoice for a $99 chair and feel like they just made a great decision. In reality that poor seat is costing them thousands in productivity, sick time and turnover.
Here’s the good news:
Repairing it is simpler than most think. Ergonomic chairs can pay for themselves quickly if you know what to look for.
What’s inside this guide:
- The real price SMEs pay for bad seating
- Why small businesses feel the pain more
- Warning signs your chairs are costing money
- What ergonomic office chairs actually do
- How to upgrade without blowing the budget
The Real Price SMEs Pay For Bad Seating
Cheap seating feels like a smart saving until you do the maths.
Every hour spent by an employee getting into comfortable positions is an hour NOT spent working at full speed. Now imagine every employee doing that all day…every day of the year. Ouch.
And that’s before you even get to the sick days.
Recent Australian research puts absenteeism costs at $33 billion per year due to loss in productivity. A large portion of this is associated with musculoskeletal problems such as back pain, neck strain, and shoulder pain…you guessed it, problems that can be caused by prolonged sitting on poor chairs.
Upgrading to quality office chairs is one of the quickest ways to plug this leak. Quality ergonomic office chairs are designed to hold your spine, hips and shoulders in correct alignment. Which means less fatigue during the day and less visits to the physio on Friday afternoon. When your staff feel good they work better – it is as simple as that.
Here’s what poor seating actually costs an SME:
- Sick days from back and neck pain
- Slower work from tired, aching staff
- Higher staff turnover as people quit uncomfortable jobs
- Workers’ comp claims and rising insurance premiums
- Lower morale across the whole team
Now to explore why this affects SMEs more than Corporate Australia.
Why Small Businesses Feel The Pinch More
Big companies can absorb the cost of one sick employee.
Entrepreneurs cannot afford to be incapacitated. If one employee is down with back pain, the entire company notices immediately. Deadlines are missed, other employees are forced to cover, and the boss works late hours to make up for lost time.
Think about it this way:
Say you have 10 employees, and someone gets injured, takes off work with a strain or something. 10% of your business is out immediately. Try taking 10% of a corporation that has 1,000 people. No one notices. When you run a small crew you don’t have that privilege.
It’s why SMEs have to take ergonomic office chairs even more seriously than large corporations. There’s much less room for error and more consequences for each sick day.
An Australian survey revealed that 86.7% of employees suffered from work related musculoskeletal disorders. Approximately nine out of ten employees come to work already injured.
But if those same workers are sitting in flat, unsupported chairs for eight hours a day, that pain is only going to intensify. And when the pain intensifies, so do missed days of work.
Warning Signs Your Chairs Are Costing Money
Not sure if your seating is the real problem?
Watch out for these warning signs around the office…
The tell-tale signs to look for:
- Staff regularly complaining about back or neck pain
- More sick days than usual across the team
- People bringing in cushions or towels from home
- Staff stretching, standing or walking around constantly
- Complaints about being exhausted after work
- Productivity that drops off a cliff in the afternoon
Are any of these ringing bells? If so, maybe the chairs are to blame. Most managers point the finger at workload. Or Monday mornings. Truth hurts, and it’s probably lurking under their employee’s… you know what.
The good news? It’s one of the simplest workplace problems to solve. No need for consultants. No massive HR initiatives. Just a few nicer chairs.
What Ergonomic Office Chairs Actually Do
There’s a lot of hype around the word “ergonomic”.
But what does that mean when sitting in a chair? An ergonomic office chair supports your body in its natural position. It helps maintain the natural curve of your spine, positions your hips at the optimal angle and relieves pressure on your body’s painful pressure points.
A quality ergonomic office chair should have:
- Adjustable seat height for different body types
- Lumbar support that fits the lower back
- Adjustable armrests to reduce shoulder strain
- A proper tilt function
- Breathable mesh or fabric
- Wheels that suit the flooring in the office
Working in concert, these features allow you to sit for hours without your body suffering for it. Less pain means more concentration and tons of productivity between brews.
Budget chairs lack most of these qualities. They’re designed to meet a price point instead of meeting a human. It’s why upgrading is so important.
How To Upgrade Without Blowing The Budget
Here’s the mistake most SMEs make when they decide to upgrade…
They buy the cheapest chairs they can find (and find themselves right back where they started) or they go crazy and buy everything new all at once. Neither solution is ideal when you are a small business looking to conserve cash.
Try this smarter approach:
Begin with the employees who sit the most: Accountants, administrative assistants, developers, designers, anyone who is typically at a computer all day. Equip these employees with the best chairs you can afford. Continue upgrading chairs for the rest of your team as budget permits over the coming months.
Allows you to spread the cost out & try before you leap into purchasing a large bulk quantity. Chairs are different for different positions so you can learn along the way.
Make sure you check whether ergonomic office chairs are tax deductible. Ergonomics equipment is one of those many items that you can claim for in Australia – so the real price is often less than you think.
And don’t forget ROI. If your quality chair reduces two sick days per employee per year, most of them pay for themselves in 12 months. Anything beyond that is gravy.
The Bottom Line
One of the costliest errors SMEs make is skimping on office seating – and also one of the simplest to correct.
The numbers really don’t lie:
- Bad chairs lead to more sick days
- Aching staff work slower and make more mistakes
- Small teams feel every single absence
- Workers’ comp claims and turnover costs add up fast
Ergonomic office chairs are not a frivolous indulgence reserved for sleek corporate office spaces. They are a business investment with returns in the form of increased productivity, reduced absenteeism, and employee retention.
Live in a marketplace where pennies mean everything. This WIN is yours for the taking. LOOK at your team. Calculate how many hours per week they spend in their chairs and ask yourself one question:
Does that chair help them perform at their best or is it secretly costing your company money?
Buying a home is more than choosing the right neighborhood, inspection report, and mortgage. Before closing, buyers also need confidence that the seller can transfer clear ownership of the property. If you are asking what is title insurance, it is protection designed to address certain covered title problems that existed before you took ownership.
The title refers to the legal rights associated with owning property. It is separate from the home’s physical condition. A house can be beautifully maintained while the public records reveal an old, unpaid lien, an incorrect deed description, or a prior ownership claim that needs attention.
Why Title Records Matter Before Closing
A title review identifies the seller’s rights to convey property and any potential rights of other parties that may affect ownership. Issues such as an unrecorded mortgage release from a previous owner may arise and should be resolved before signing. Title insurance is distinct from homeowners’ insurance; the former covers defects, liens, and ownership issues existing before the policy’s effective date, while the latter protects against future physical losses. The National Association of Insurance Commissioners provides resources on how title searches and policies protect buyers and lenders.
What a Title Search Checks
A title company, attorney, or other qualified closing professional typically examines available public records connected to the property. The review may include:
- Prior deeds and ownership transfers.
- Mortgages, releases, and satisfactions.
- Property tax records, judgments, and recorded liens.
- Easements, restrictions, and access rights.
- Probate, estate, trust, divorce, or business-entity records when relevant.
- Legal descriptions, parcel details, and recording information.
If a problem appears, the transaction may pause while the seller, lender, title professional, or another party resolves it. Request a written explanation for any item that remains open.
Common Title Problems Buyers May Encounter
- Unpaid liens: Taxes, contractor bills, judgments, or other debts may still be attached to the property.
- Unreleased mortgages: A past loan may appear outstanding because its release was not recorded.
- Clerical errors: Misspelled names, incorrect signatures, or legal-description mistakes can cloud ownership.
- Undisclosed heirs: A person with an interest in a prior owner’s estate may later assert a claim.
- Forgery or fraud: False documents or identity fraud can disrupt the chain of title.
- Easements and boundary questions: A utility company, neighbor, or other party may have rights affecting part of the land.
Owner’s Policy and Lender’s Policy
These policies serve different insured parties. Do not assume that a policy required by your mortgage lender also protects you personally.
- Owner’s policy: Protects the homebuyer’s covered ownership interest and, in many cases, the equity built in the property. It is usually purchased with a one-time premium at closing.
- Lender’s policy: Protects the mortgage lender’s interest in the loan and its lien on the property. Most financed purchases require it.
An owner’s policy may be optional from the lender’s perspective, but that does not make it unimportant. Read the actual policy, commitment, endorsements, exclusions, and exceptions. Coverage can vary by insurer, state, policy form, and transaction details.
What Title Insurance May, and May Not, Cover
Depending on the policy terms, title insurance may cover certain unknown liens, prior ownership claims, errors in public records, forged earlier documents, defects in the chain of title, and legal defense costs for covered claims. It does not promise to solve every property-related problem.
Common limits can include known issues listed as exceptions, physical defects, future damage, matters caused after closing, and some survey, zoning, land-use, or environmental concerns. Ask which exceptions are standard, which are specific to the property, and whether any endorsements are available to modify coverage.
How Much Does Title Insurance Cost in 2026?
Title costs depend on the purchase price, location, policy type, endorsements, state rules, and the closing services involved. The premium is often a one-time closing cost, but it should be separated from title search, settlement, recording, courier, and other fees. Compare your Loan Estimate with your Closing Disclosure, and review the full title-related total rather than focusing on one line item. The Consumer Financial Protection Bureau’s guidance on shopping for title services explains how buyers can compare these costs and determine whether services may be shopped for.
Who Pays for Coverage?
There is no universal answer. In some markets, sellers commonly pay for an owner’s policy. In others, buyers do. Buyers often pay for the lender’s policy when financing is involved, but the purchase agreement and negotiated credits control the final arrangement. Confirm who pays for each policy, title service, recording fee, and endorsement before closing day.
Questions to Ask Before Closing
- What policy or policies are included in my closing package?
- What exceptions and requirements appear in the title commitment?
- Are any liens, taxes, judgments, or releases still unresolved?
- Does the quote include insurance premiums and separate settlement fees?
- Can I shop for any title or closing services?
- Are endorsements available for this property?
- What happens if a title issue delays closing?
- When will I receive the final policy and recorded deed?
A Simple Review Process for Buyers
- Request documents early. Ask for the title commitment, fee estimate, and policy options well before closing.
- Read the exceptions page. Pay attention to easements, restrictions, liens, and legal descriptions.
- Compare coverage. Understand the difference between owner and lender protection.
- Confirm costs. Match title charges with your Loan Estimate and Closing Disclosure.
- Keep final records. Store the policy, deed, settlement documents, and payment confirmations securely.
Title Fraud, Digital Risks, and Special Situations
Wire fraud remains a serious closing risk. Never rely solely on a last-minute email that changes payment instructions. Call a trusted phone number already provided by your lender, attorney, escrow officer, or title company to verify instructions. Use multi-factor authentication for email and report suspicious messages immediately.
Extra review is especially useful for inherited homes, trusts, divorces, foreclosures, short sales, new construction, investment properties, cash purchases, refinances, and homes owned by business entities. These transactions may involve more parties, documents, or title requirements.
Final Checklist
- Title commitment reviewed and exceptions explained.
- Owners’ and lenders’ policies compared.
- Title costs and payment responsibilities confirmed.
- Outstanding issues resolved or documented in writing.
- Wire instructions verified by phone.
- Final policy delivery process understood.
Conclusion
Buyers do not need to become title experts before closing. They do need to understand what the title documents say, which policy protects their interests, what exceptions may affect the property, and where to get clear answers. A careful review before signing can help prevent costly surprises after you receive the keys.
-

 NEWS1 year ago
Historical Churches in Manila
-

 TOPIC1 year ago
Symbols of Hope: The 15th Belenismo sa Tarlac
-

 TOPIC1 year ago
RIZAL at 160: a Filipino Feat in Britain
-

 TOPIC1 year ago
“The Journey Beyond Fashion” – Ditta Sandico
-

 TOPIC2 weeks ago
Unveiling AvTub: Your Ultimate Guide to the Best AV Content
-

 TOPIC1 year ago
5 Must-Have Products From Adarna House to Nurture Your Roots
-

 TOPIC1 year ago
Filipino, alternative language course at Moscow State University
-

 TOPIC3 weeks ago
Understanding Fascisterne: Origins and Ideological Roots