
TECHNOLOGY
The Ultimate Performance Tuning Toolkit: Features and Benefits You Need to Know

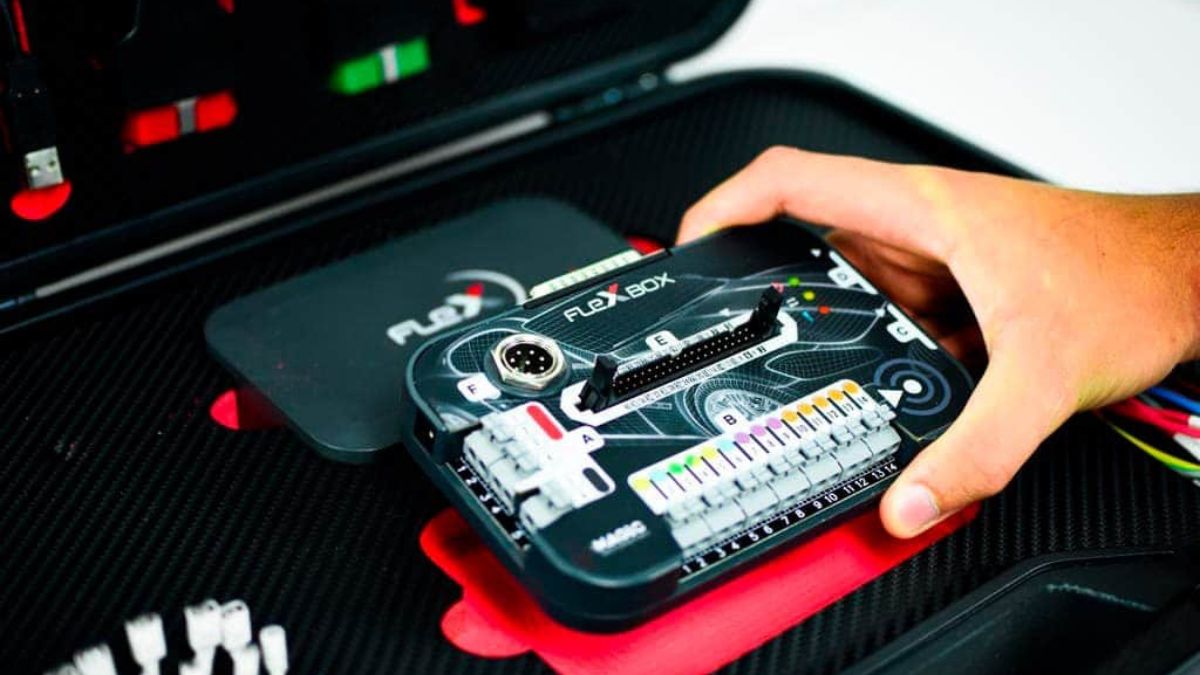
Introduction to Performance Tuning Toolkit
Are you ready to unlock the full potential of your systems? Whether you’re managing a website, an application, or an entire server ecosystem, performance is key to success. In today’s fast-paced digital landscape, users expect instant results and seamless experiences. Enter the performance tuning toolkit—the secret weapon for developers and IT professionals alike.
These toolkits are designed to optimize system efficiency, enhance speed, and improve overall functionality. With the right tools at your disposal, you can identify bottlenecks, streamline processes, and ensure that your digital infrastructure operates at peak performance.
Get ready to dive into everything there is to know about these essential resources. From understanding their features to exploring top options on the market today—this guide will equip you with all the knowledge needed for effective performance tuning.
What is a Performance Tuning Toolkit?
A performance tuning toolkit is a collection of software tools designed to optimize system performance. These toolkits analyze various components, from hardware to applications, ensuring everything runs smoothly.
At its core, a performance tuning toolkit helps identify bottlenecks. It highlights areas where resources are underutilized or overstrained. With this information, users can make informed adjustments to enhance efficiency.
These toolkits often include monitoring features that track real-time data. This allows for proactive management rather than reactive fixes when issues arise.
The goal is improved system responsiveness and reliability across various environments—whether in databases, servers, or network systems. Each component plays a significant role in achieving optimal results tailored to specific needs.
Features of a Great Performance Tuning Toolkit
A great performance tuning toolkit should seamlessly integrate with your existing systems. Compatibility is essential to ensure that you can leverage its full potential without major disruptions.
User-friendliness stands out as a critical feature. An intuitive interface allows users, regardless of experience level, to navigate the tools effortlessly.
Real-time monitoring capabilities are vital for assessing system performance instantly. The ability to track metrics on-the-go enables immediate adjustments when needed.
Moreover, a comprehensive set of analysis tools enhances problem-solving efficiency. Identifying bottlenecks and diagnosing issues quickly saves time and resources.
Scalability is another key aspect; your chosen toolkit should grow alongside your business needs. This flexibility ensures long-term value and adaptability in an ever-changing environment.
Excellent customer support cannot be overlooked. Access to knowledgeable assistance helps users maximize the benefits of their toolkit while troubleshooting effectively.
Benefits of Using a Performance Tuning Toolkit
Using a performance tuning toolkit can significantly enhance your system’s efficiency. With the right tools, you identify bottlenecks that slow down processes. This leads to smoother operations and improved response times.
Cost savings are another major benefit. By optimizing resource usage, you minimize unnecessary expenditures on hardware upgrades or additional software licenses.
A performance tuning toolkit also promotes better scalability. As your business grows, these tools help maintain optimal performance levels without requiring extensive reconfigurations.
Moreover, they provide valuable insights through monitoring and analytics features. Understanding how applications perform under different loads enables informed decision-making.
User experience improves dramatically when systems run efficiently. Happier users often lead to increased productivity and satisfaction across teams or customer bases alike.
Top Performance Tuning Toolkits in the Market
When it comes to performance tuning toolkits, several options stand out in the crowded market. Each one offers unique features tailored to different needs.
One notable choice is **Dynatrace**, known for its AI-driven insights and robust monitoring capabilities. It excels at identifying performance bottlenecks rapidly.
**New Relic** is another strong contender. This toolkit provides comprehensive analytics that help optimize application performance instantly, making it a favorite among developers.
For those focused on database optimization, **SolarWinds Database Performance Analyzer** shines brightly. Its deep-dive analysis helps pinpoint issues related to SQL queries and server configurations.
There’s **AppDynamics**, which integrates seamlessly into existing workflows while providing real-time visibility across applications and infrastructure components.
Choosing the right toolkit can dramatically enhance your software’s efficiency and user satisfaction levels.
How to Choose the Right Toolkit for Your Needs
Choosing the right performance tuning toolkit can feel overwhelming with so many options available. Start by assessing your specific needs. Consider the type of applications you work on and the environments they run in.
Next, evaluate the features each toolkit offers. Look for functionalities like real-time monitoring, automated diagnostics, and support for various programming languages. Ensure that these align with your workflows to maximize efficiency.
Don’t forget to check user reviews and ratings. Feedback from others who have used the toolkit can provide insights into its effectiveness and ease of use.
Consider scalability. As your projects grow or change, will this toolkit adapt? The right choice should not only meet your current demands but also evolve along with them.
Case Studies: Real-Life Success Stories using Performance Tuning Toolkits
Case studies highlight the transformative power of performance tuning toolkits in various industries.
One notable example comes from an e-commerce giant that faced slow load times during peak shopping seasons. By implementing a comprehensive toolkit, they identified bottlenecks and optimized their database queries. As a result, page loading speeds improved by over 40%, leading to increased customer satisfaction and higher sales.
In another case, a financial services firm struggled with system lag affecting client transactions. Utilizing advanced profiling tools within their chosen performance tuning toolkit allowed them to streamline operations significantly. They recorded a 30% reduction in transaction processing time, enhancing user experience and boosting client retention rates.
These stories illustrate how tailored solutions can drive efficiency and productivity across different sectors, showcasing the real-world impact of effective performance tuning strategies.
Conclusion
The performance tuning toolkit is an essential asset for anyone looking to enhance their system’s efficiency and effectiveness. By understanding its features and benefits, you can make informed decisions that will lead to improved performance across your projects. With numerous options available in the market, selecting the right toolkit tailored to your specific needs can set you on a path toward success.
Real-life case studies demonstrate how these toolkits have transformed operations across various industries, showcasing their power and versatility. Whether you’re a seasoned professional or just starting out, investing time in finding the right performance tuning toolkit could significantly elevate your work quality.
Embrace the potential of a well-chosen toolkit today, and watch as it streamlines processes while boosting productivity and results. Don’t underestimate the impact that optimizing your tools can have on achieving your goals effectively.


Website navigation should help people move forward, not make them stop and decode a set of clever labels. Whether someone is comparing prices, looking for support, or trying to contact your team, the path should feel obvious from the first interaction.
Browsing examples of navigation UI can spark useful visual ideas, but appearance is only one part of the job. A successful menu reflects a clear content structure, works across devices, and provides every visitor with a reliable way to find important information.
Why Website Navigation Matters
Navigation is the map of your website. It tells visitors what the site offers, where they are, and what they can do next. When a person cannot quickly find pricing, account help, or contact details, they may assume the answer is unavailable. Polished images and animations cannot repair a confusing structure. Clear navigation also improves trust, content discovery, and the overall ease of completing a task.
Plan The Information Architecture First
Start with content and intent, not colors or dropdown effects. List the main jobs visitors come to complete, then group the pages that help them do those jobs. Remove duplicated pages and low-value links from the primary menu. Put high-priority sections in expected places, such as Pricing, Support, About, or Contact.
A practical exercise is to write each major page on a separate card. Group the cards by visitor intent, name each group, and look for overlaps. This often exposes duplicate labels, missing categories, and sections that belong in the footer instead of the header.
Choose The Right Menu Structure
The right pattern depends on the size and purpose of the site. Begin with the smallest structure that supports common tasks.
- Horizontal menus work well for small sites with a limited number of top-level pages.
- Dropdown menus suit categories with a few closely related child pages.
- Mega menus can help large sites, but only when categories are clearly grouped and easy to scan.
- Sidebar navigation is useful for dashboards, documentation, and knowledge bases.
- Bottom navigation supports frequent, task-focused actions on mobile experiences.
More visible choices can reduce clicks, but they also create noise. If a menu needs dozens of links to explain the site, improve the underlying hierarchy instead of adding more options.
Write Clear Labels
Labels should use the words visitors expect. “Pricing,” “Support,” and “Case Studies” usually communicate more quickly than broad terms such as “Explore,” “Discover,” or “Solutions.” If a broad label is necessary, make the contents obvious once it opens.
Keep labels short enough to scan on narrow screens, and use the same term in the menu, page heading, buttons, and footer. Replace “Click Here” with destination-focused text such as “View onboarding guides.” The best label is rarely the most creative one. It is the one that requires no interpretation.
Design For Mobile Use
A desktop menu should not simply be squeezed into a phone’s width. Use a clearly labeled menu button, generous touch targets, and sufficient spacing between nearby controls. The open panel should be easy to scan with one hand, while the closed control must be visible and predictable.
Test at narrow widths, including 320 pixels, with enlarged text and in both portrait and landscape orientation. A menu that looks tidy on a wide monitor may become unusable when labels wrap, buttons overlap, or the close action falls outside the visible area.
Build Accessibility Into The Menu
Use semantic landmarks, such as headings, sections, and articles, to help assistive technology identify the page structure. Ensure that every link, button, submenu, and closing control can be accessed without a mouse. Keep the keyboard focus visible, maintain a logical focus order, and return the focus to the menu button when an overlay is closed.
On longer pages, provide a “Skip to main content” link, and when necessary, assign descriptive names to multiple navigation areas. For complex interactive menus, use keyboard interaction guidance for menus and menubars to help teams avoid focus traps and mouse-required actions. These improvements will also benefit users of touchscreens, trackpads, voice input, and zoomed interfaces.
Support Users With Wayfinding Tools
The main menu should not carry the full burden of navigation. Search helps people reach a known destination quickly. Breadcrumbs explain where a page sits in a deeper hierarchy. Clear headings improve scanning, related links suggest a useful next step, and footer links provide a second route to essential pages without crowding the header. Different visitors prefer different paths, so offer more than one sensible route.
Test Navigation Before Launch
Ask several people to find three common pieces of information without telling them where to look. Note when they pause, choose the wrong category, or return repeatedly to the home page. Repeat the tasks with a keyboard, on a small phone, and with a screen reader or accessibility tool. Address the largest source of confusion first.
Automated checks matter, but they cannot confirm that a menu is understandable or easy to operate. The 2026 accessibility review of one million home pages found widespread detectable accessibility failures, reinforcing the need for regular manual testing alongside automated scans.
Avoid Common Navigation Mistakes
- Putting every page in the primary menu.
- Using hover-only dropdowns that keyboard and touch users cannot reliably operate.
- Hiding important links behind unfamiliar icons.
- Changing labels between the menu, page title, and footer.
- Using slow animations or full-screen overlays without an obvious close option.
- Creating a visual link order that does not match keyboard focus order.
- Ignoring translated text, long labels, high zoom, and user-selected font sizes.
Use A Simple Review Checklist
- Can visitors identify the main sections in a few seconds?
- Do labels match the language visitors use?
- Can the whole menu be used with a keyboard?
- Is the focus easy to see at every step?
- Does the menu work on small screens and at high zoom?
- Can visitors tell where they are and what to do next?
- Have real people tested the most important tasks?
Conclusion
Strong website navigation is clear, predictable, and useful before it is stylish. Remove one unnecessary menu item, test one important task, and check one accessibility feature before beginning a larger redesign. Small improvements can make the entire website feel easier to use.

Choosing the right RAM for a computer is not only about selecting the amount of memory needed. RAM must also be compatible with the motherboard to work correctly and deliver the expected performance. Different motherboards support specific RAM generations, speeds, capacities, and configurations. Therefore, checking motherboard specifications before purchasing memory is an important step in building or upgrading a PC.
Understanding how to choose RAM compatible with your motherboard helps prevent compatibility problems and ensures that the system can use the installed memory efficiently.
Check the RAM Generation Supported by the Motherboard
The first thing to check when choosing RAM is the DDR generation supported by the motherboard. Common generations include DDR3, DDR4, and DDR5. These standards are not interchangeable.
For example, a motherboard designed for DDR4 memory cannot use DDR5 RAM, even if the physical appearance seems similar. The position of the notch on each RAM module is different, preventing incompatible memory from being installed in the wrong slot.
Motherboard specifications usually state the supported memory type clearly. Checking this information before purchasing RAM is one of the easiest ways to avoid a compatibility issue.
Check the Maximum RAM Capacity
Another important factor is the maximum amount of RAM supported by the motherboard. Every motherboard has a maximum memory capacity determined by its chipset, processor compatibility, BIOS support, and DIMM slots.
A motherboard may support configurations such as:
- Up to 32 GB of RAM
- Up to 64 GB of RAM
- Up to 128 GB of RAM
- Up to 192 GB or more on newer platforms
The number of RAM slots also matters. A motherboard with four memory slots provides more flexibility for future upgrades than a board with only two slots.
For example, if a motherboard supports up to 64 GB and has four slots, a 2 × 16 GB configuration leaves two slots available for a future upgrade.
Pay Attention to RAM Frequency
RAM frequency, commonly expressed in MHz or MT/s depending on the specification, can affect memory performance. However, the motherboard and processor determine which memory speeds are officially supported.
A RAM kit advertised at a high speed may still work on a compatible motherboard, but it may operate at a lower default speed unless the system supports the advertised profile.
For this reason, it is important to check the motherboard’s official memory support list and the processor’s memory specifications before purchasing high-speed RAM.
Modern DDR5 platforms, for example, can support significantly higher memory speeds than older DDR4 systems. However, simply purchasing the fastest available memory does not always provide the best value.
Check the Number of RAM Slots
Motherboard RAM slots determine how many memory modules can be installed and how the memory can be configured.
Most desktop motherboards use two or four DIMM slots. Using multiple compatible modules can enable dual-channel or other multi-channel memory configurations, depending on the platform.
For many systems, purchasing a matched RAM kit such as 2 × 8 GB or 2 × 16 GB is preferable to installing a single module. A matched kit can provide better memory bandwidth when the motherboard supports dual-channel operation.
The motherboard manual also shows which slots should be populated first. On a four-slot motherboard, for example, the recommended configuration may use the second and fourth slots rather than placing both modules next to each other.
Check RAM Capacity Per Slot
Maximum total RAM capacity is not the only specification that matters. The motherboard may also have a maximum supported capacity per memory slot.
For example, a motherboard could support 128 GB of total RAM but have a specific limit for each DIMM slot. Checking both values helps determine whether a particular configuration will work.
It is also useful to check whether the motherboard supports the capacity of the specific RAM modules being considered, particularly when purchasing high-capacity DDR5 modules.
Check the Motherboard’s QVL
Many motherboard manufacturers provide a Qualified Vendor List (QVL) for memory. The QVL contains RAM models that have been tested with the motherboard under specific conditions.
A RAM module does not necessarily have to appear on the QVL to work. However, selecting a memory kit from the QVL can provide additional confidence, especially when building a high-performance system or using high-capacity memory.
The motherboard manufacturer’s support page is usually the best place to find the latest QVL and memory compatibility information.
Consider XMP or EXPO Support
Performance-oriented RAM often includes memory profiles that allow it to operate at its advertised specifications. Intel systems commonly use XMP, while AMD platforms commonly use EXPO for supported DDR5 memory.
Before purchasing a performance RAM kit, check whether the motherboard supports the relevant memory profile. Without the appropriate profile support or manual configuration, RAM may operate at a standard JEDEC speed rather than its advertised performance level.
This is particularly important when buying high-frequency DDR5 memory.
Check RAM Form Factor
Desktop computers generally use DIMM memory, while laptops commonly use SO-DIMM modules. These formats are physically different and cannot be used interchangeably.
Therefore, a desktop motherboard normally requires standard DIMM RAM, while a laptop motherboard typically requires SO-DIMM memory.
Checking the form factor before purchasing is essential because even the correct DDR generation may not fit the intended device if the physical module type is different.
How to Check RAM Compatibility Before Buying
The easiest way to determine which RAM is compatible with a motherboard is to identify the exact motherboard model and check its official specifications.
Look for information about:
- Supported DDR generation
- Maximum total memory capacity
- Maximum capacity per slot
- Supported memory speeds
- Number of DIMM slots
- Supported memory profiles such as XMP or EXPO
- Recommended RAM configurations
- Qualified Vendor List, if available
The processor specification should also be checked because the CPU’s integrated memory controller can influence supported memory speeds and configurations.
Final Thoughts
Choosing RAM compatible with your motherboard requires more than checking the memory capacity. DDR generation, RAM frequency, module capacity, form factor, motherboard slots, processor support, and memory profiles all play a role in compatibility.
For most users, a matched RAM kit with the correct DDR generation and a reasonable supported speed is a practical choice. Checking the motherboard manufacturer’s specifications and QVL before purchasing can further reduce the risk of compatibility problems.
By comparing these specifications before buying, it becomes much easier to select RAM that fits the motherboard and provides reliable performance for gaming, productivity, content creation, or everyday computing.

Introduction
-

 NEWS1 year ago
Historical Churches in Manila
-

 TOPIC1 year ago
Symbols of Hope: The 15th Belenismo sa Tarlac
-

 TOPIC1 year ago
RIZAL at 160: a Filipino Feat in Britain
-

 TOPIC1 year ago
“The Journey Beyond Fashion” – Ditta Sandico
-

 TOPIC4 weeks ago
Unveiling AvTub: Your Ultimate Guide to the Best AV Content
-

 TOPIC1 year ago
5 Must-Have Products From Adarna House to Nurture Your Roots
-

 TOPIC1 year ago
Filipino, alternative language course at Moscow State University
-

 TOPIC1 month ago
Understanding Fascisterne: Origins and Ideological Roots